The Front Porch Virtual Quilt Show

During these uncertain times and social distancing I have been missing my friends. So, I decided to host the "Front Porch Virtual Quilt Show". 

Here are some photos of smiles from friends I have missed while in lock down and the sewing projects they have been busy working on. I drove from place to place and took photos from either their front porch, balconies, and at their places of work. 

If you would like to join the "Front Porch Virtual Quilt Show" and live in the greater Buffalo area, please let me know. I am ready to hit the road again, let me know if I can stop by!

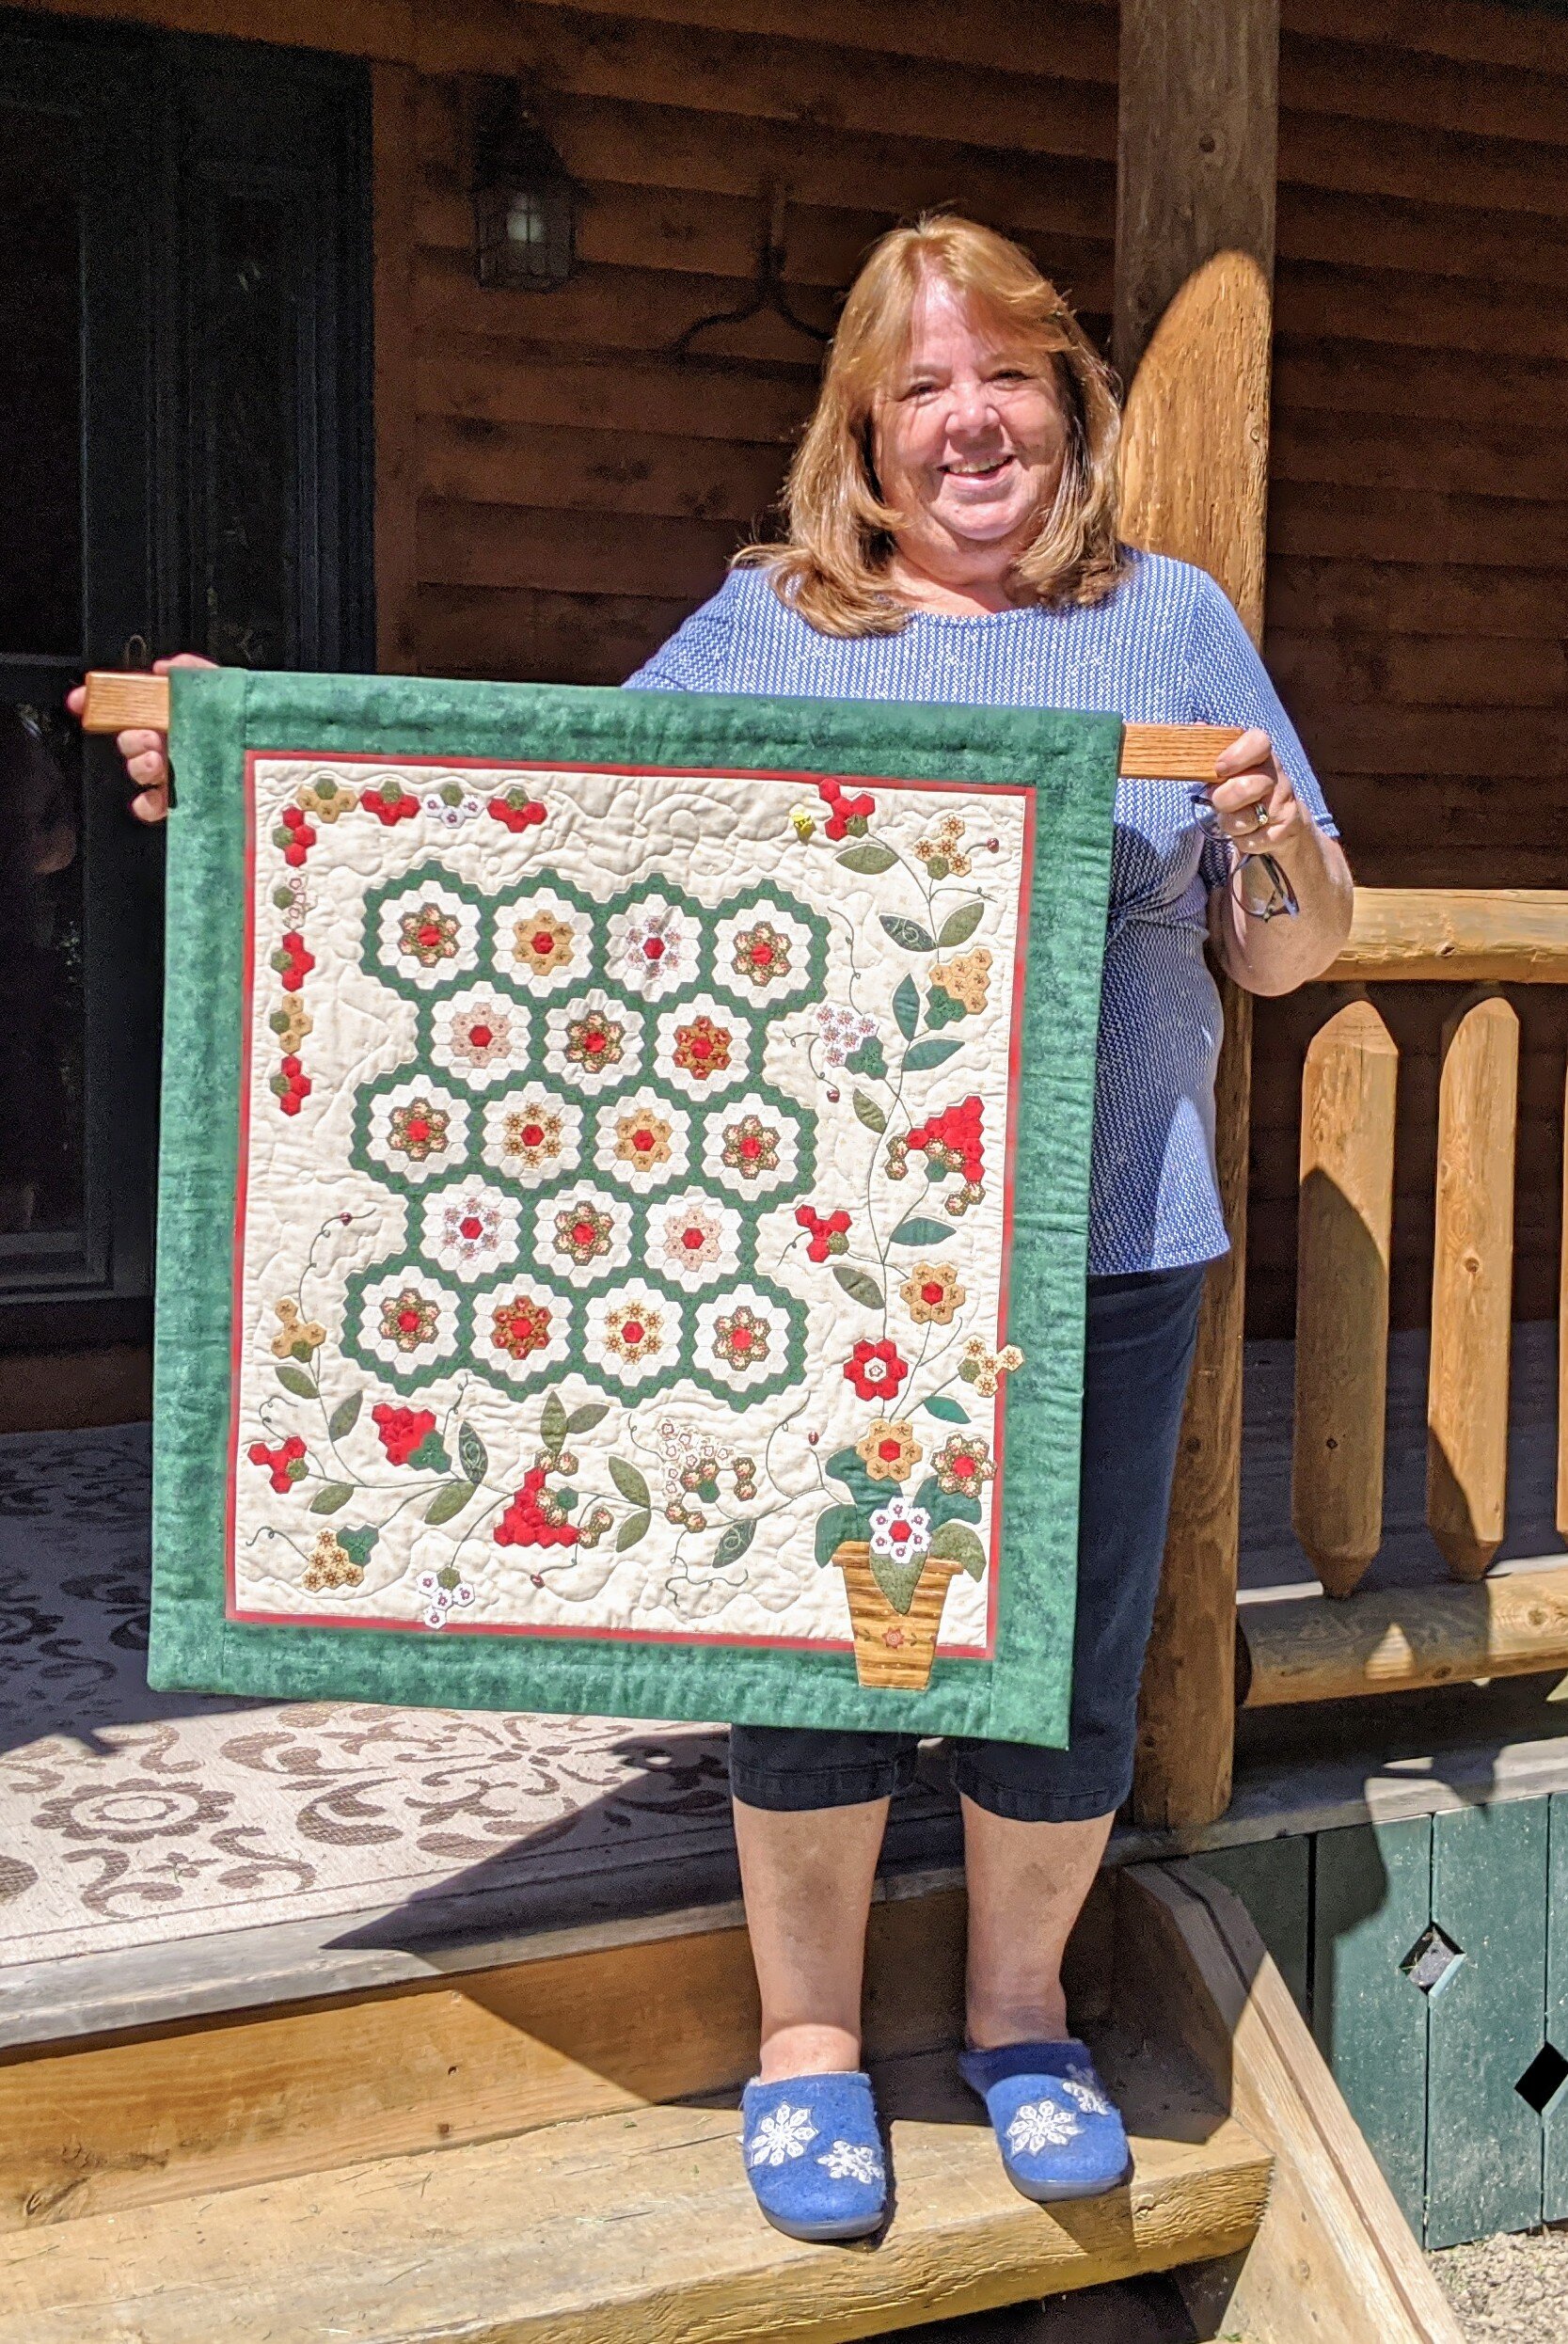
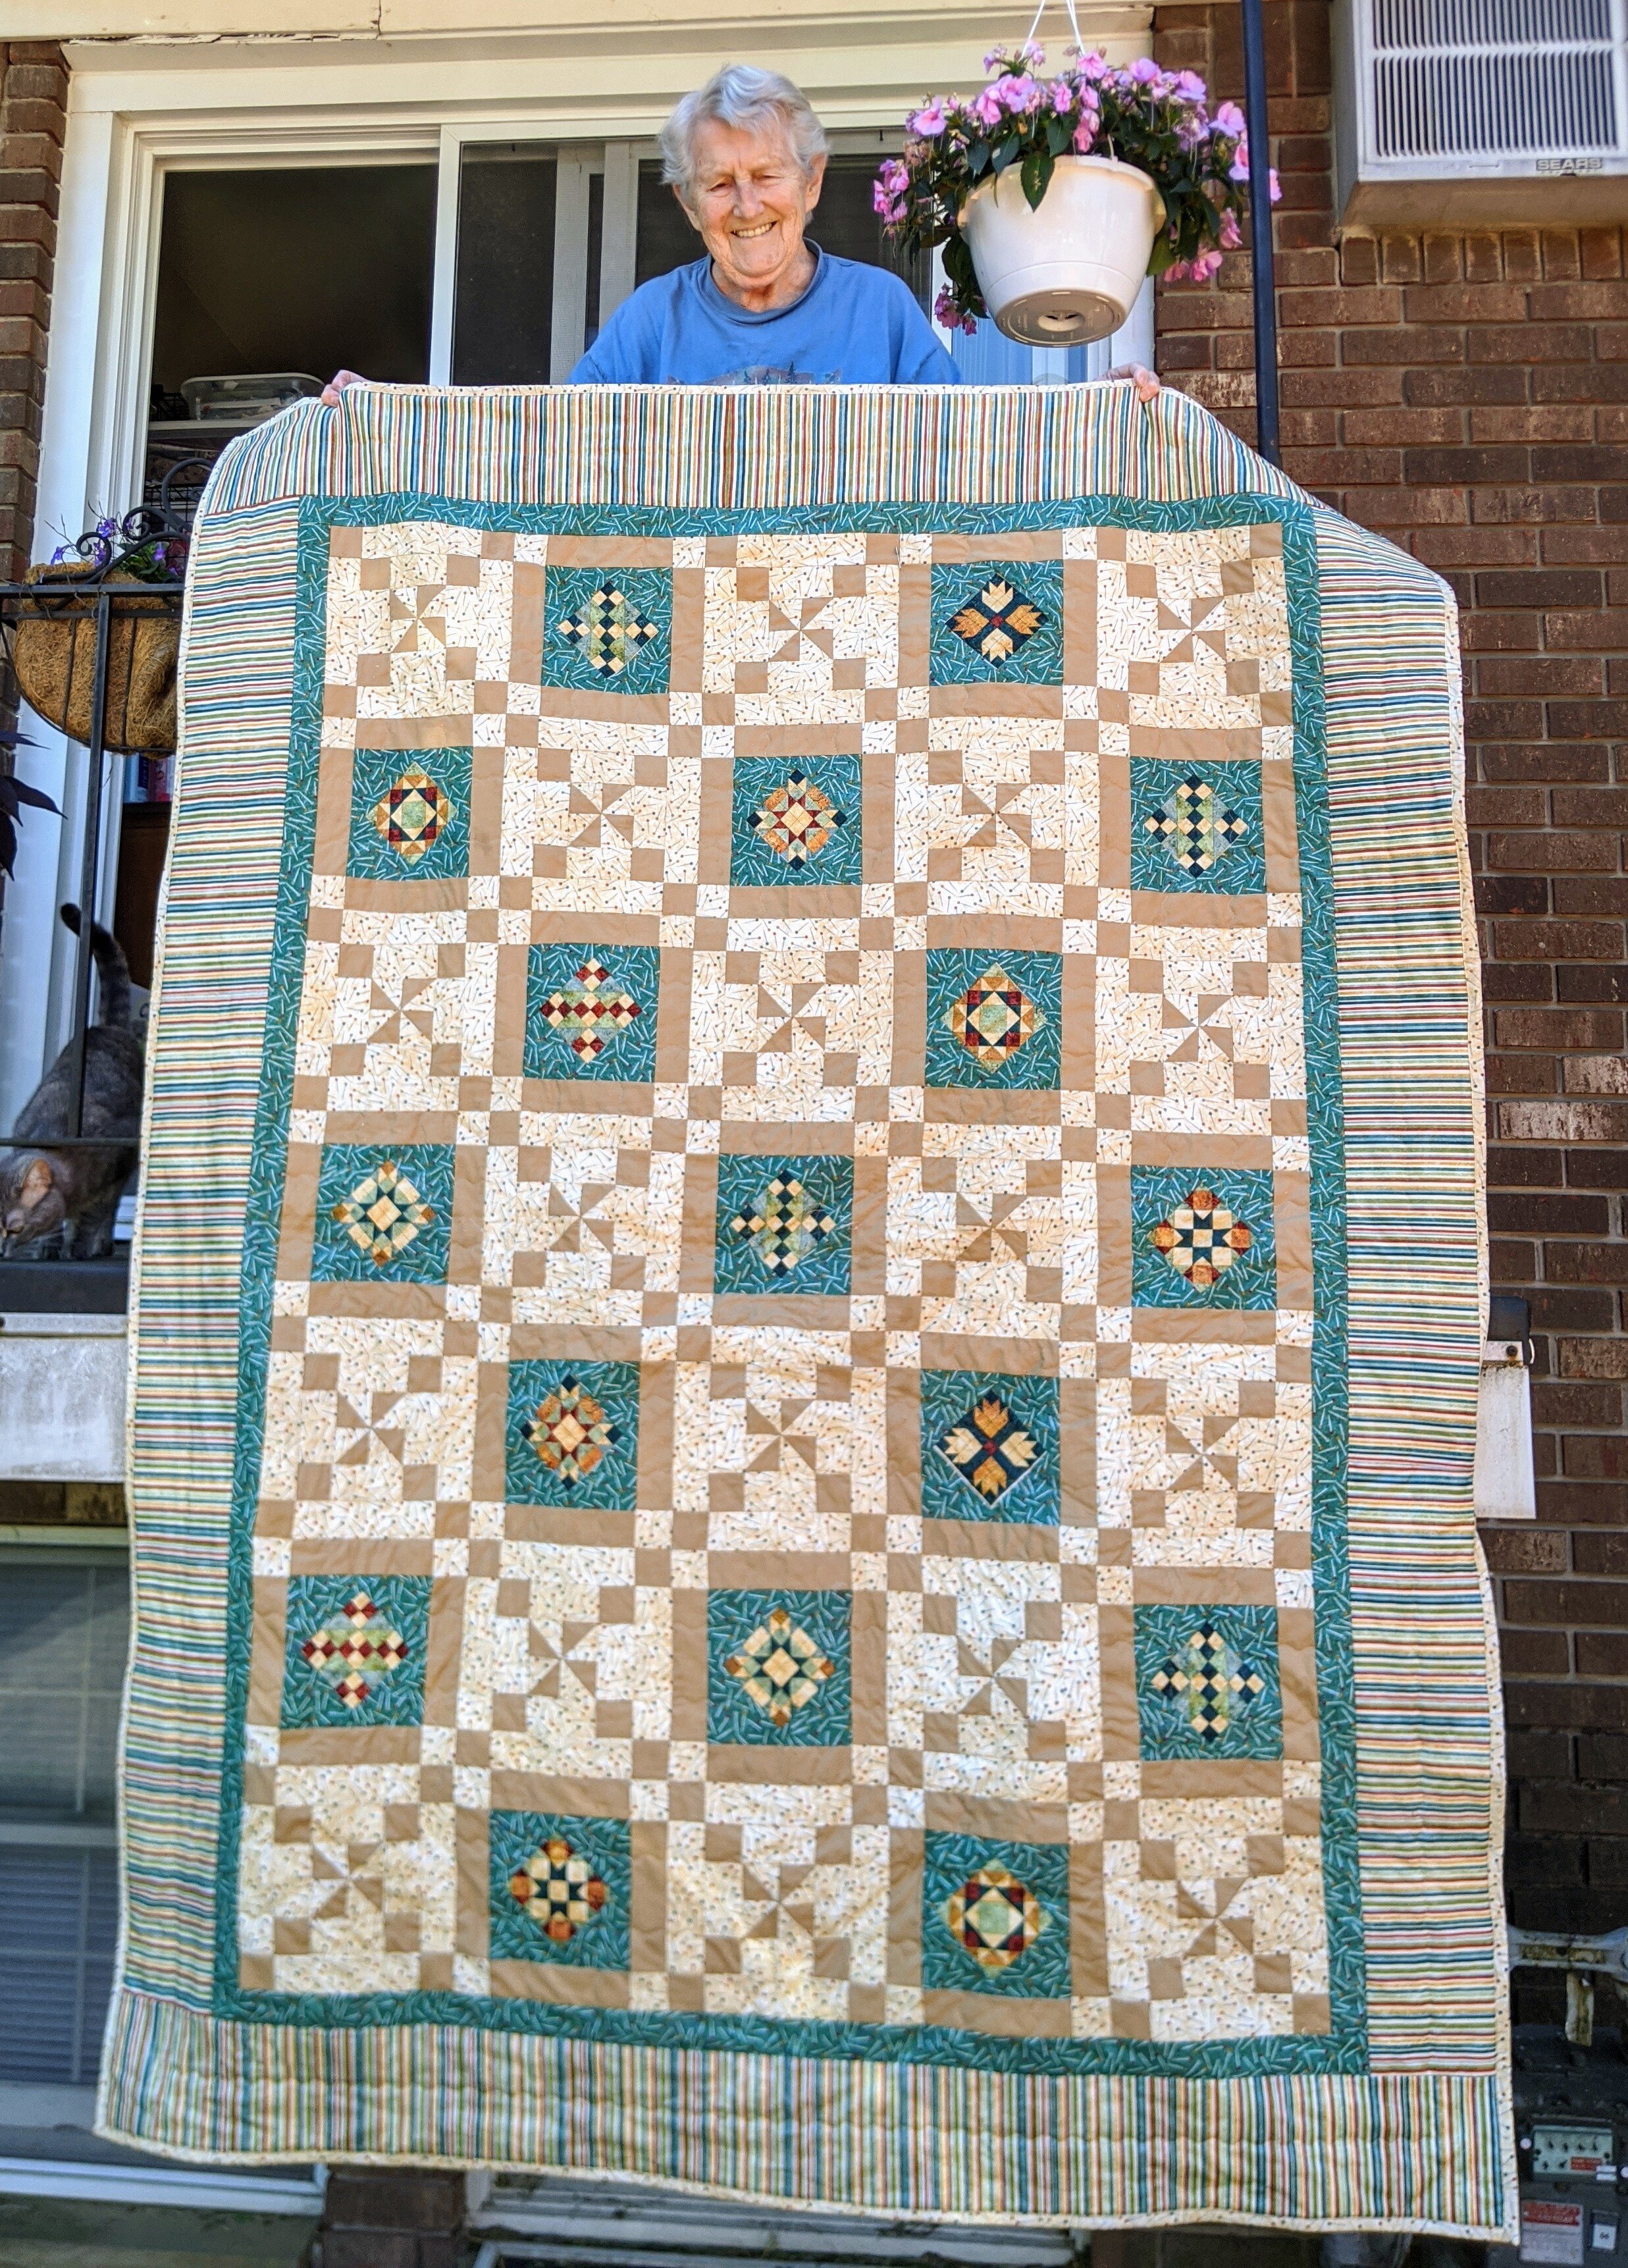
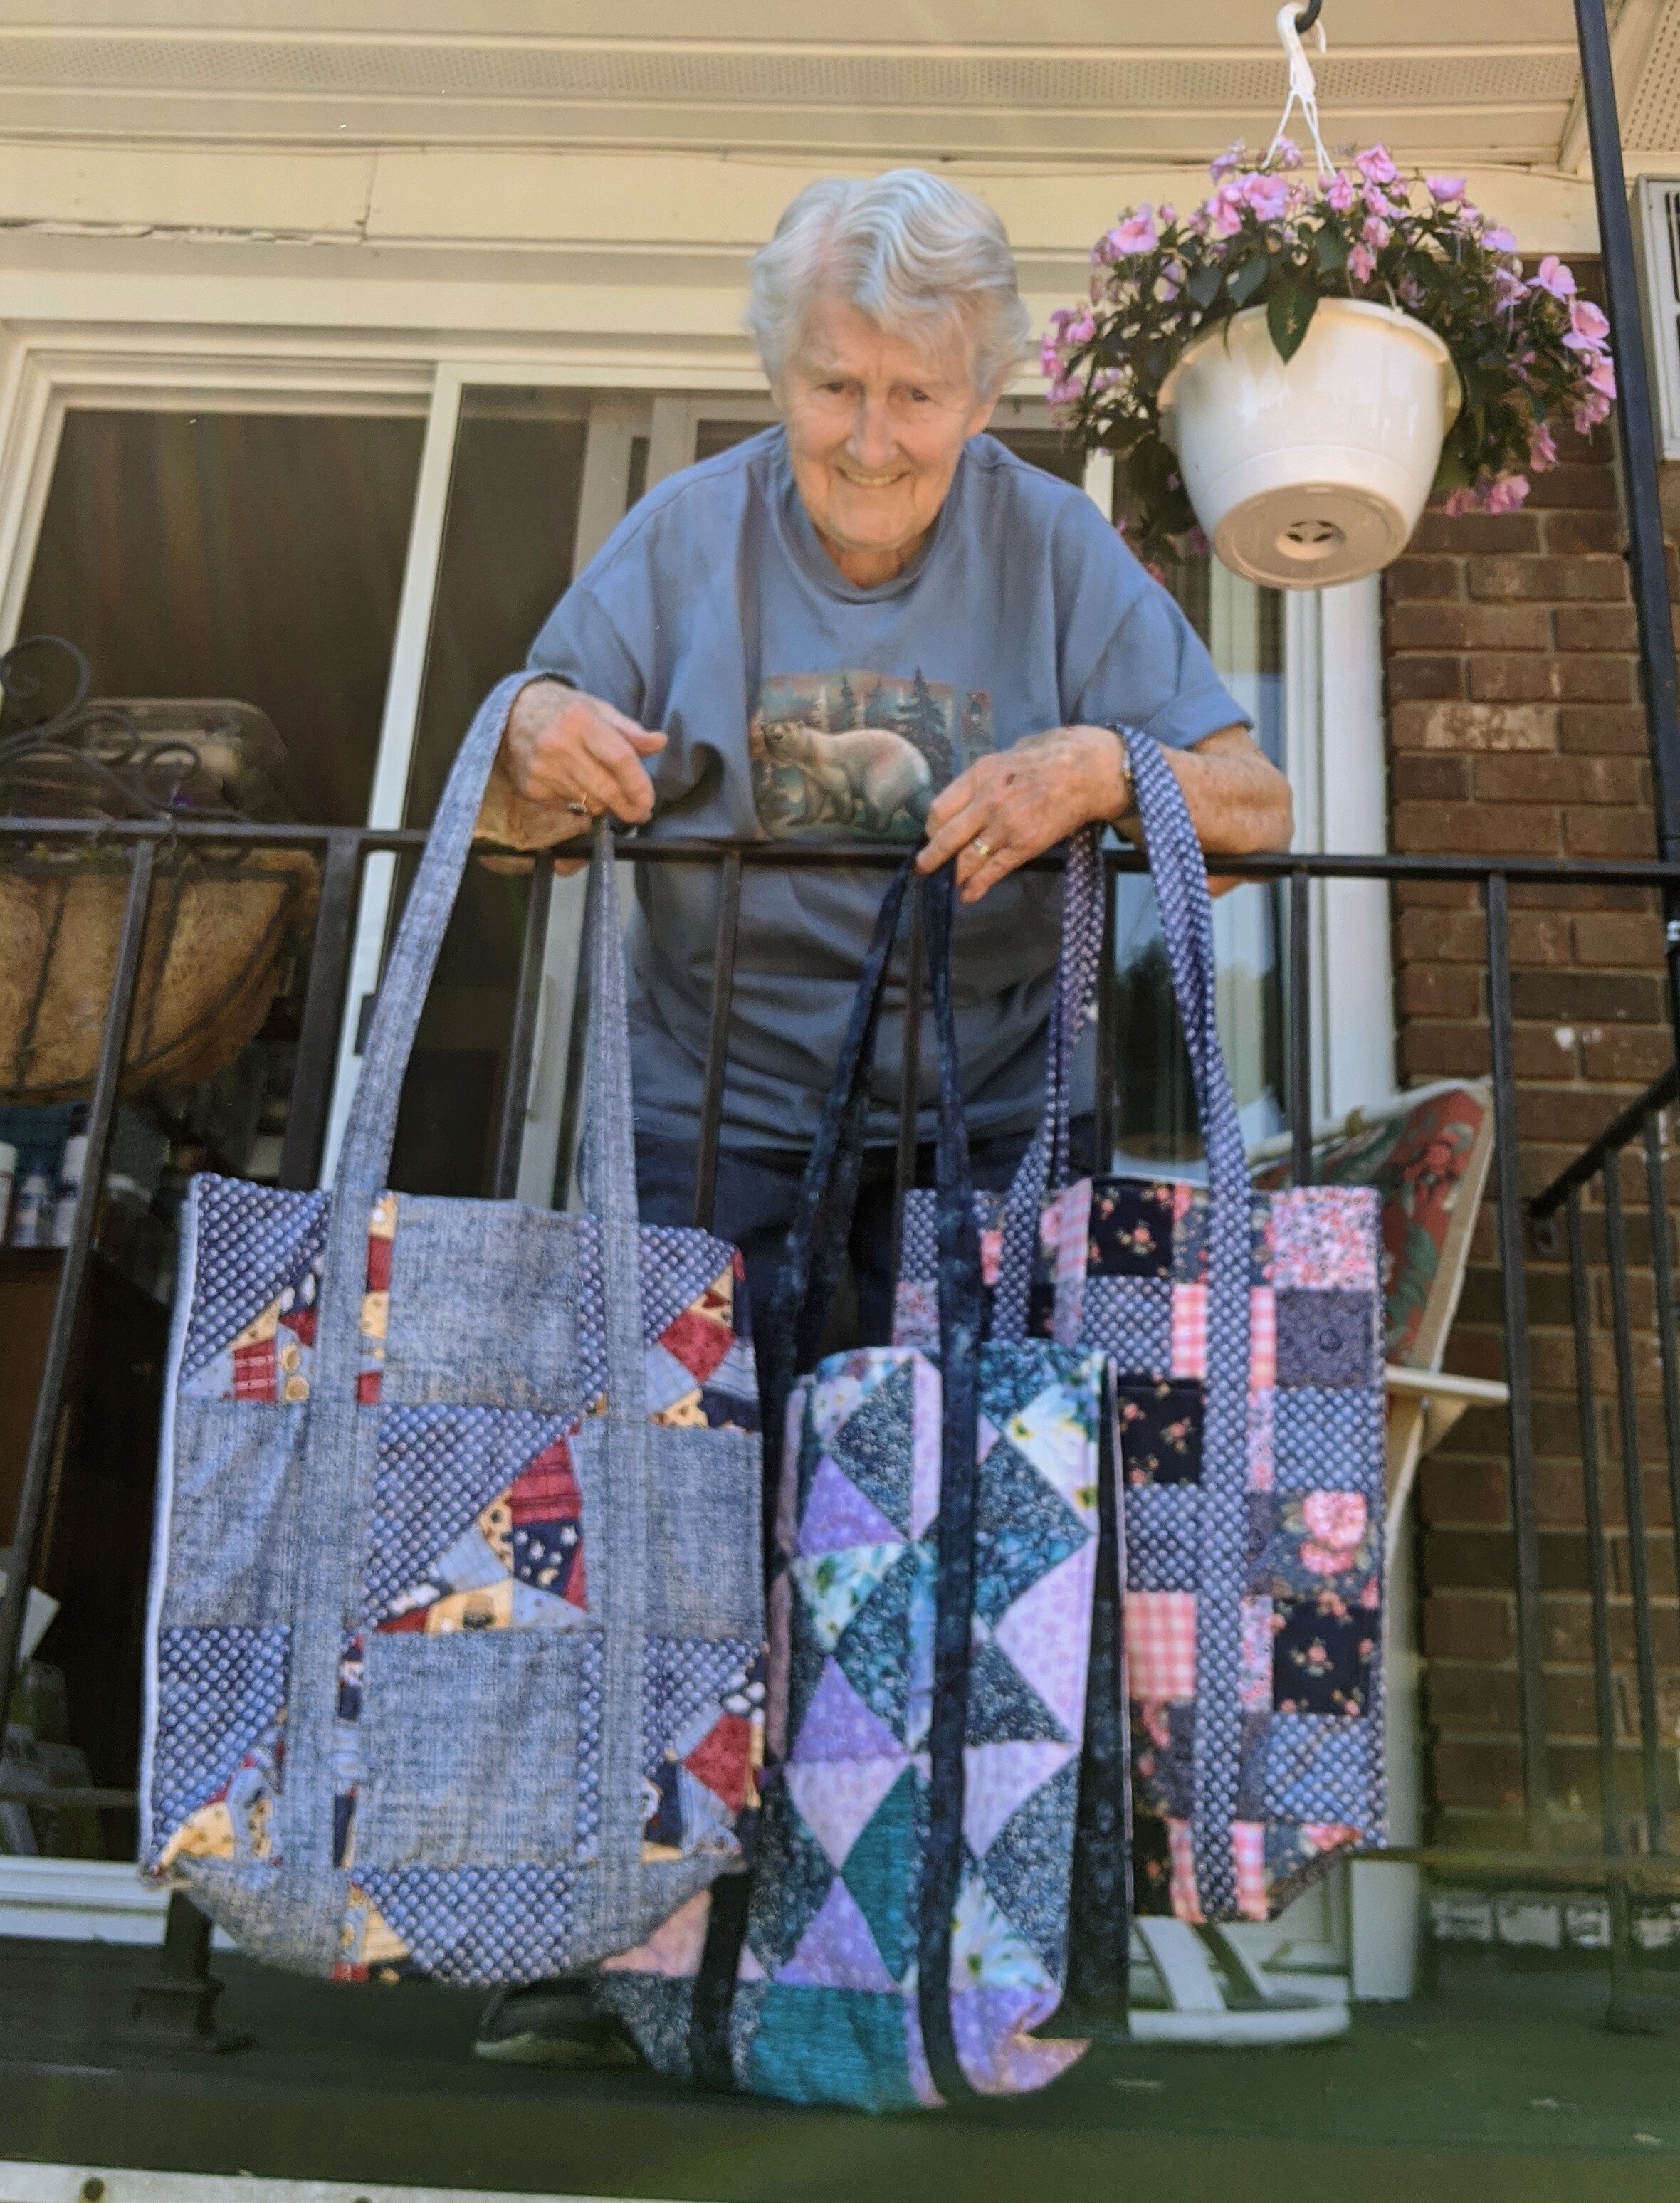
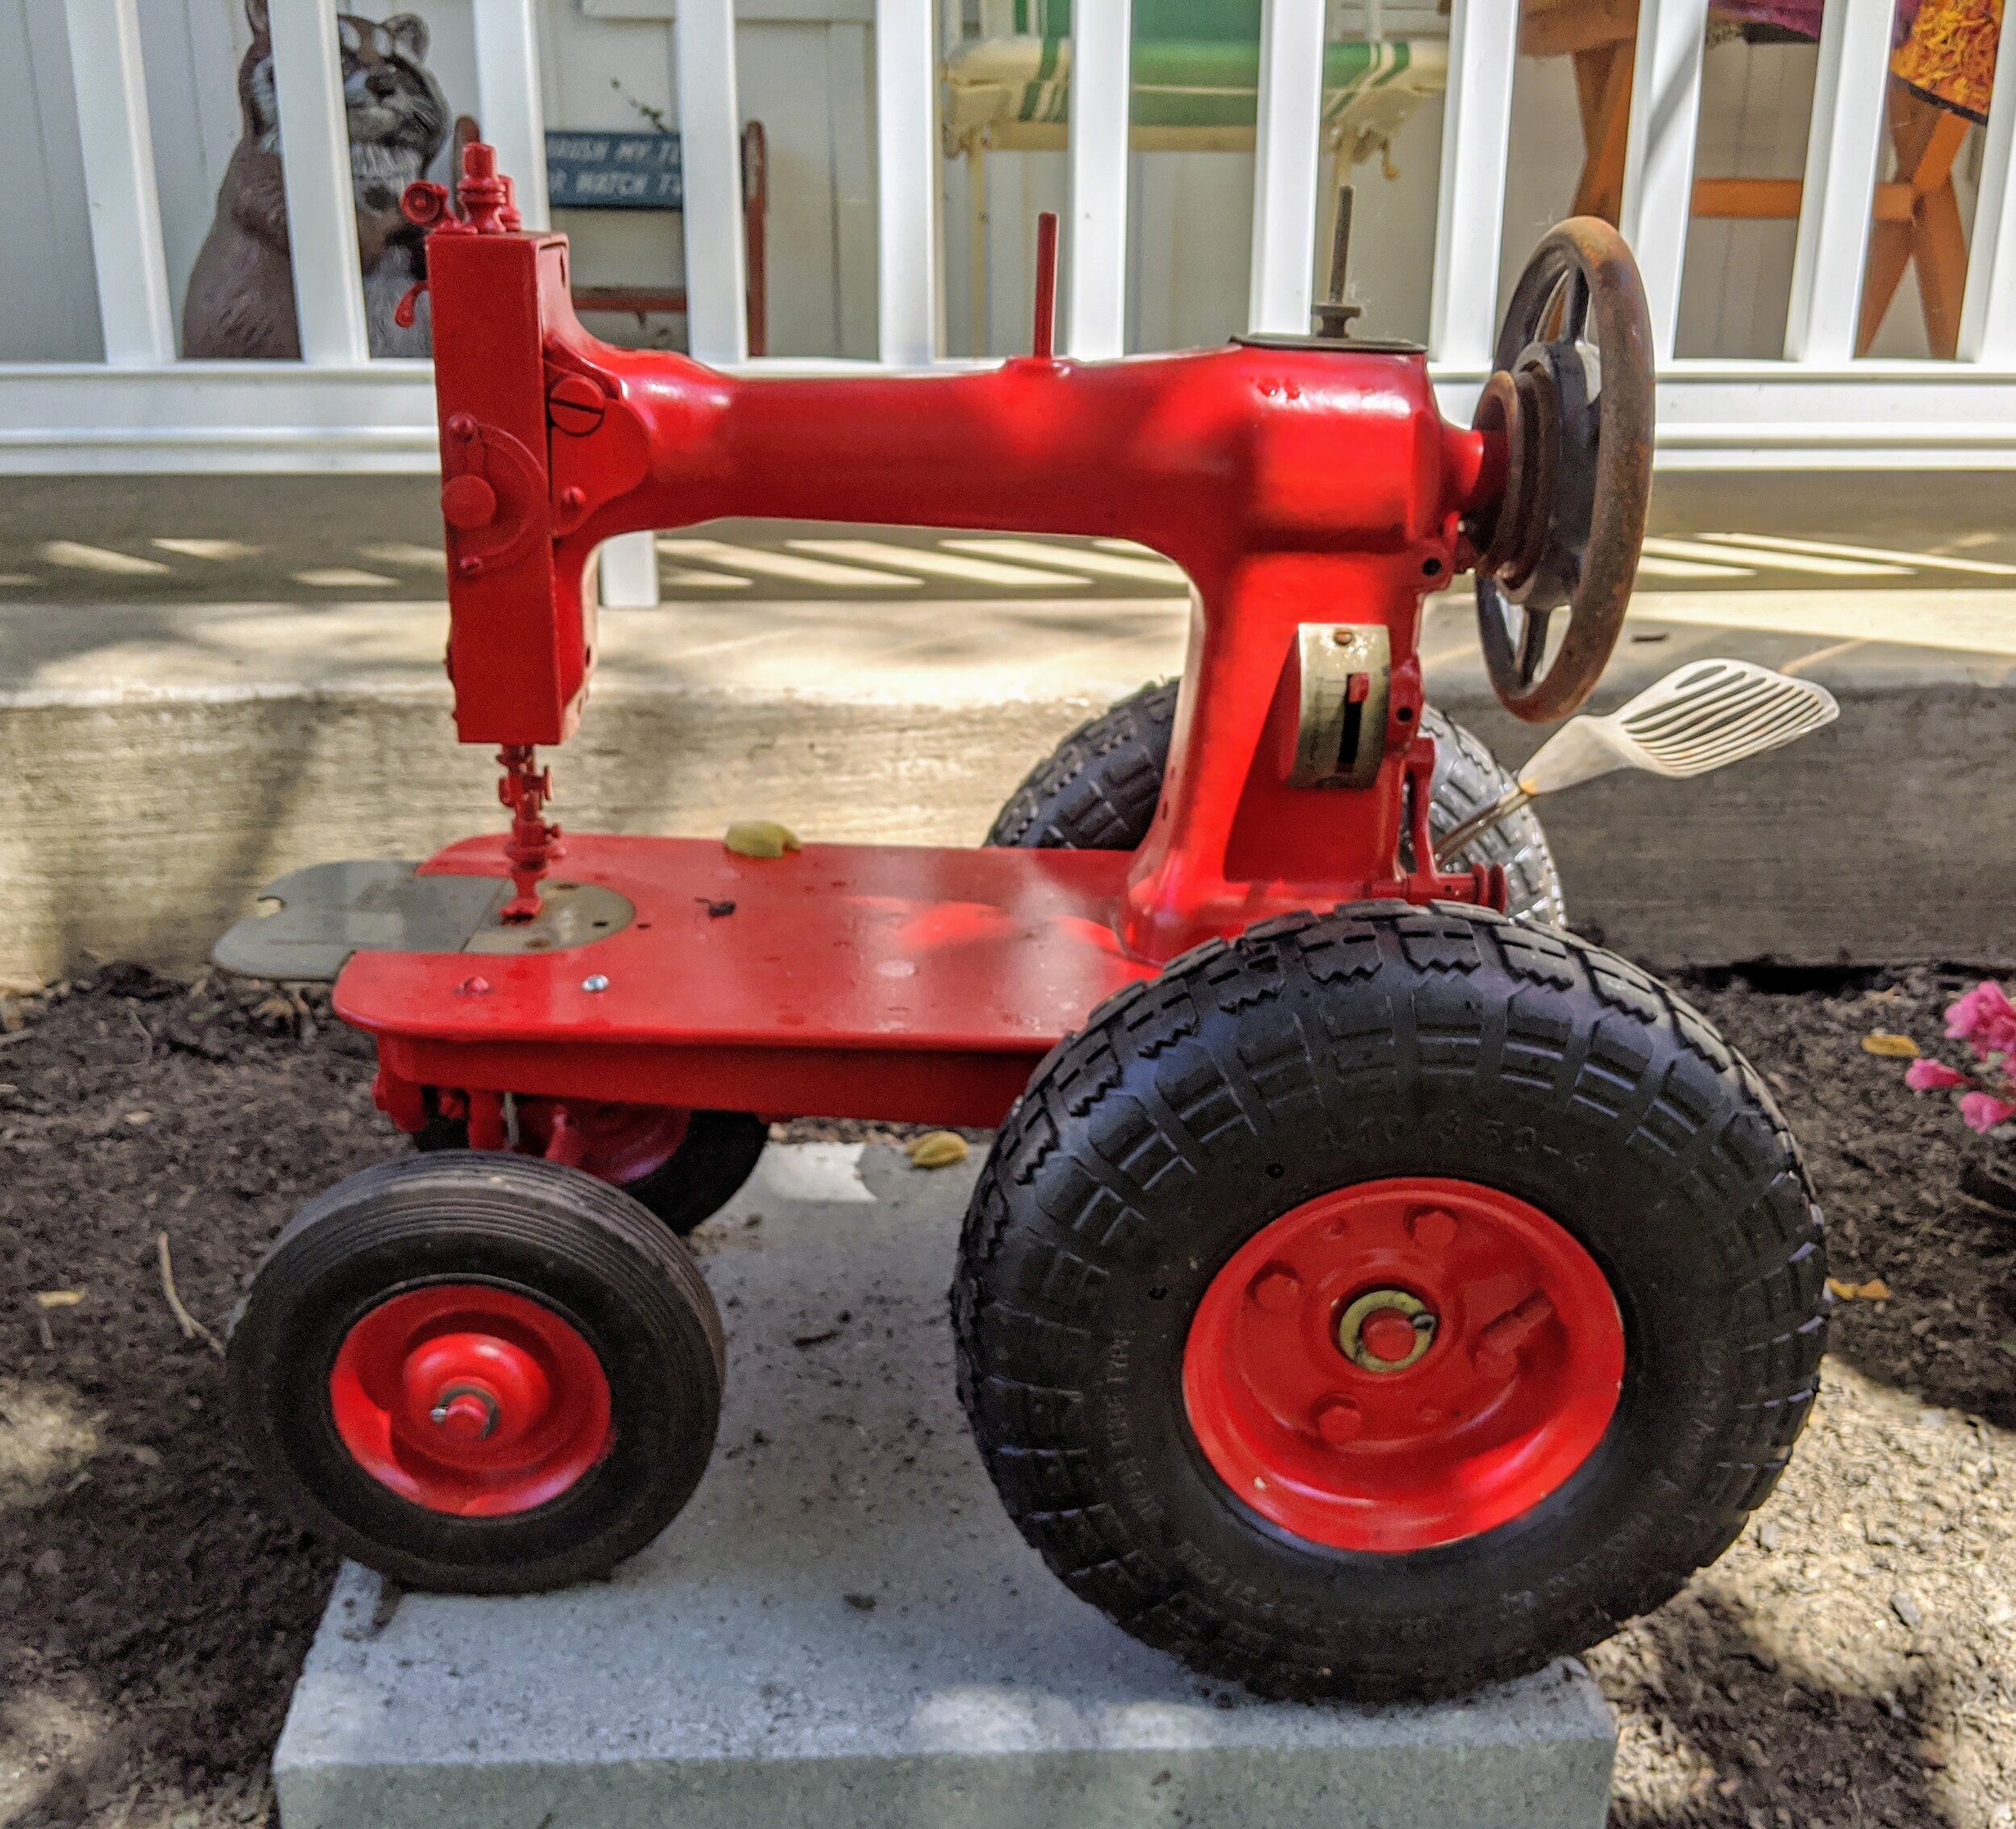
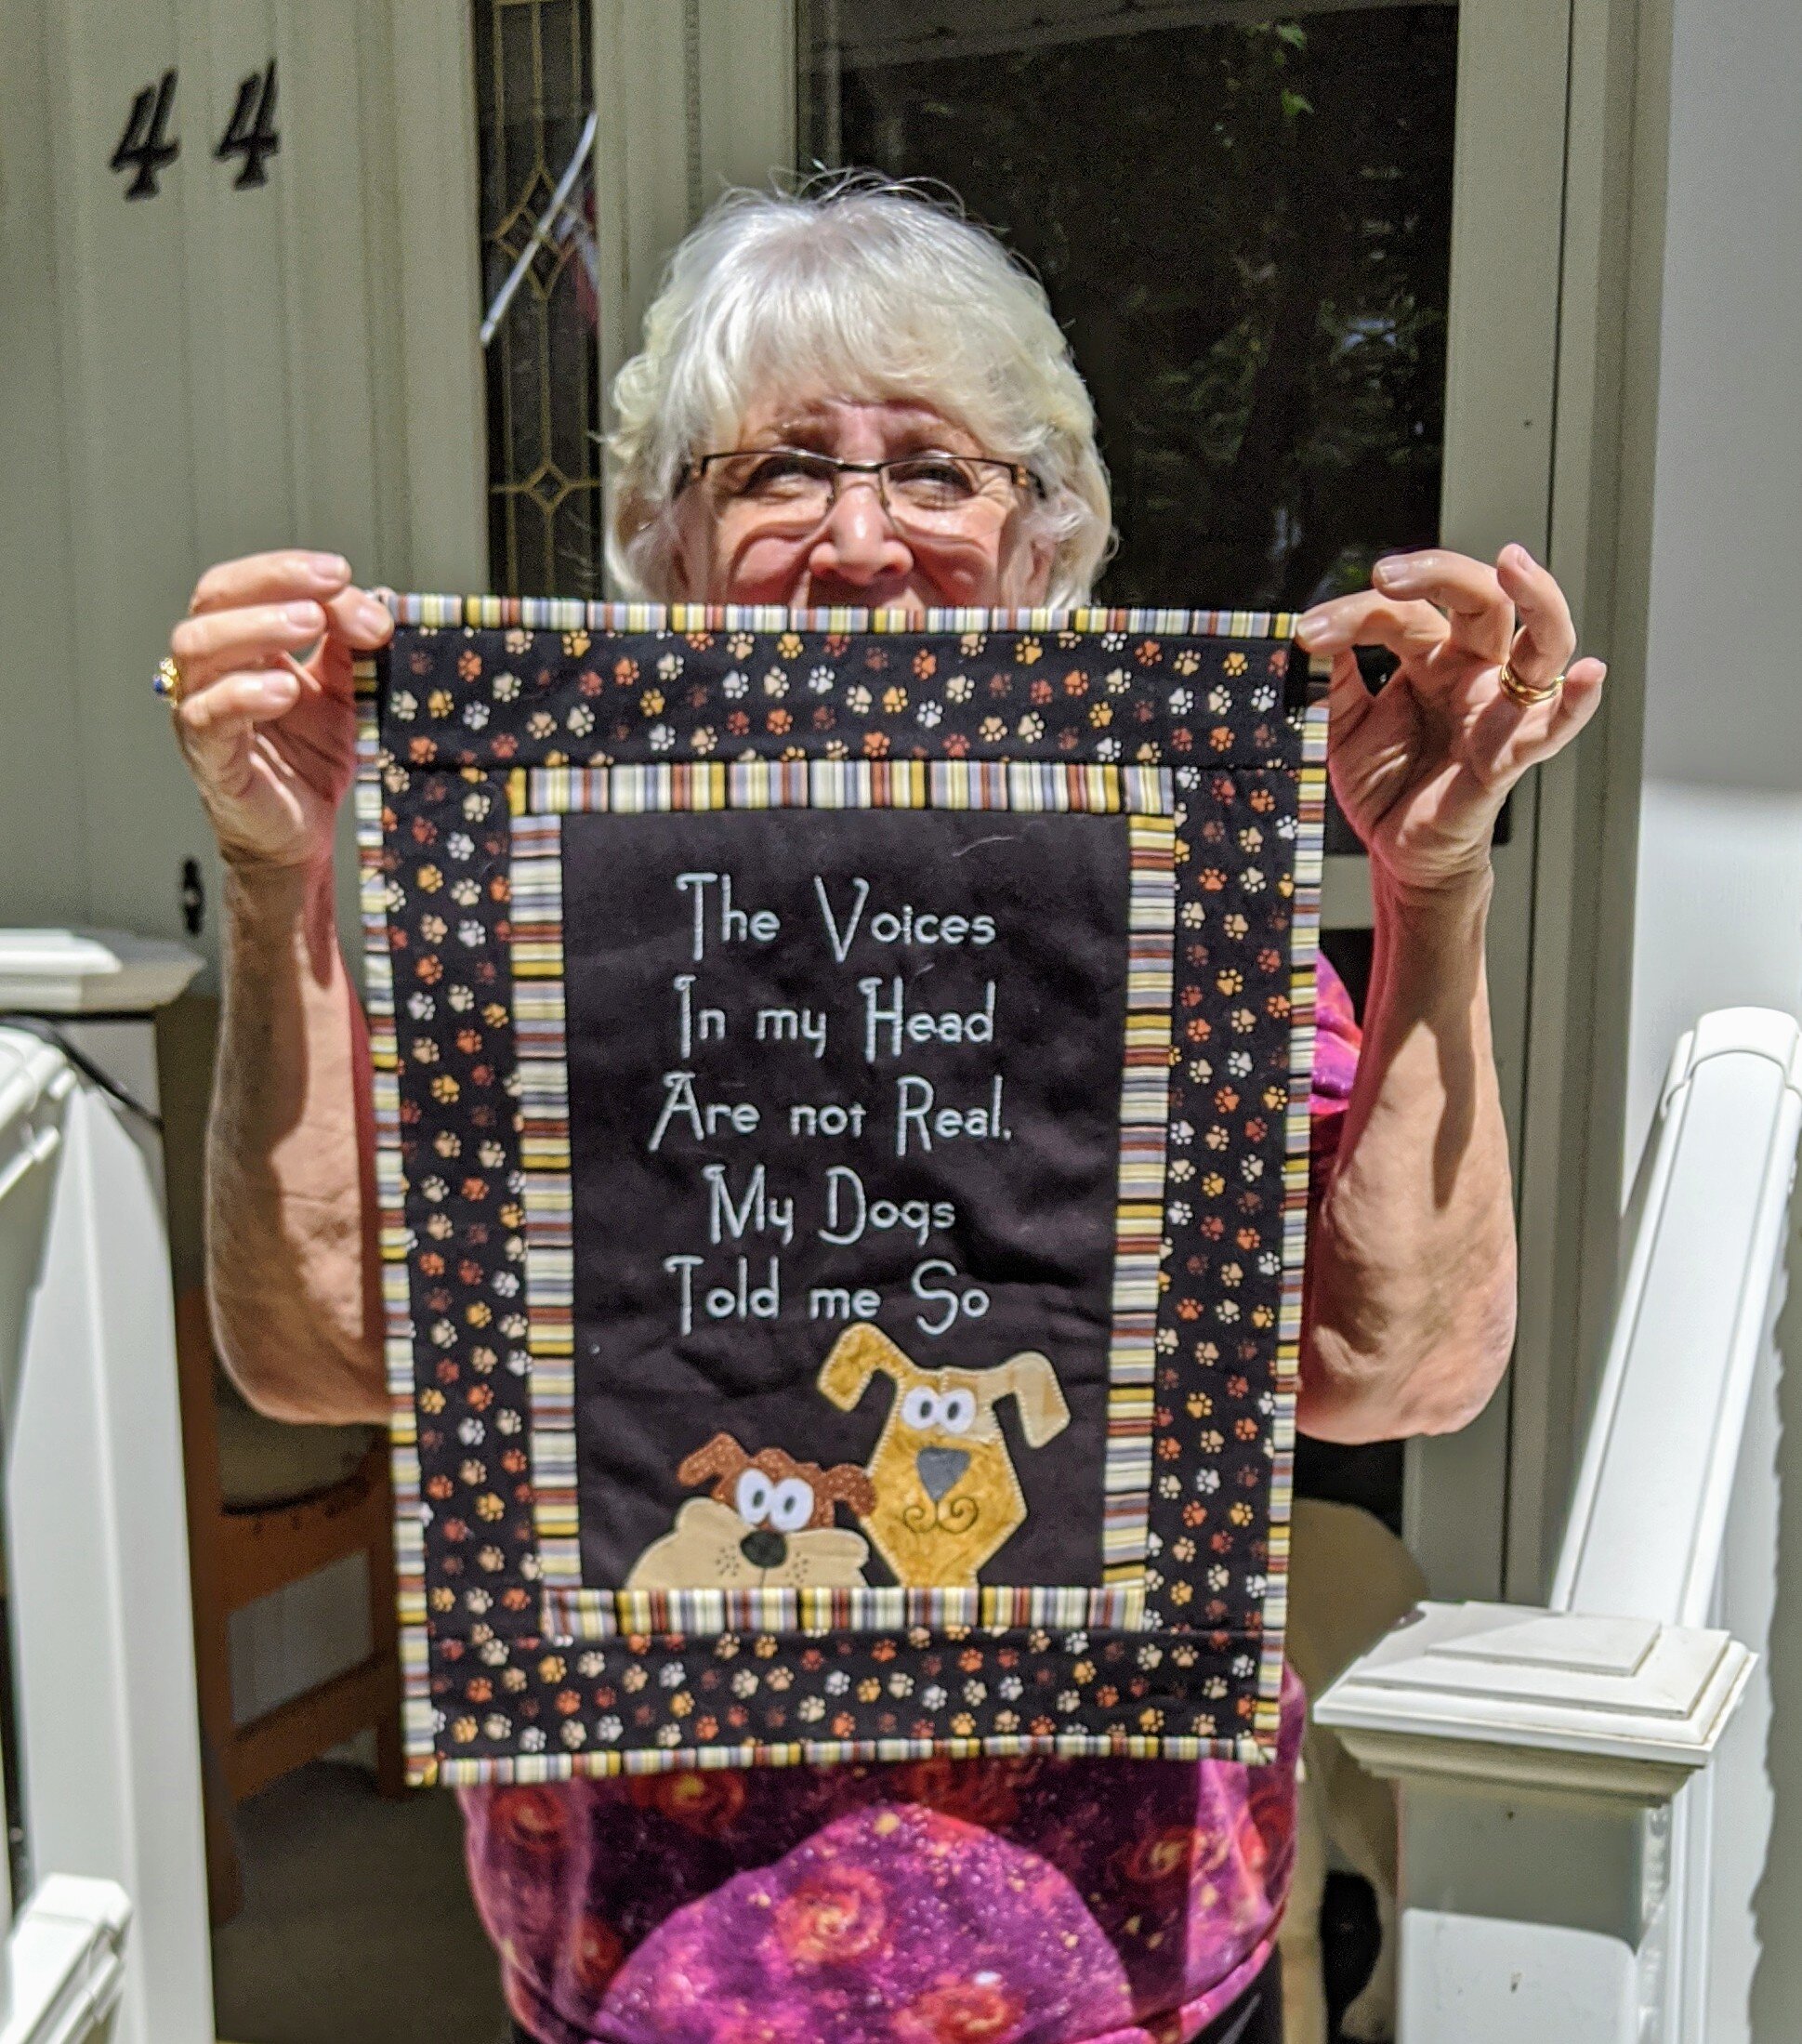
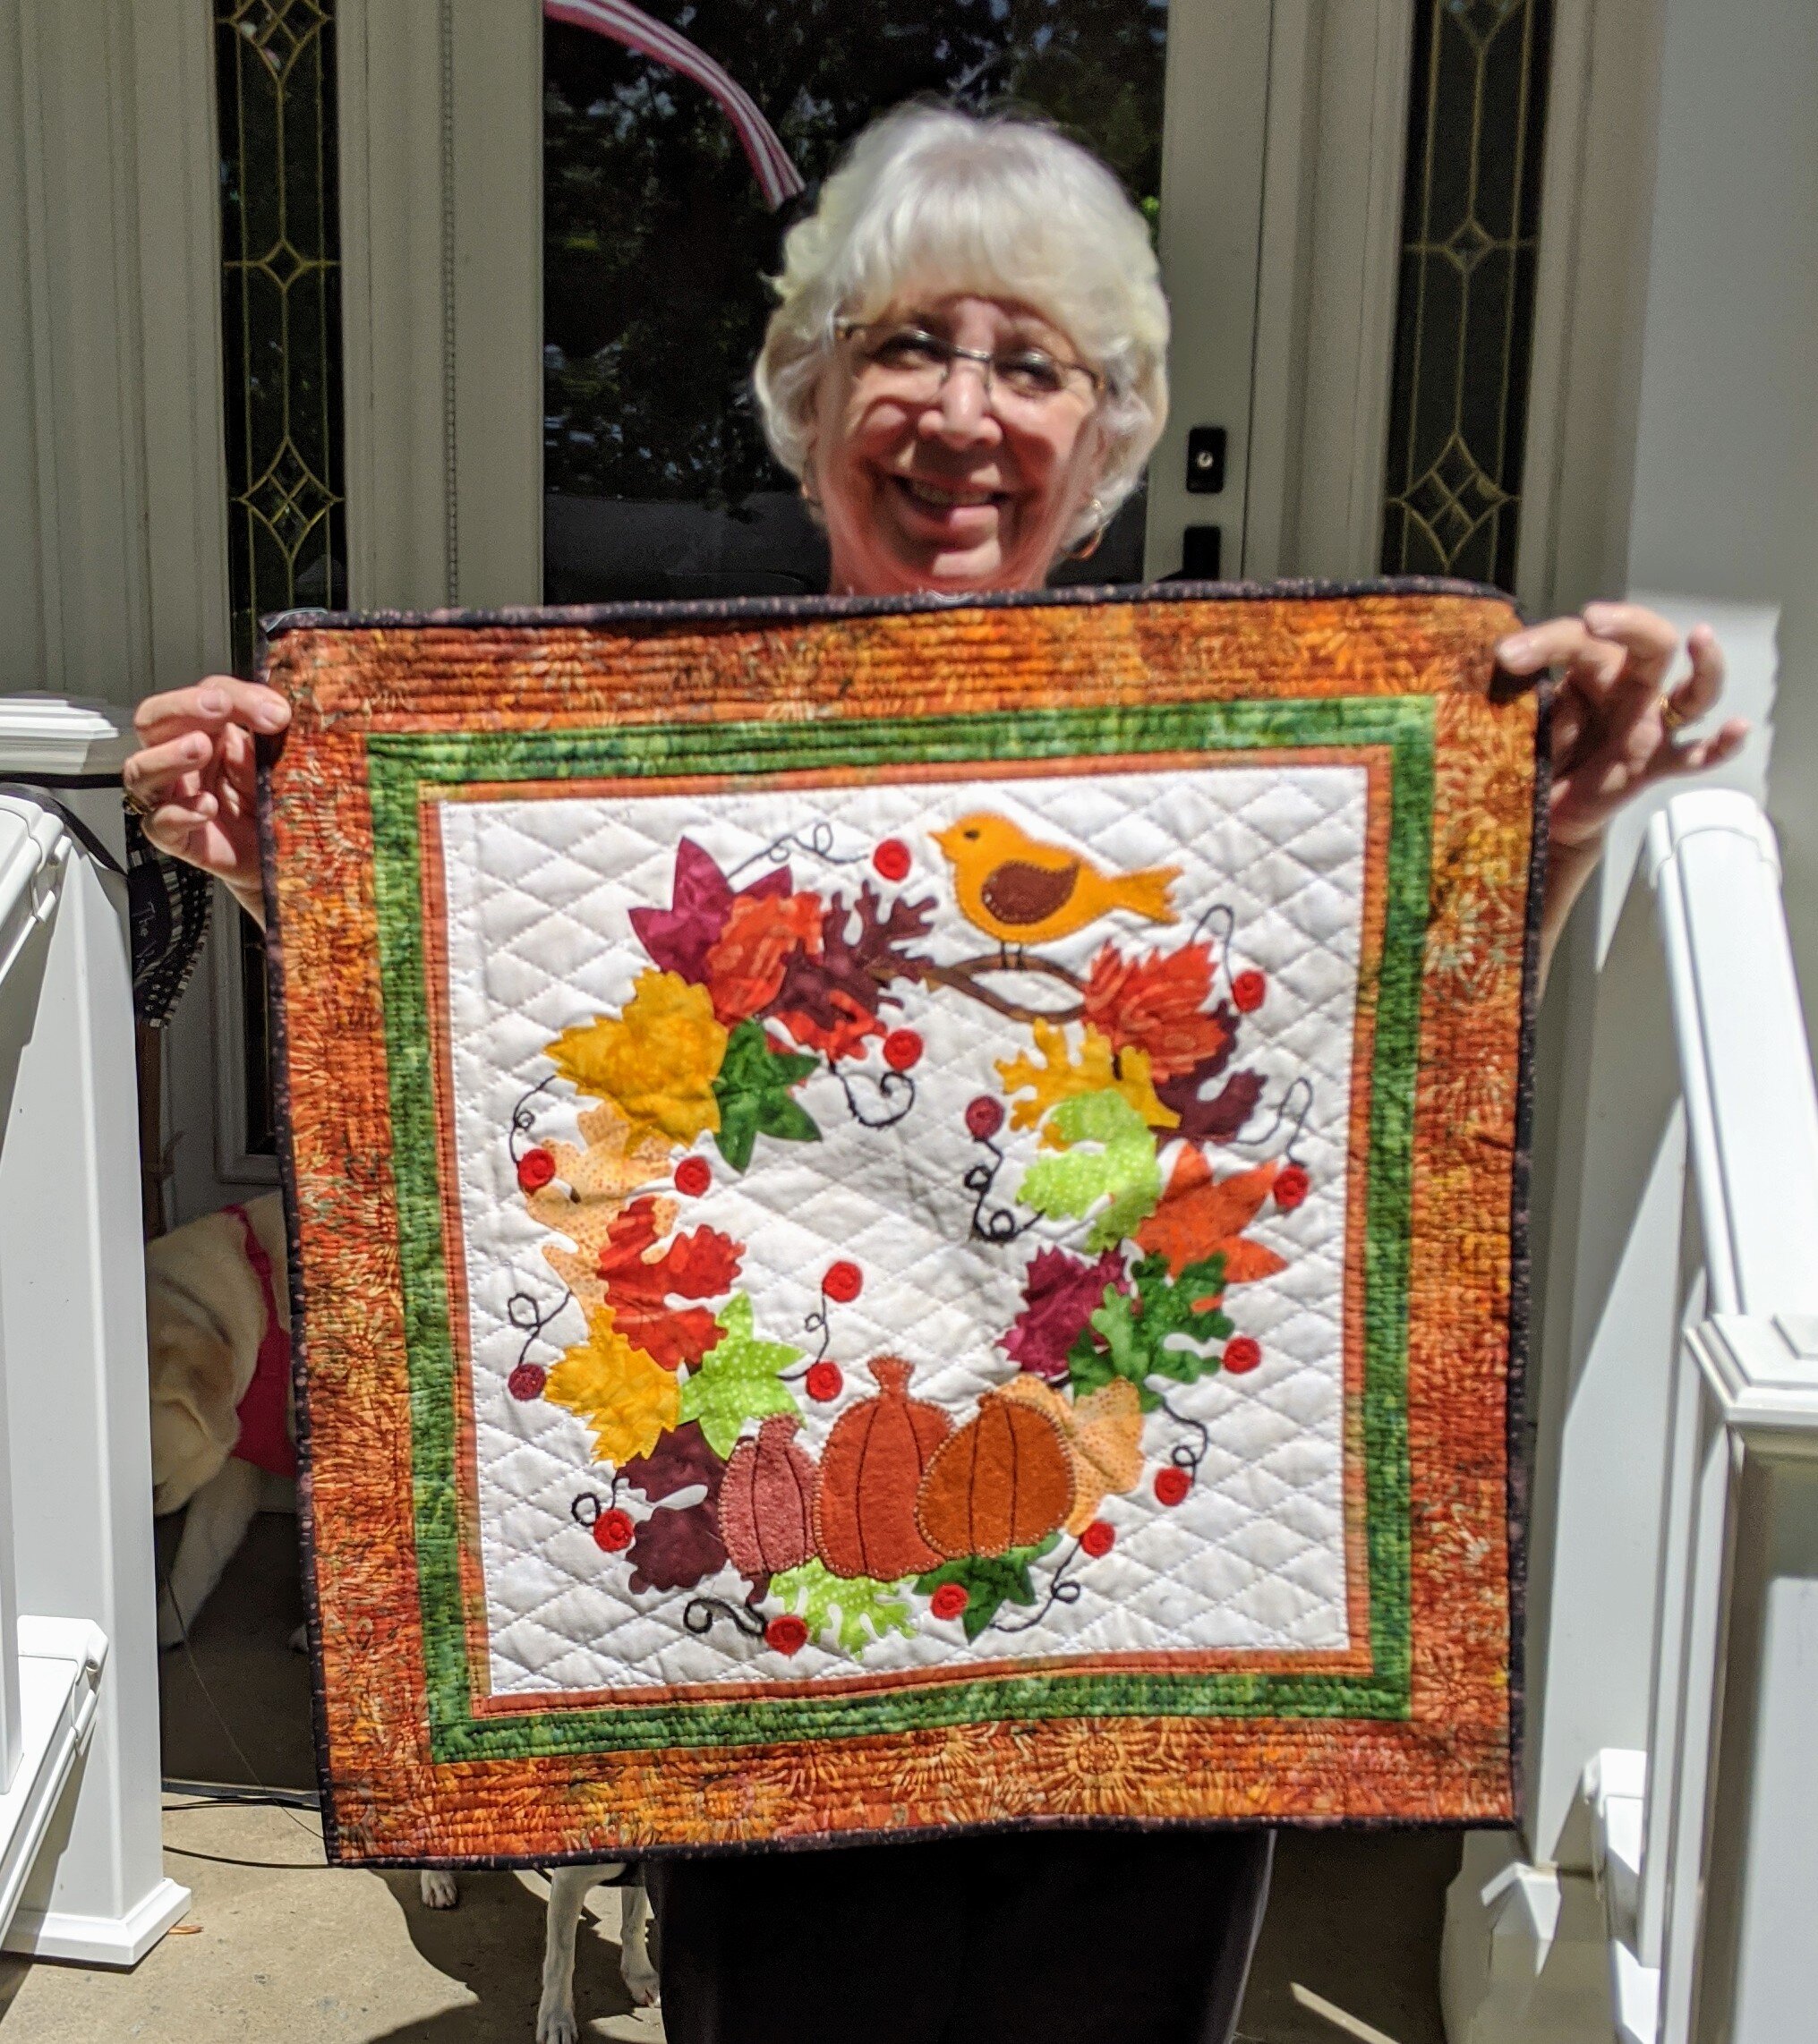
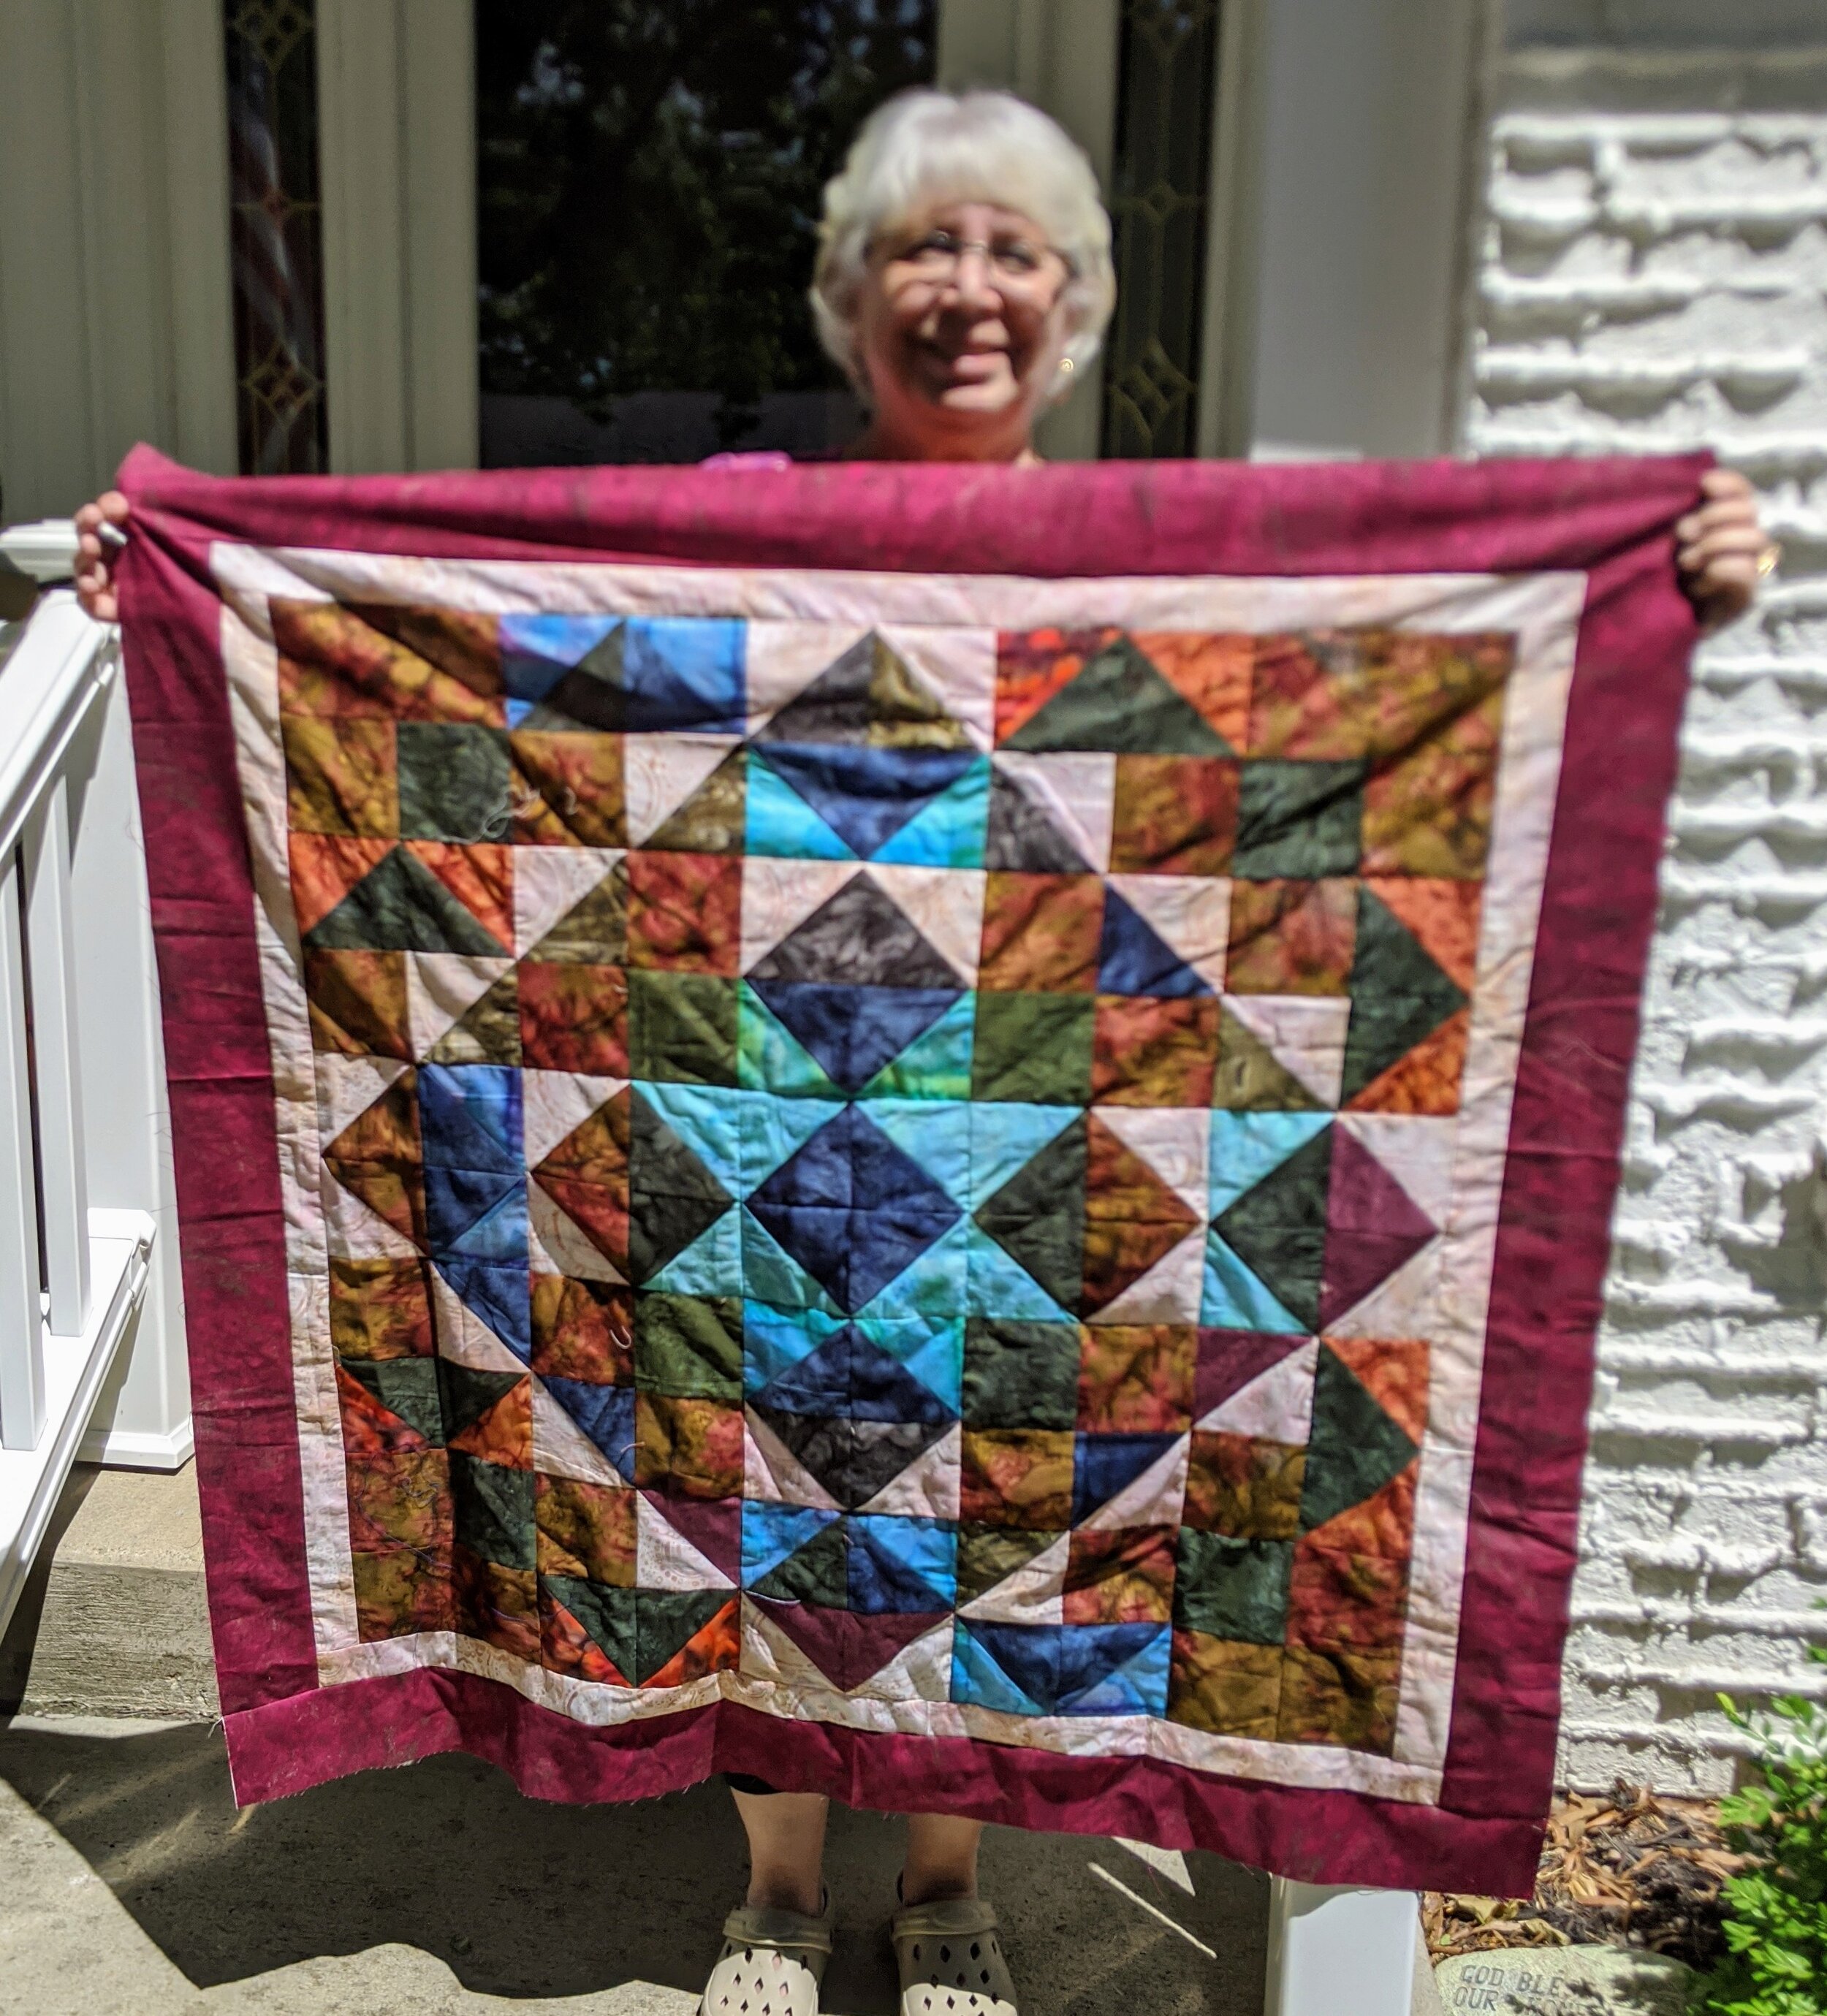
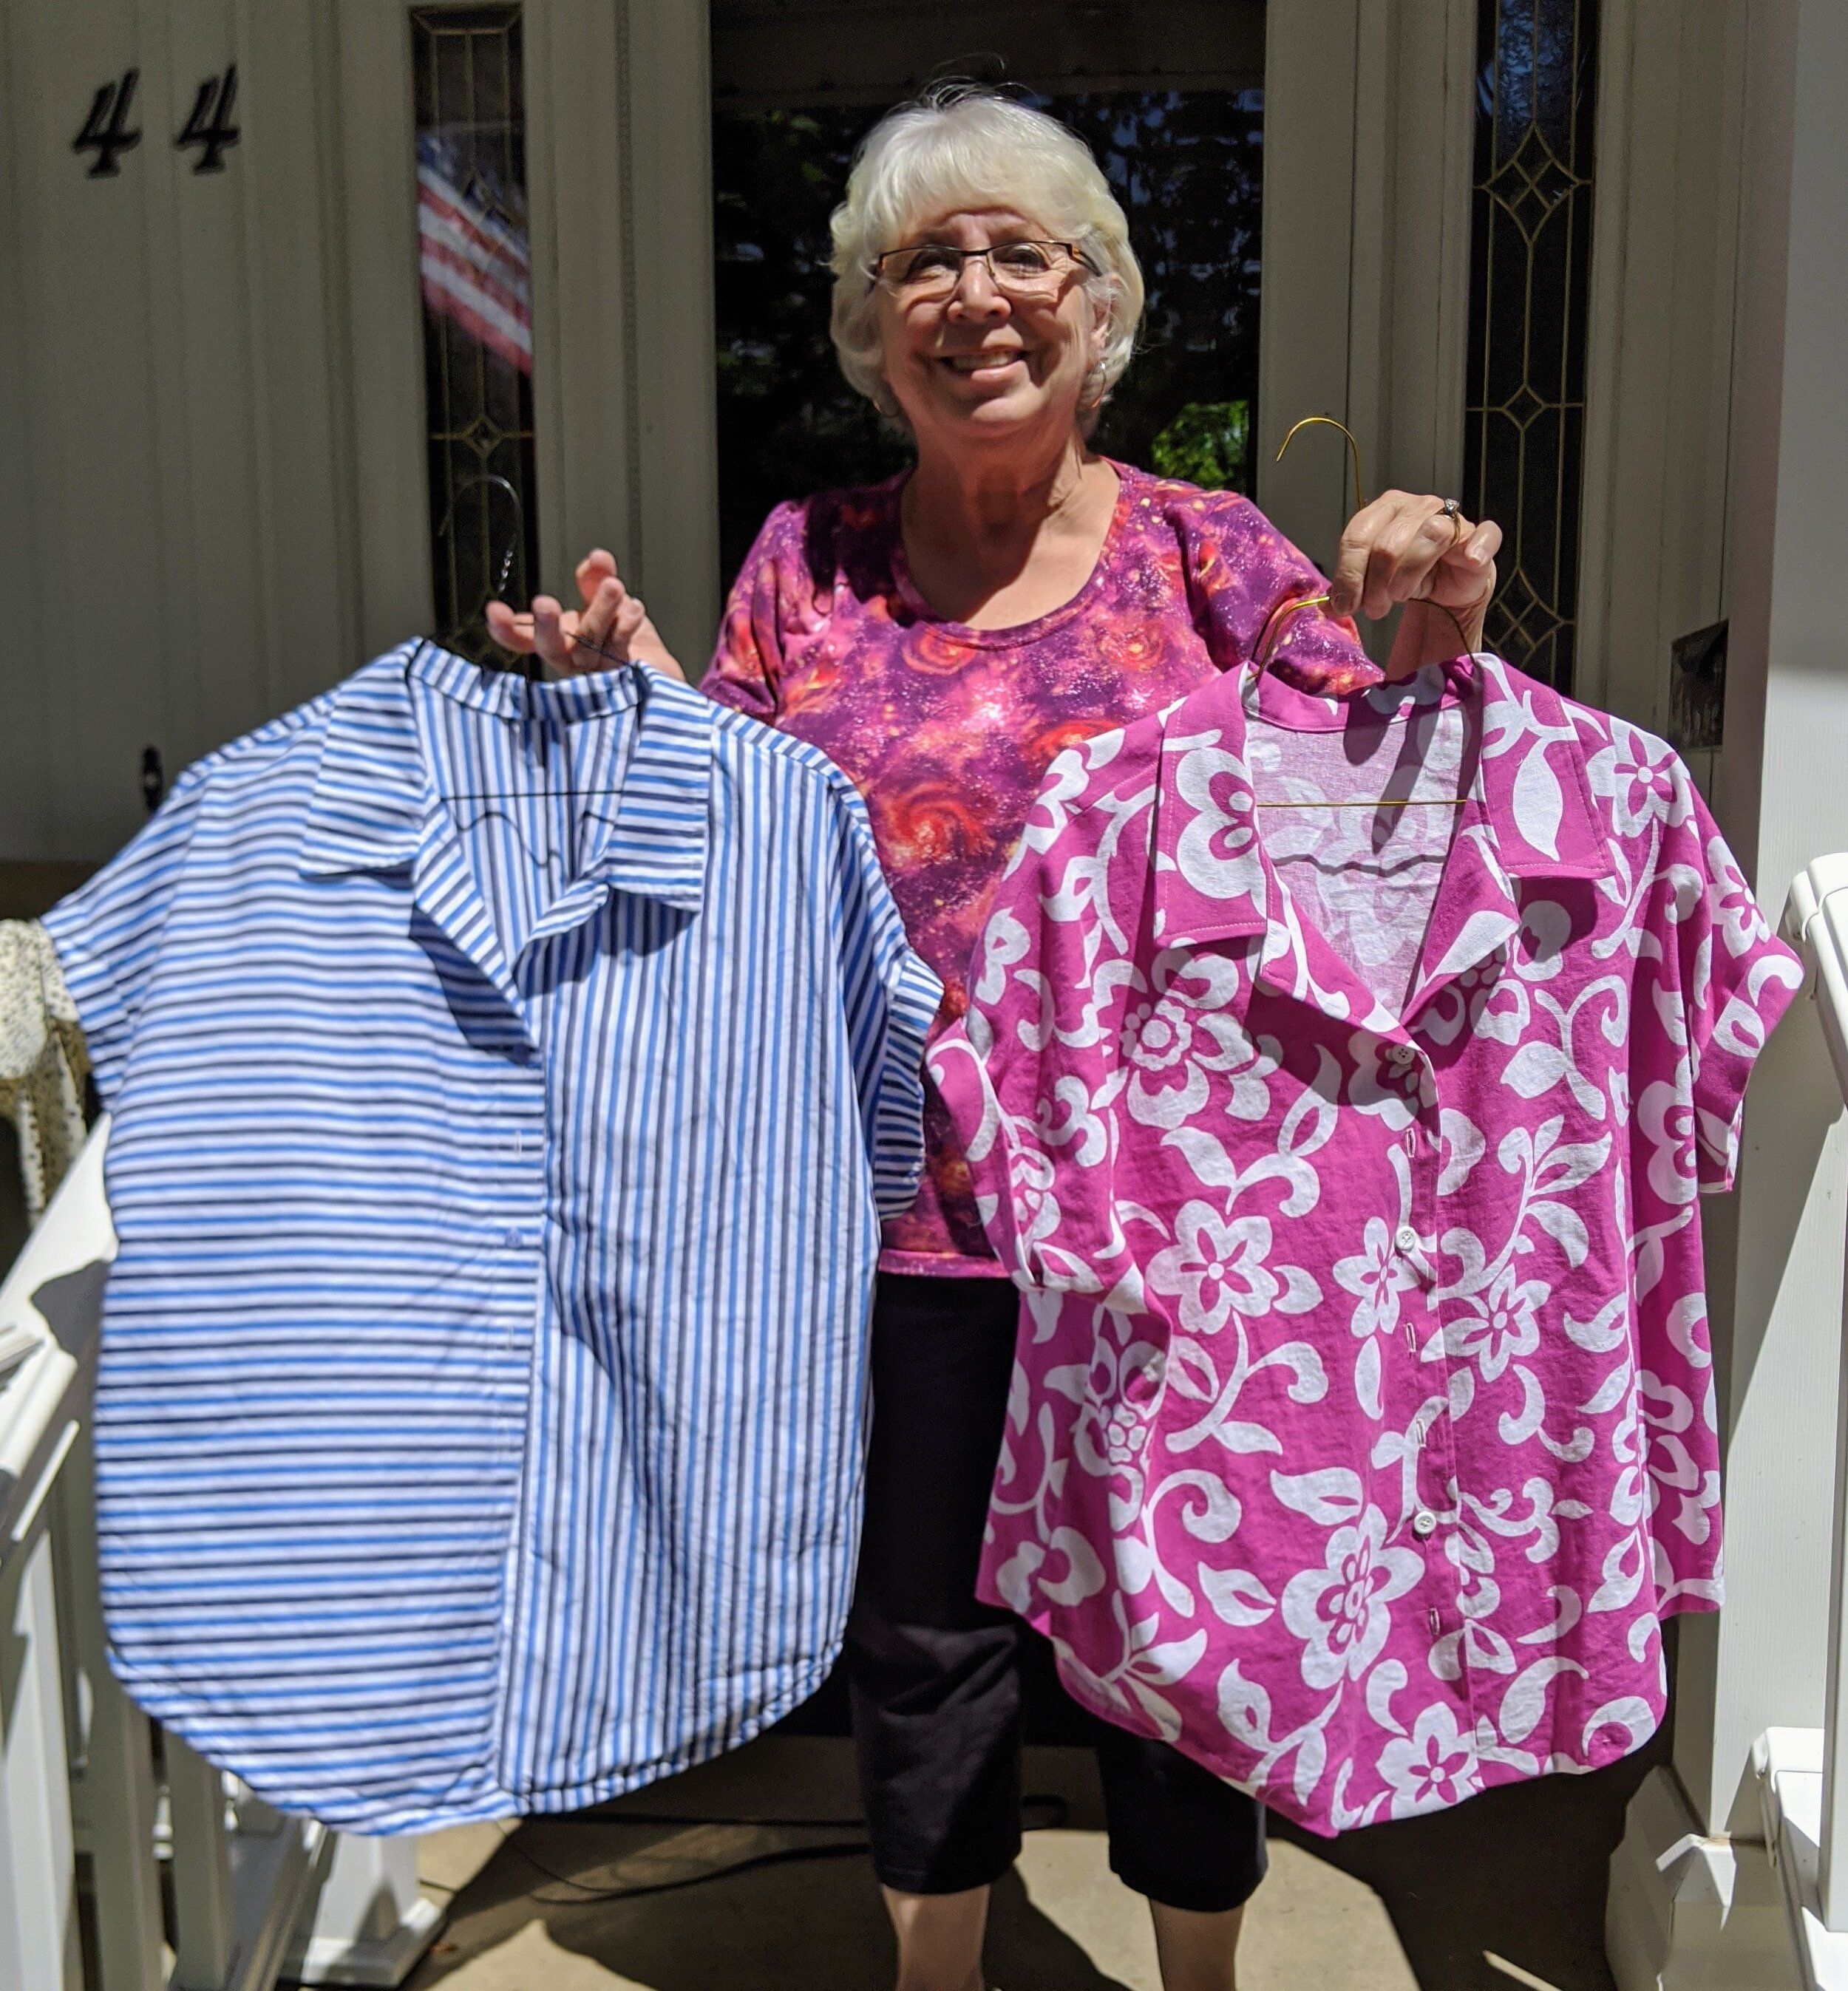
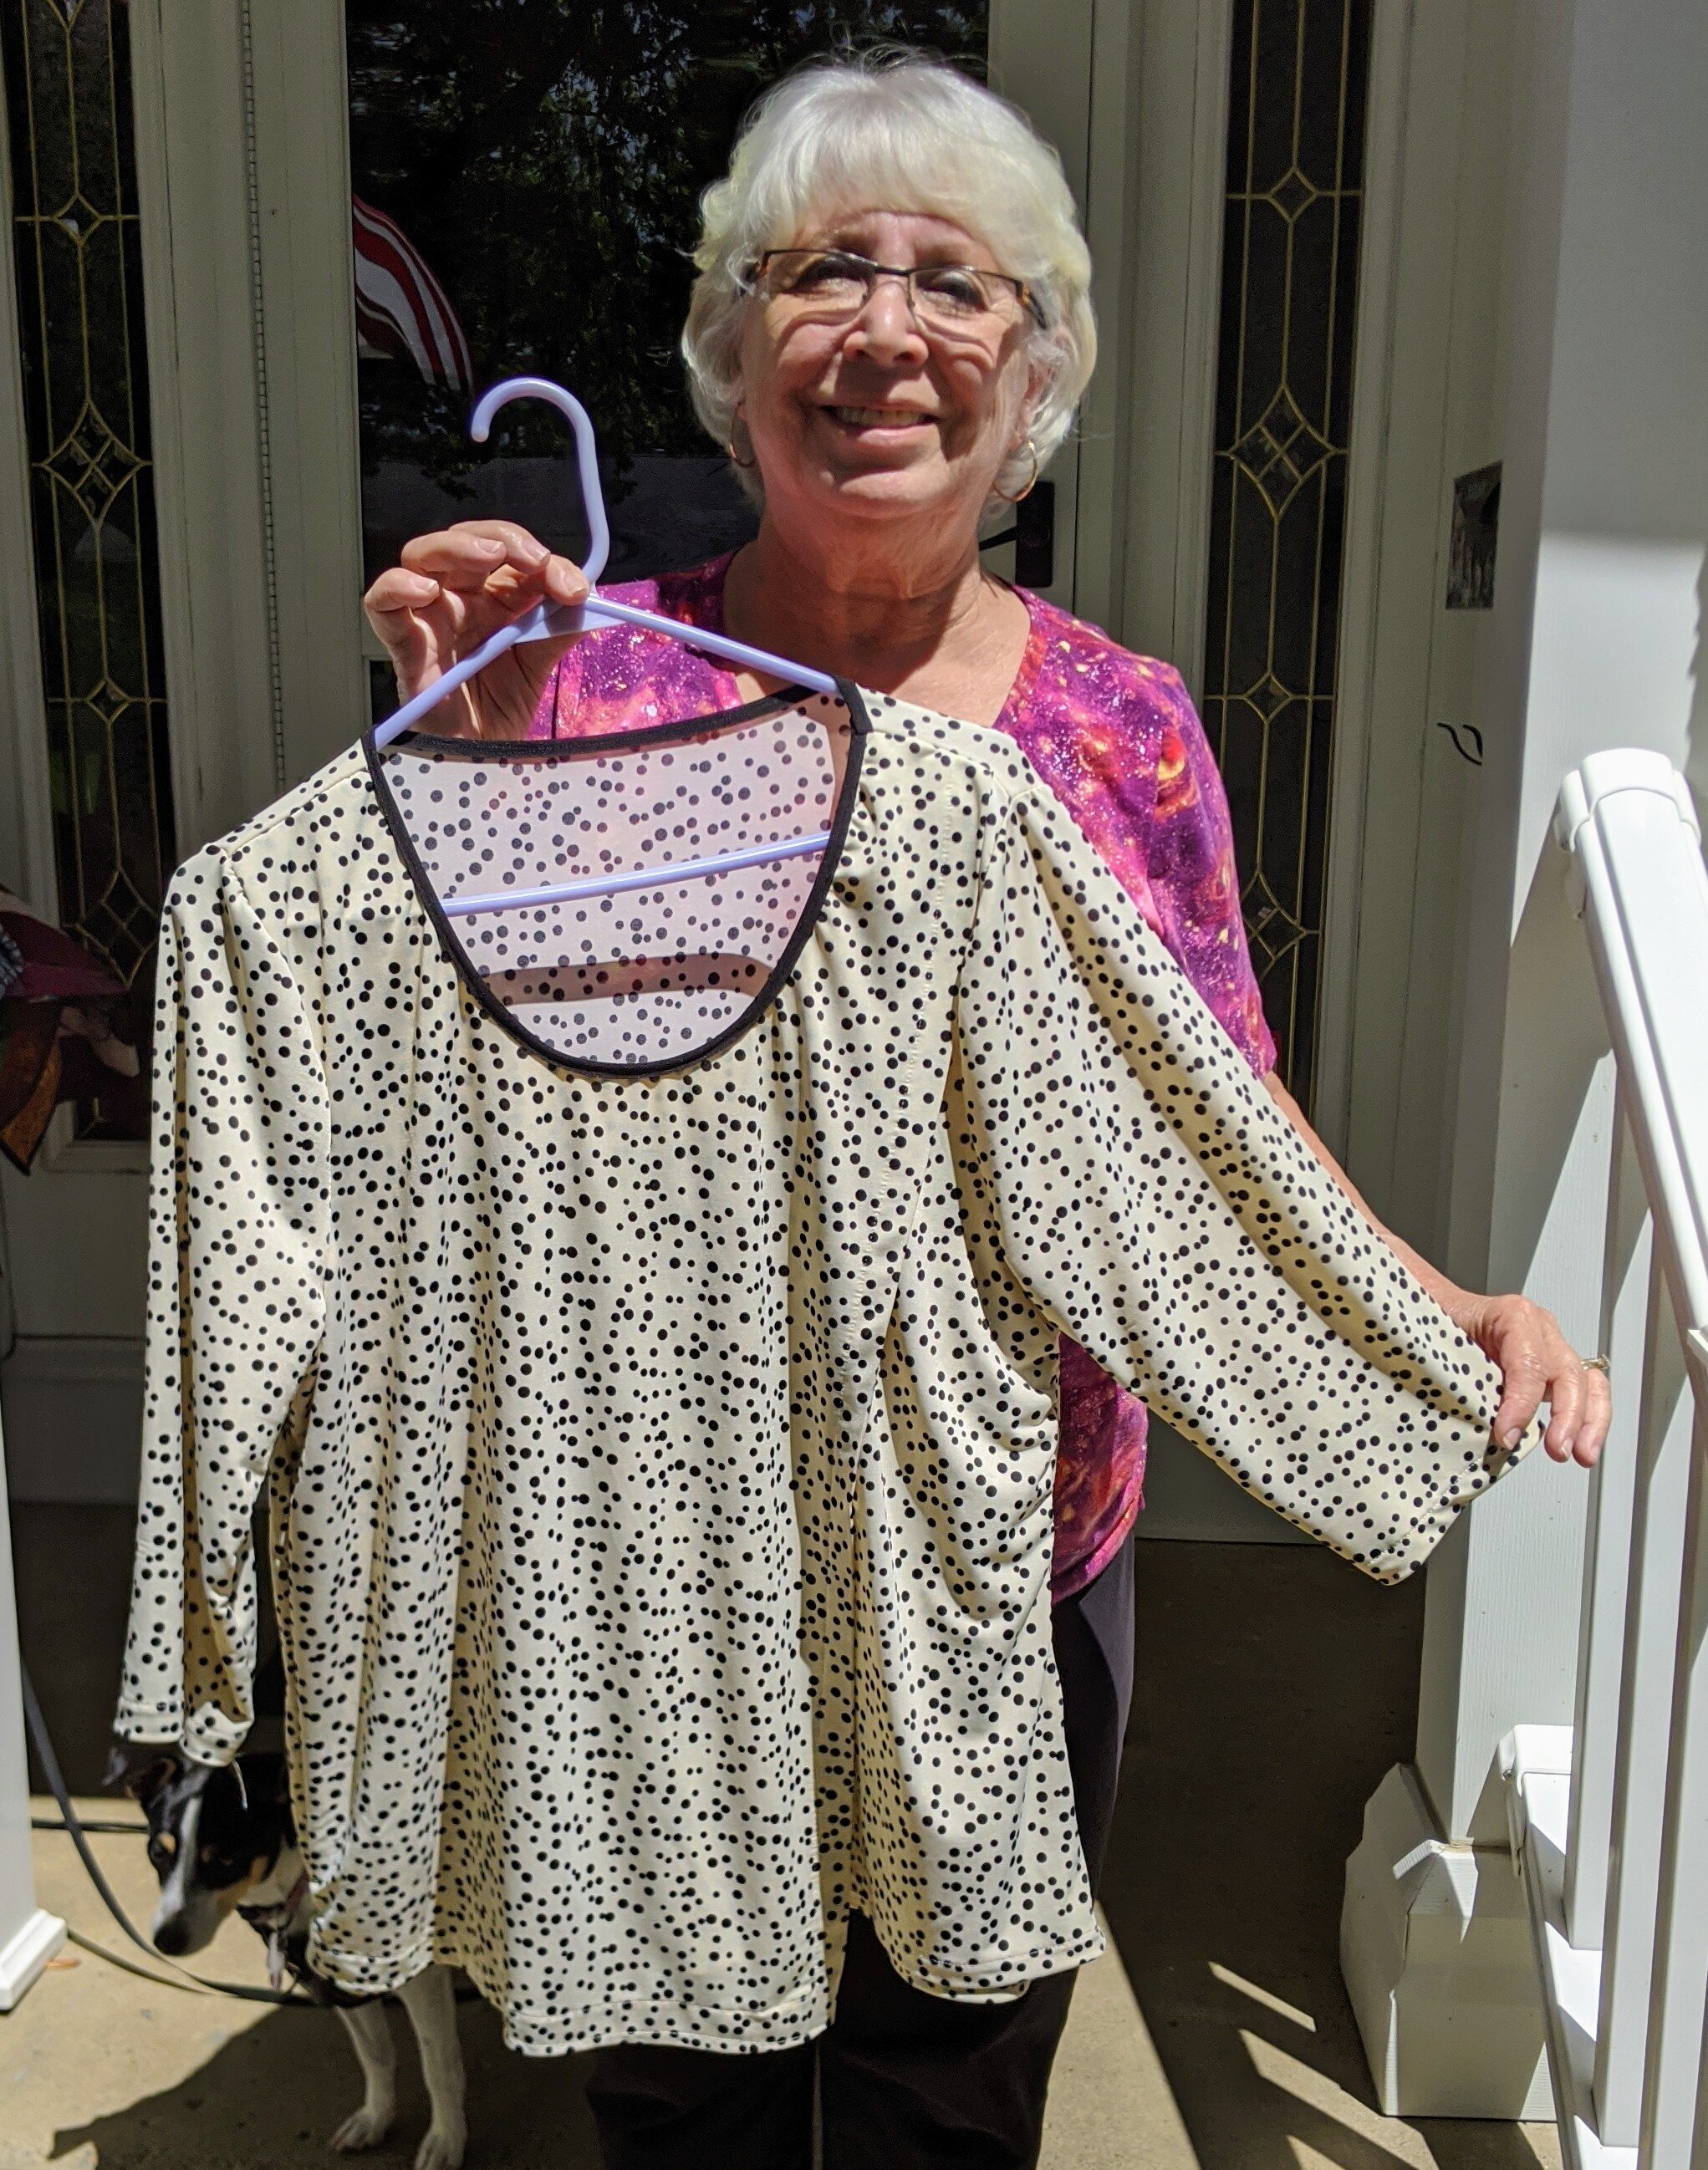
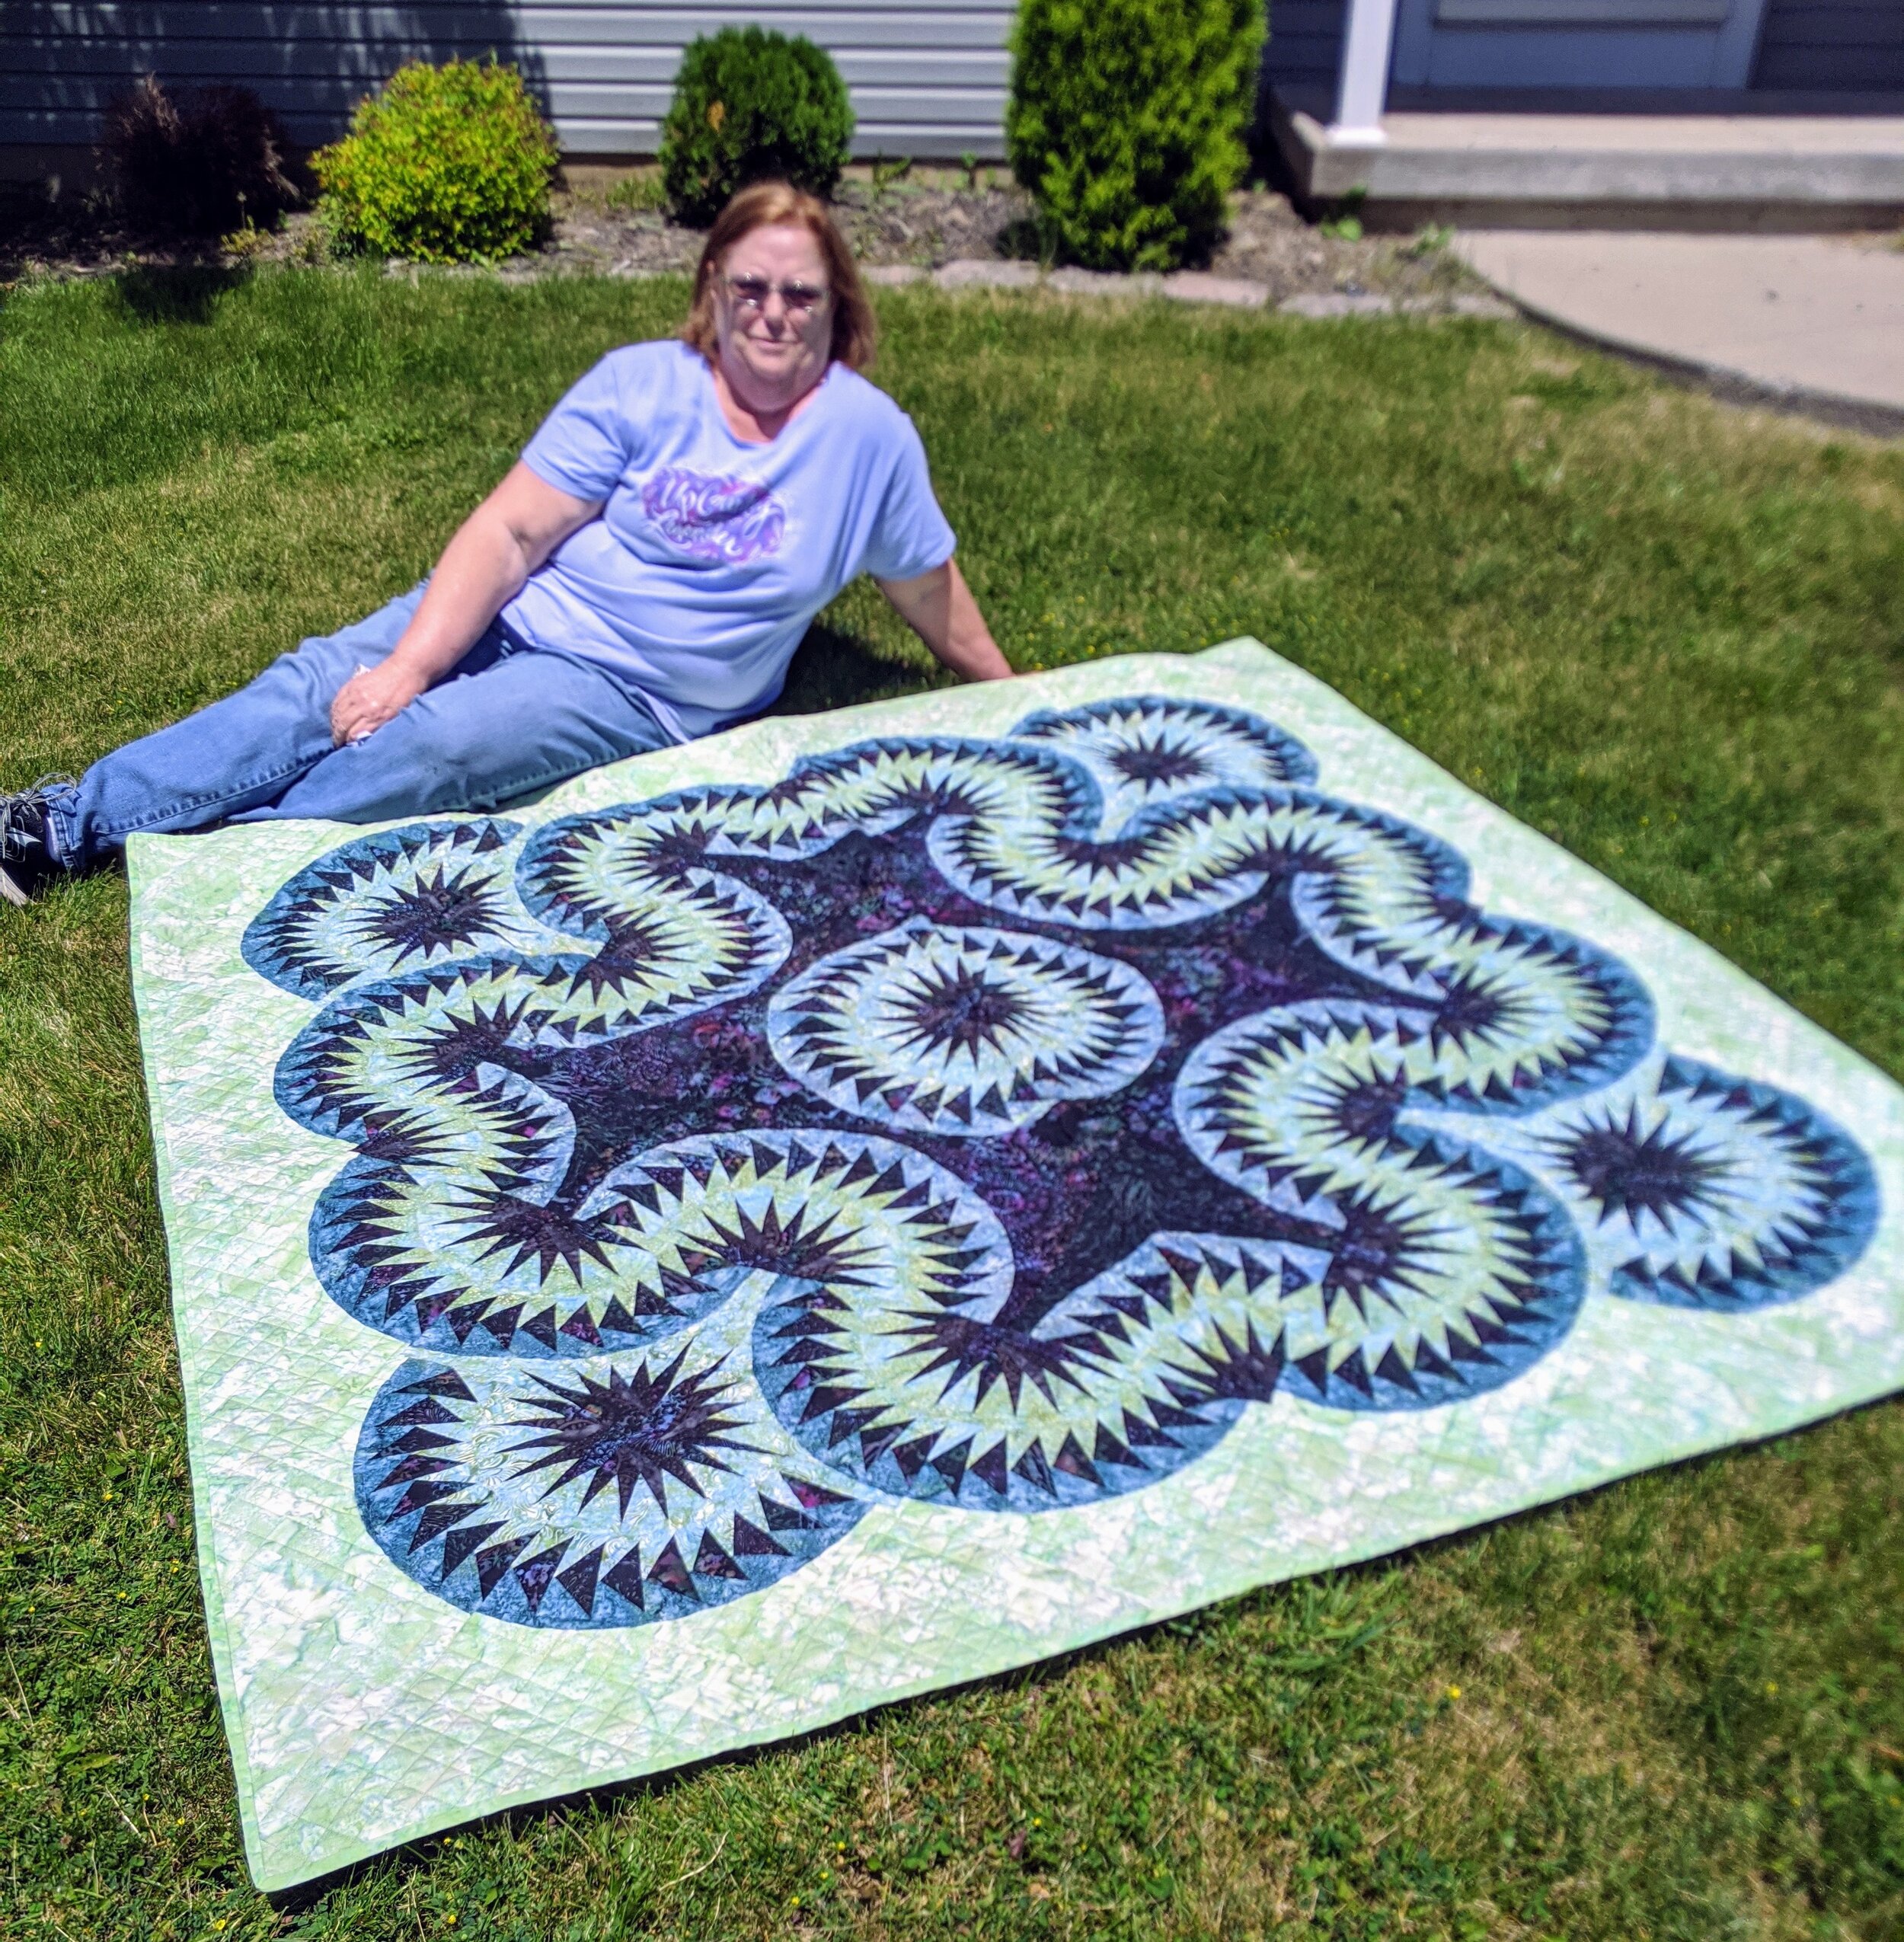
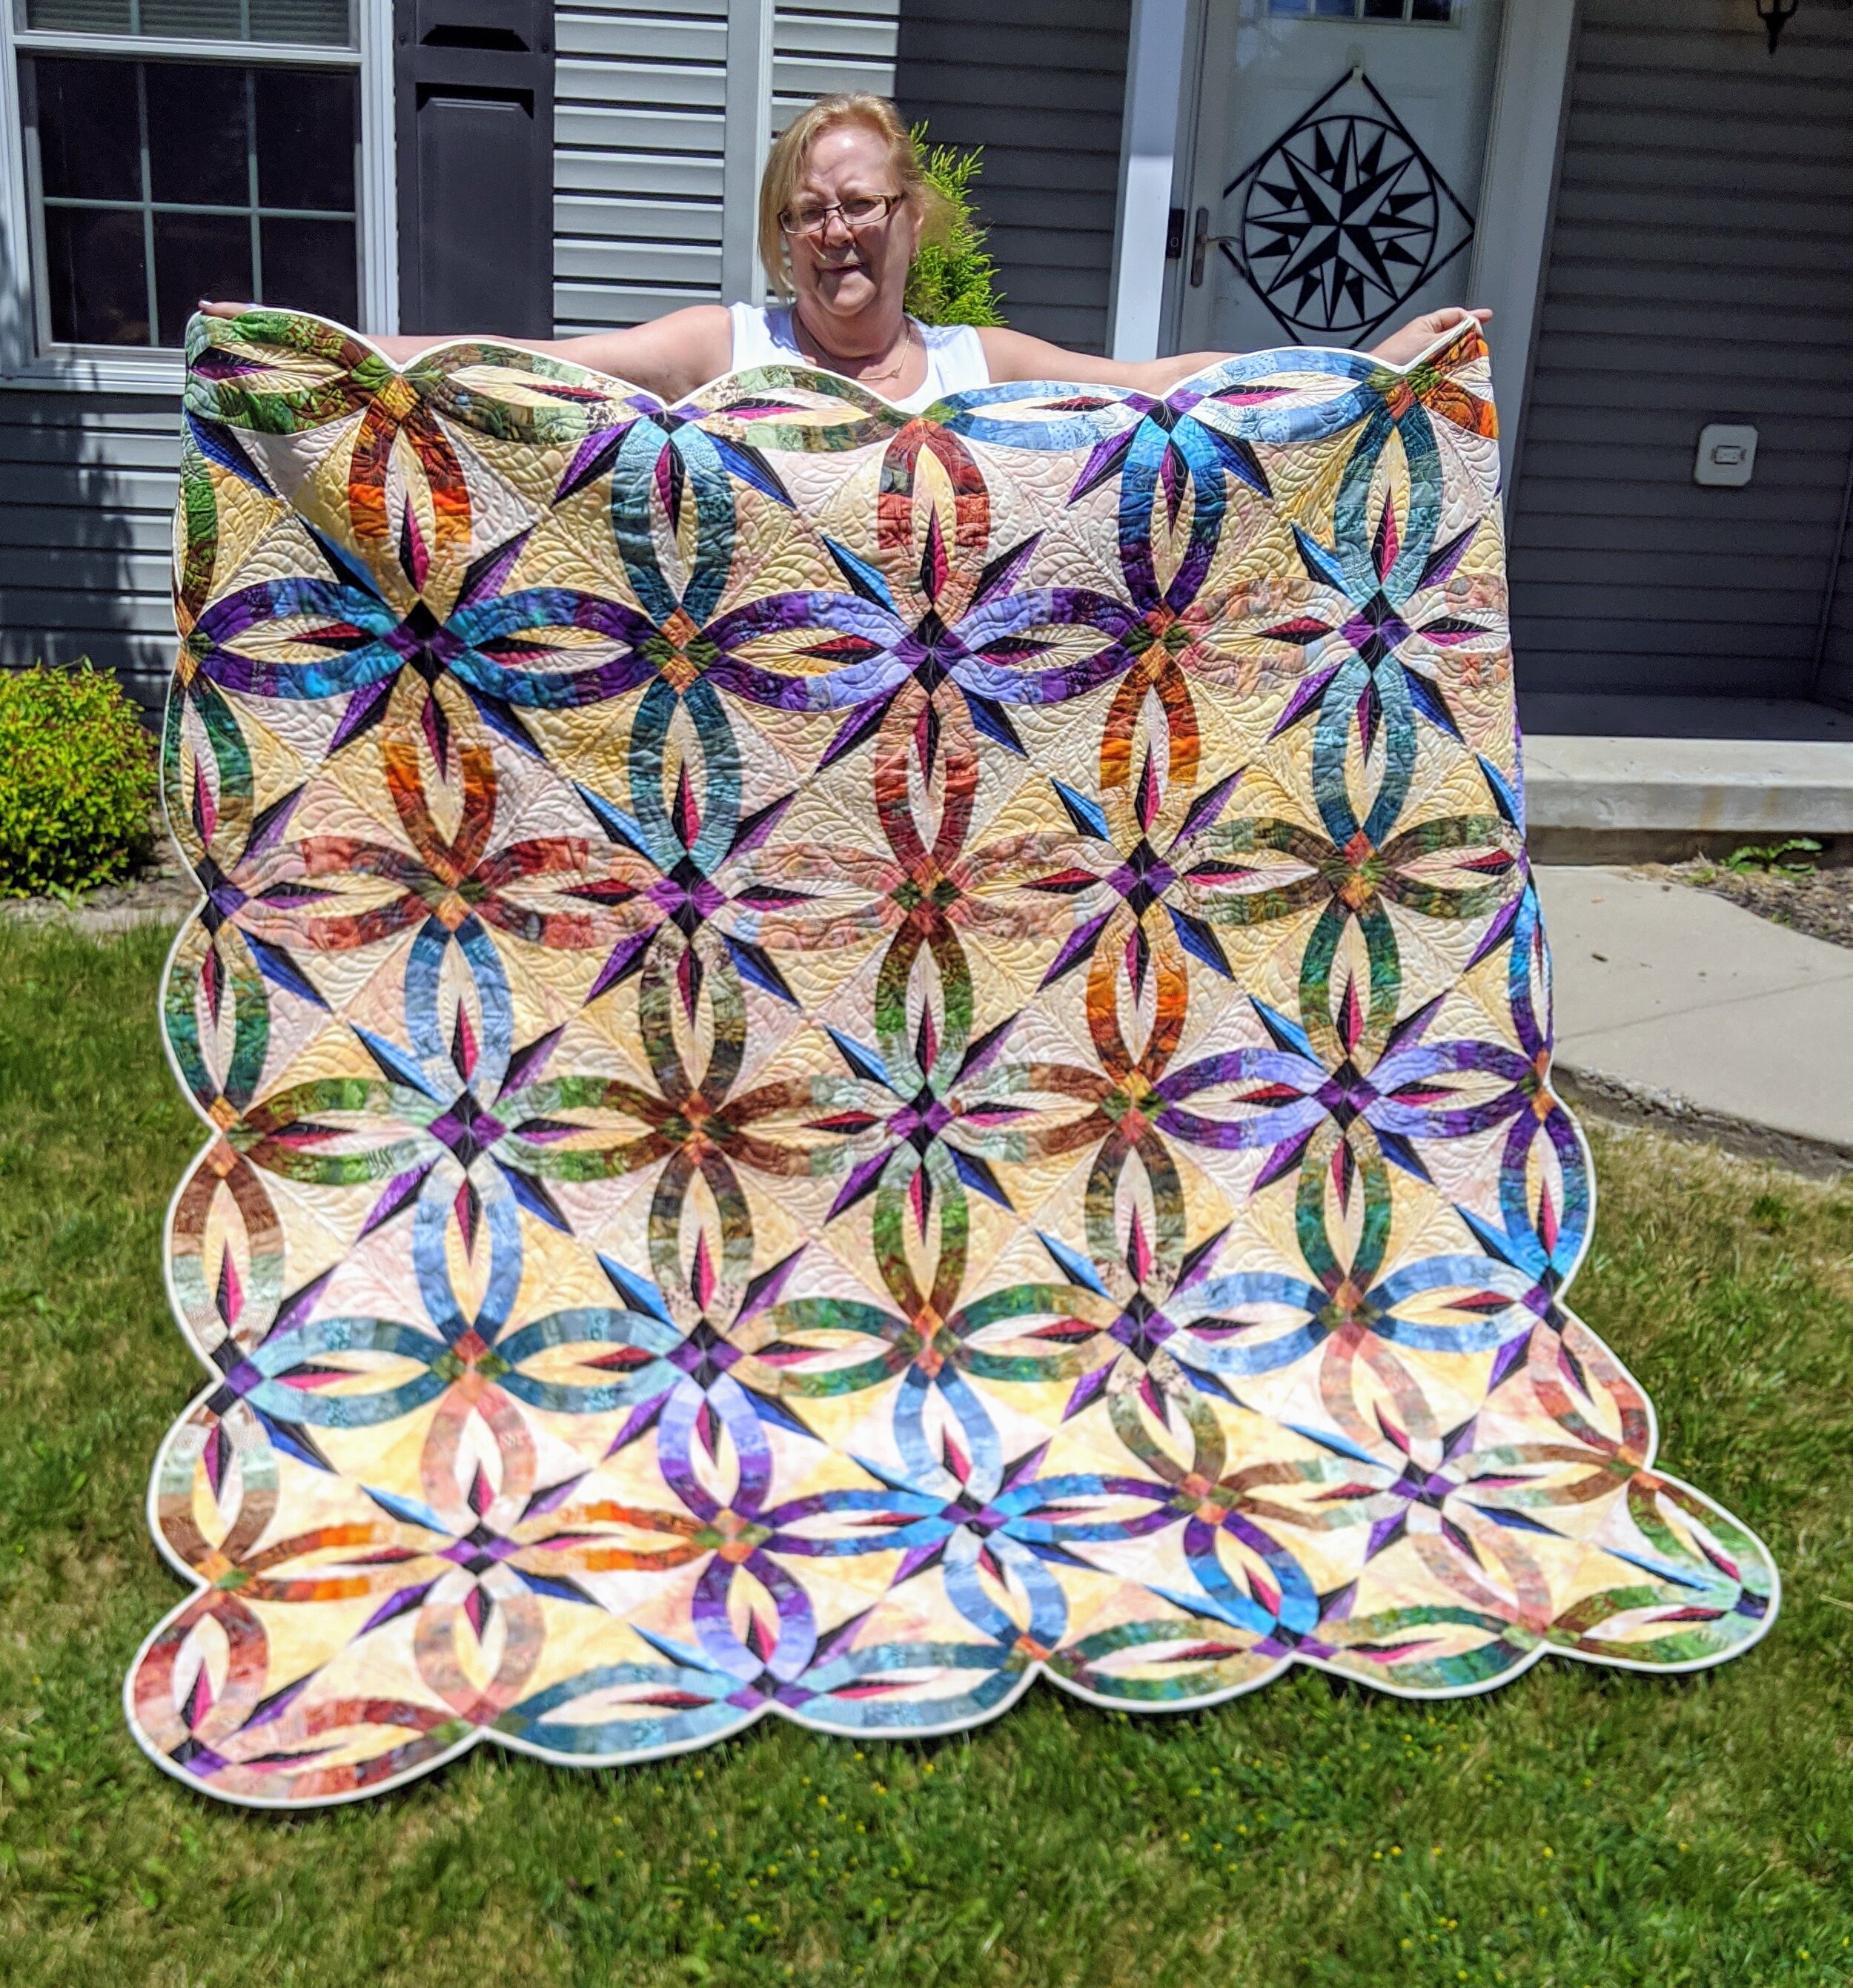
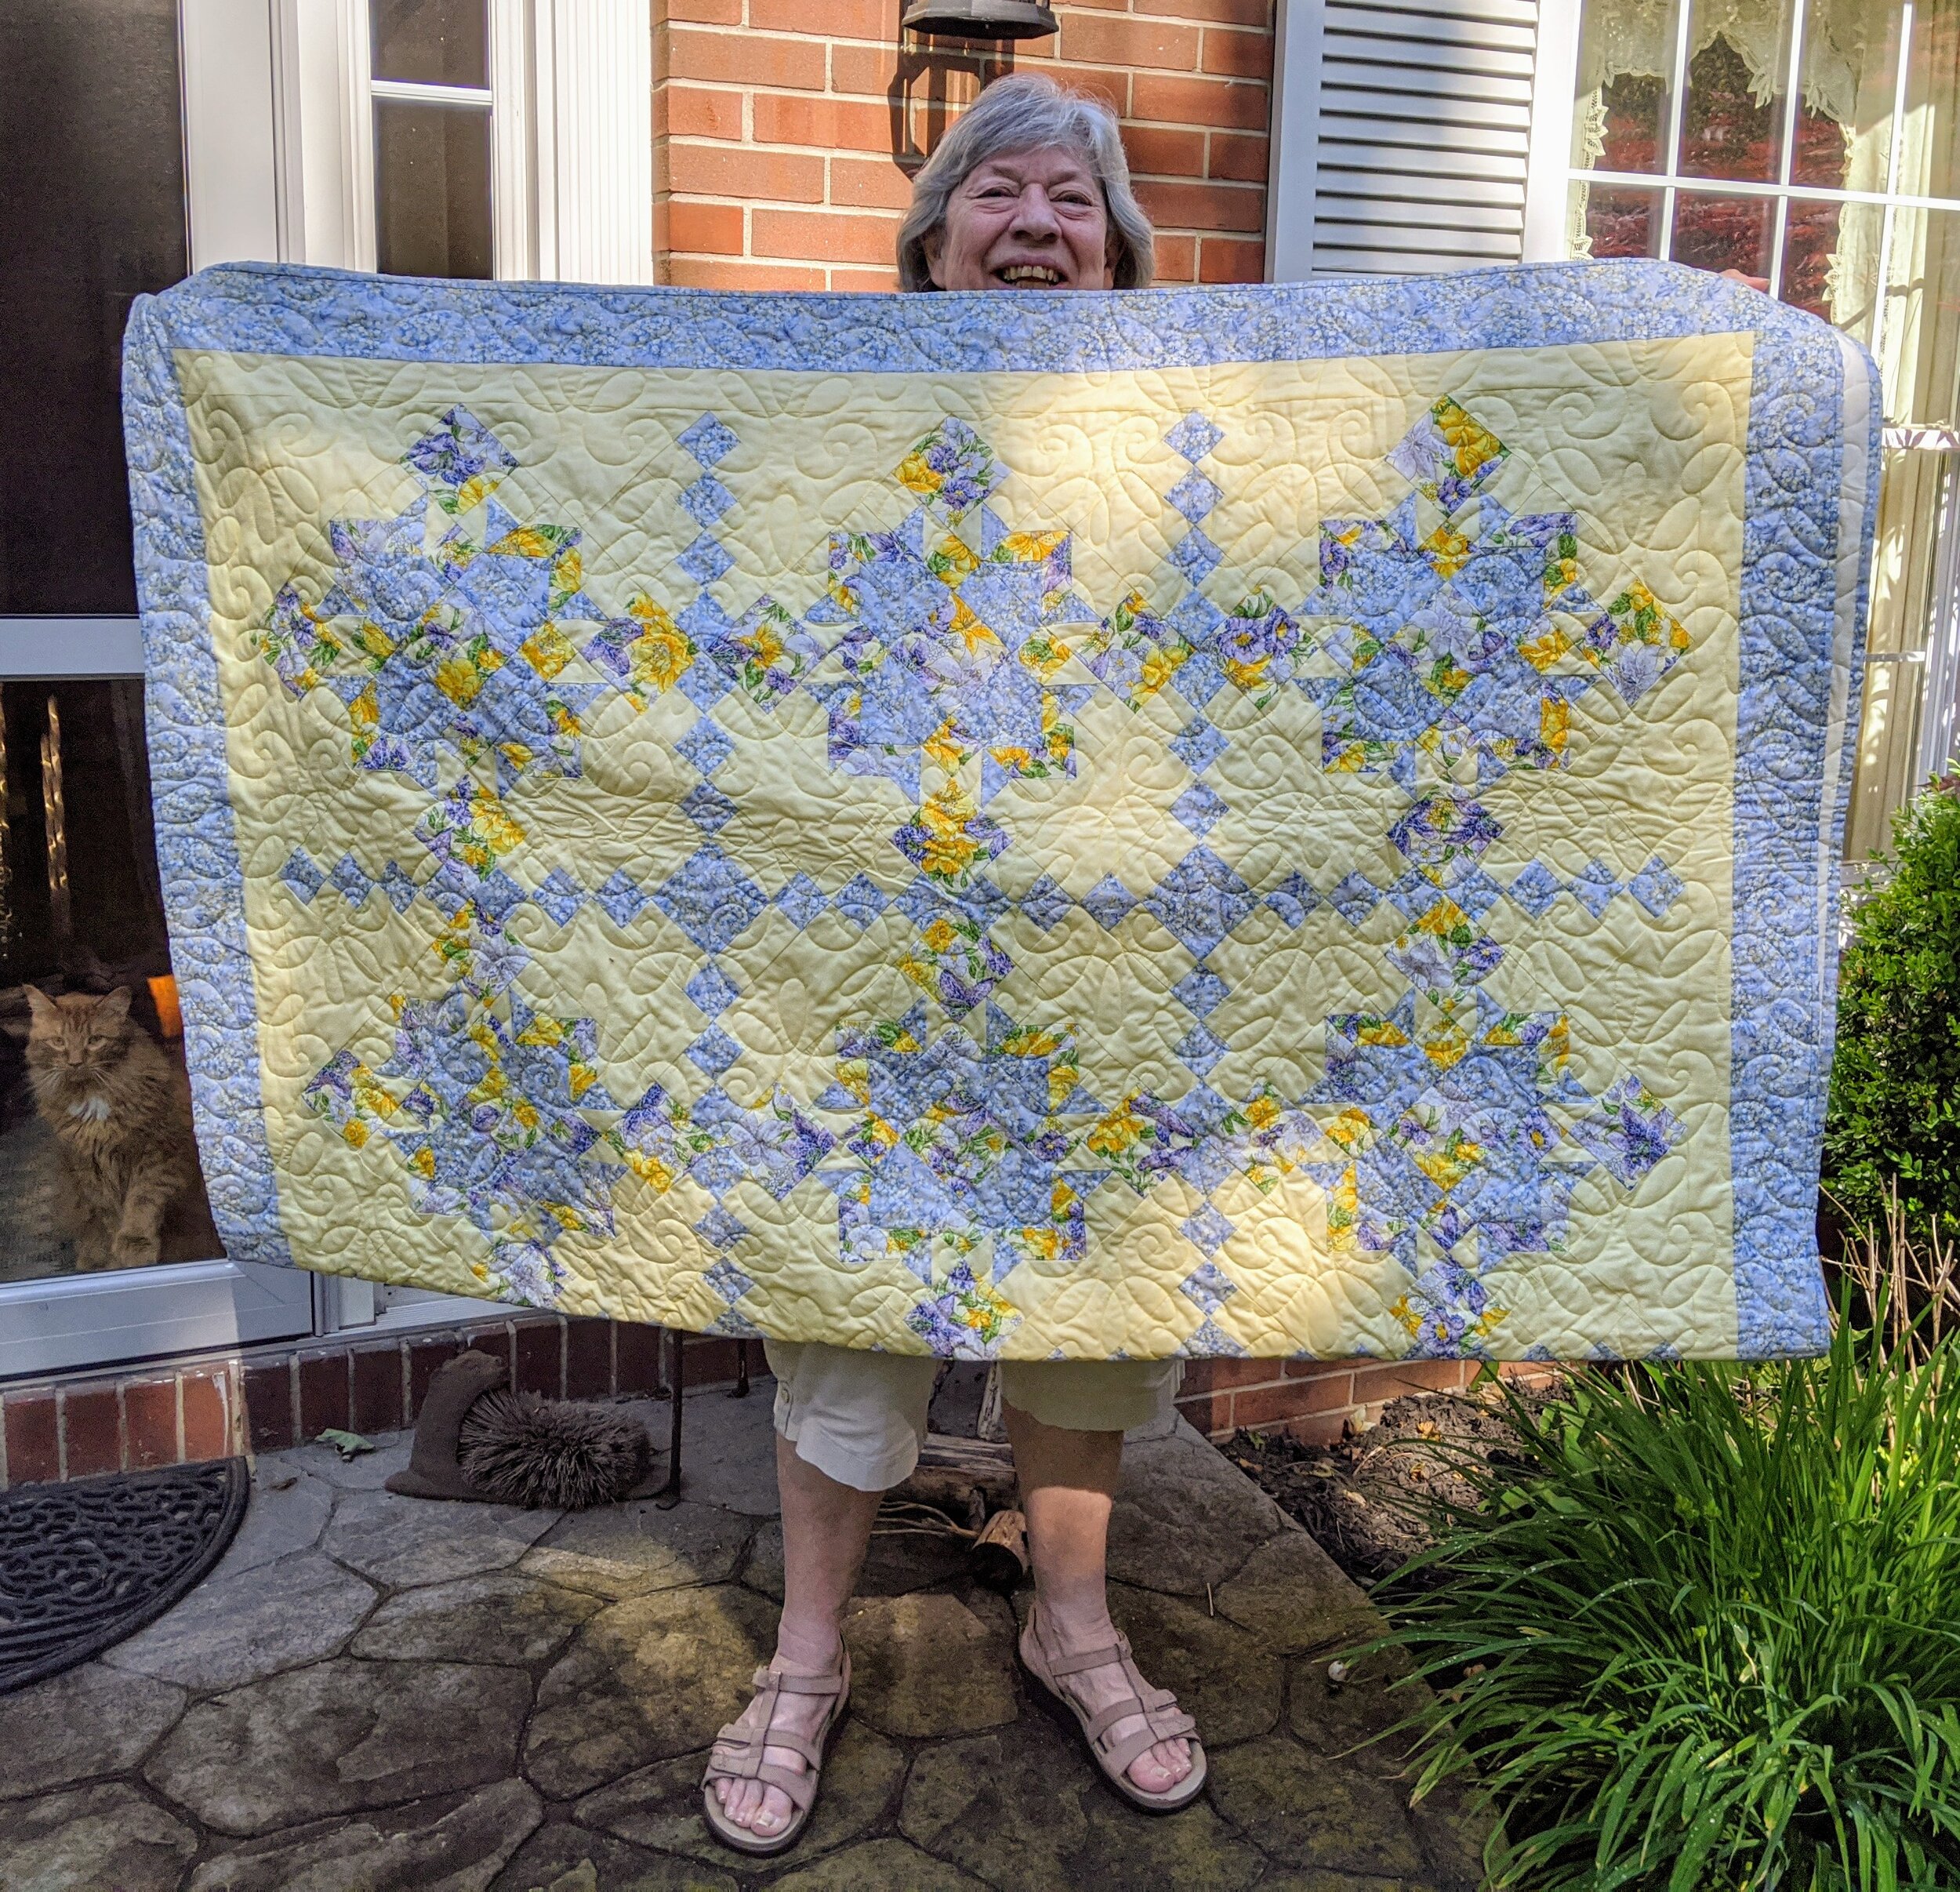
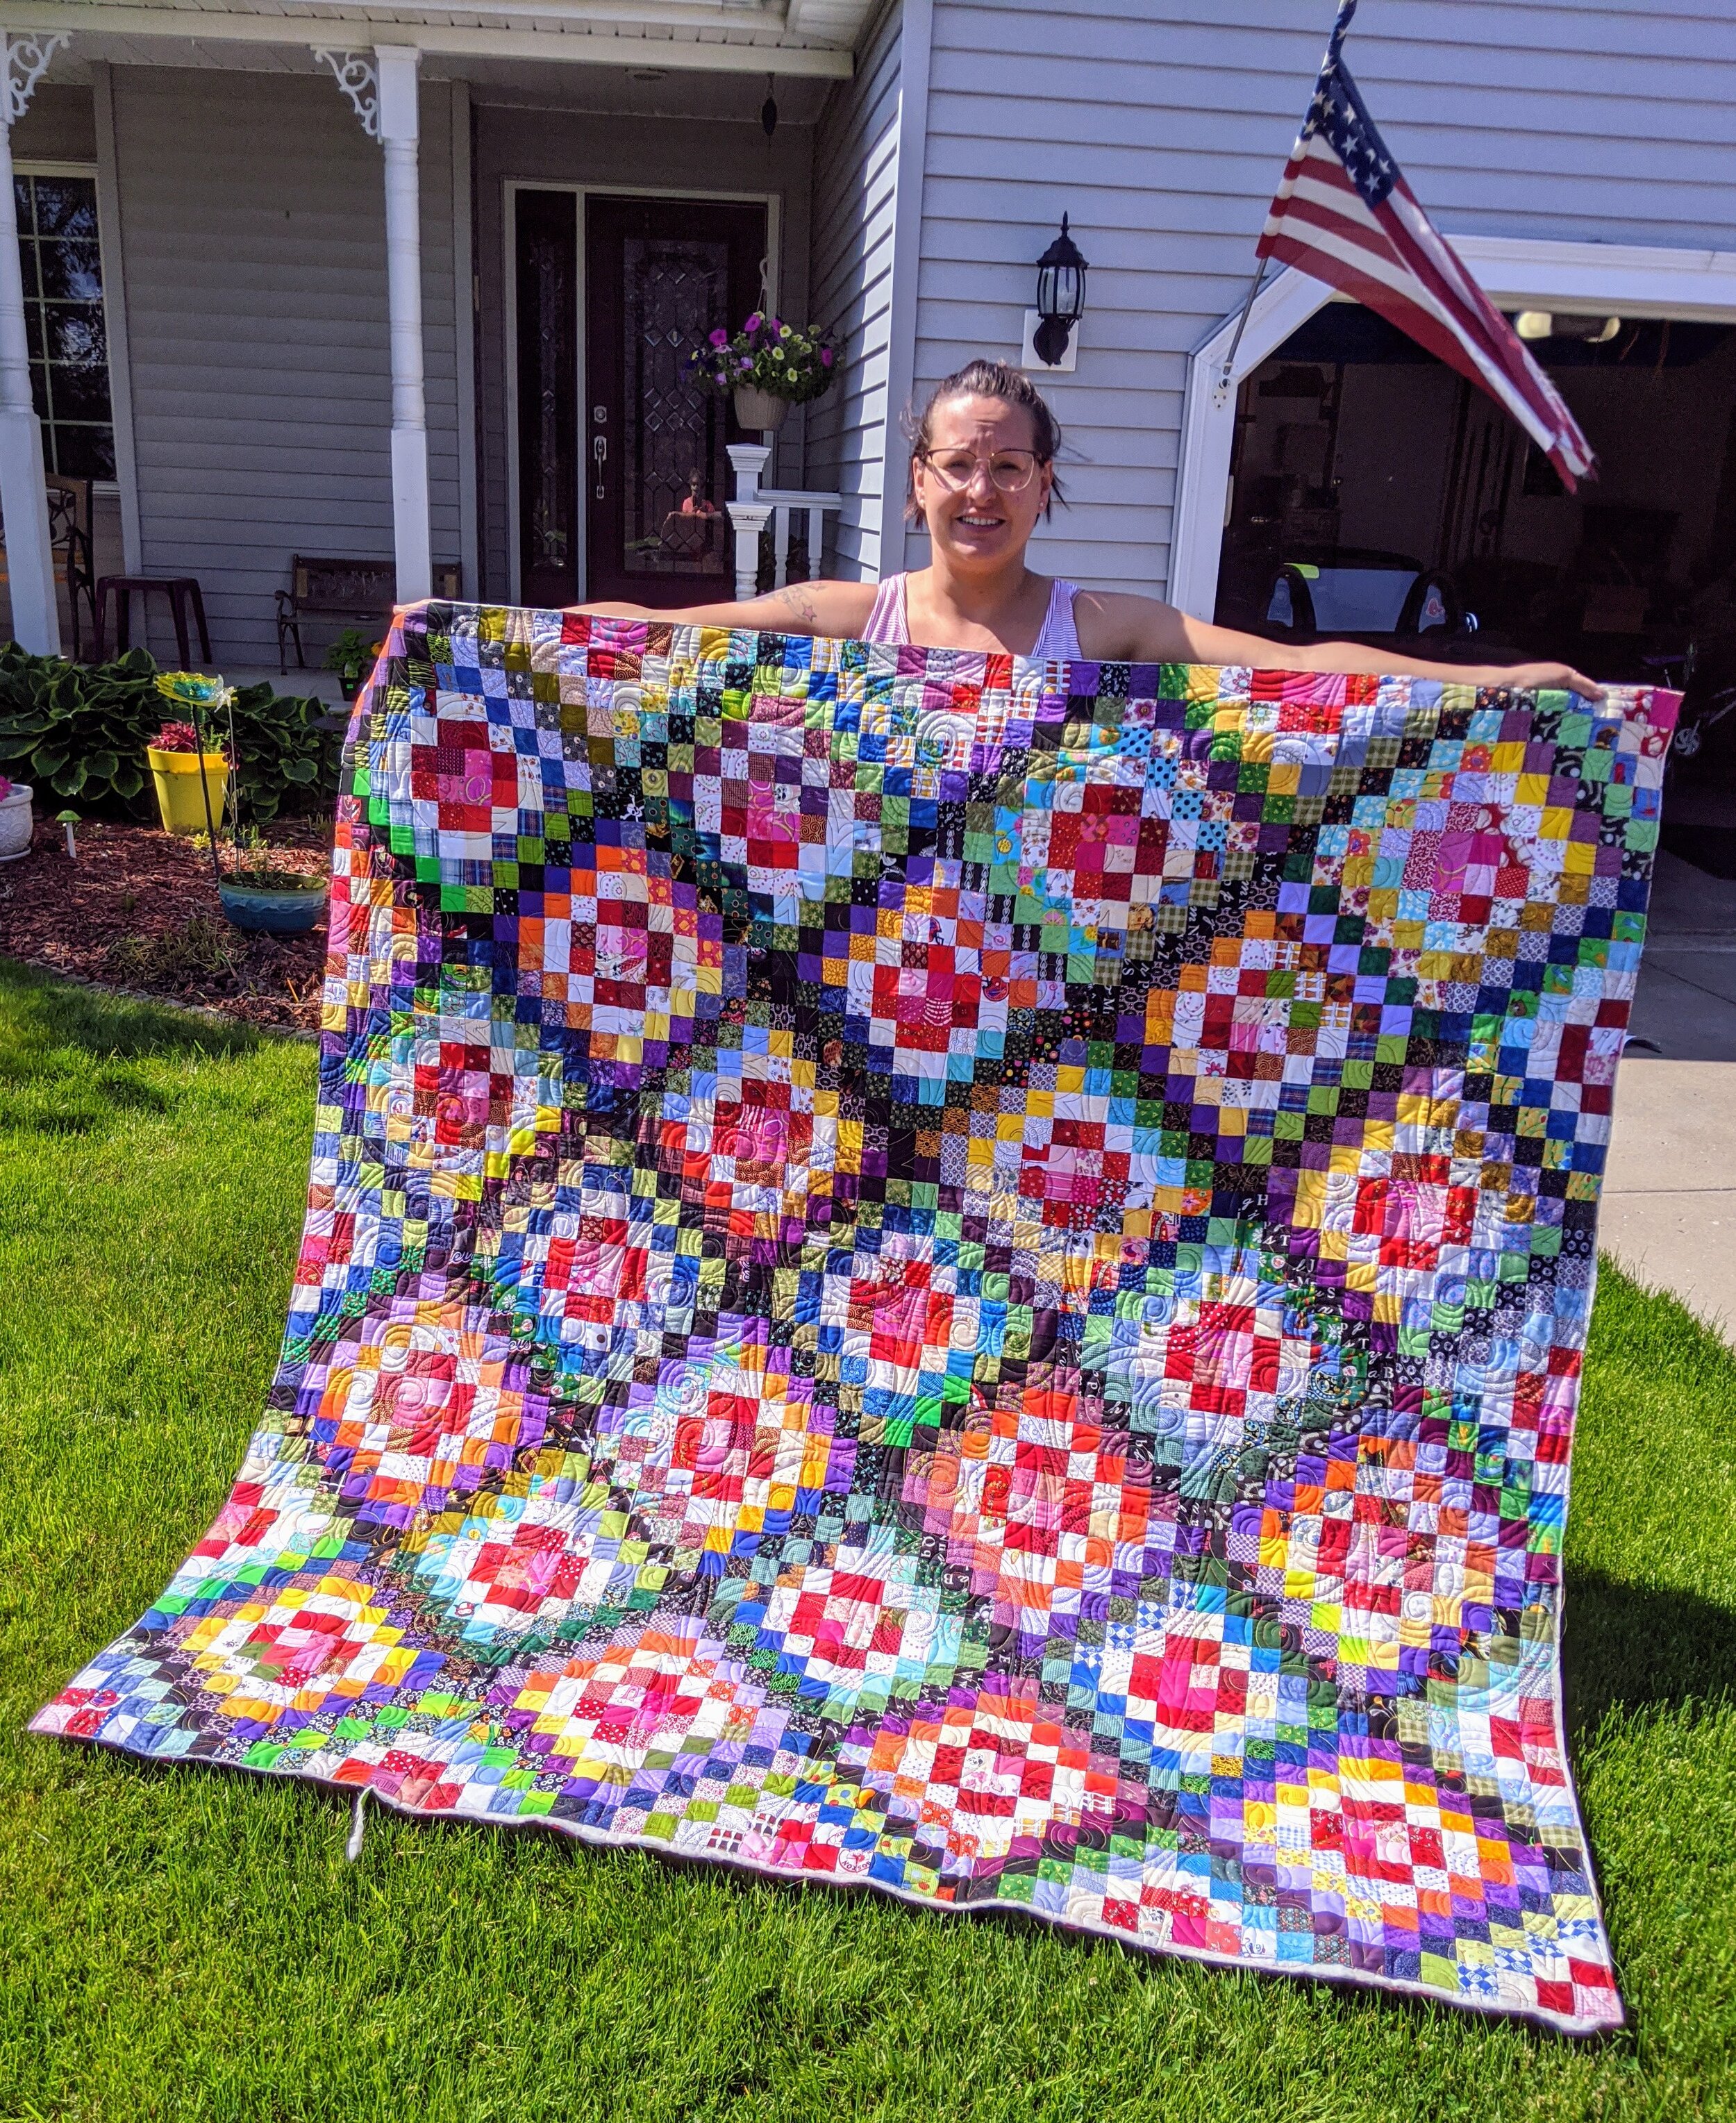
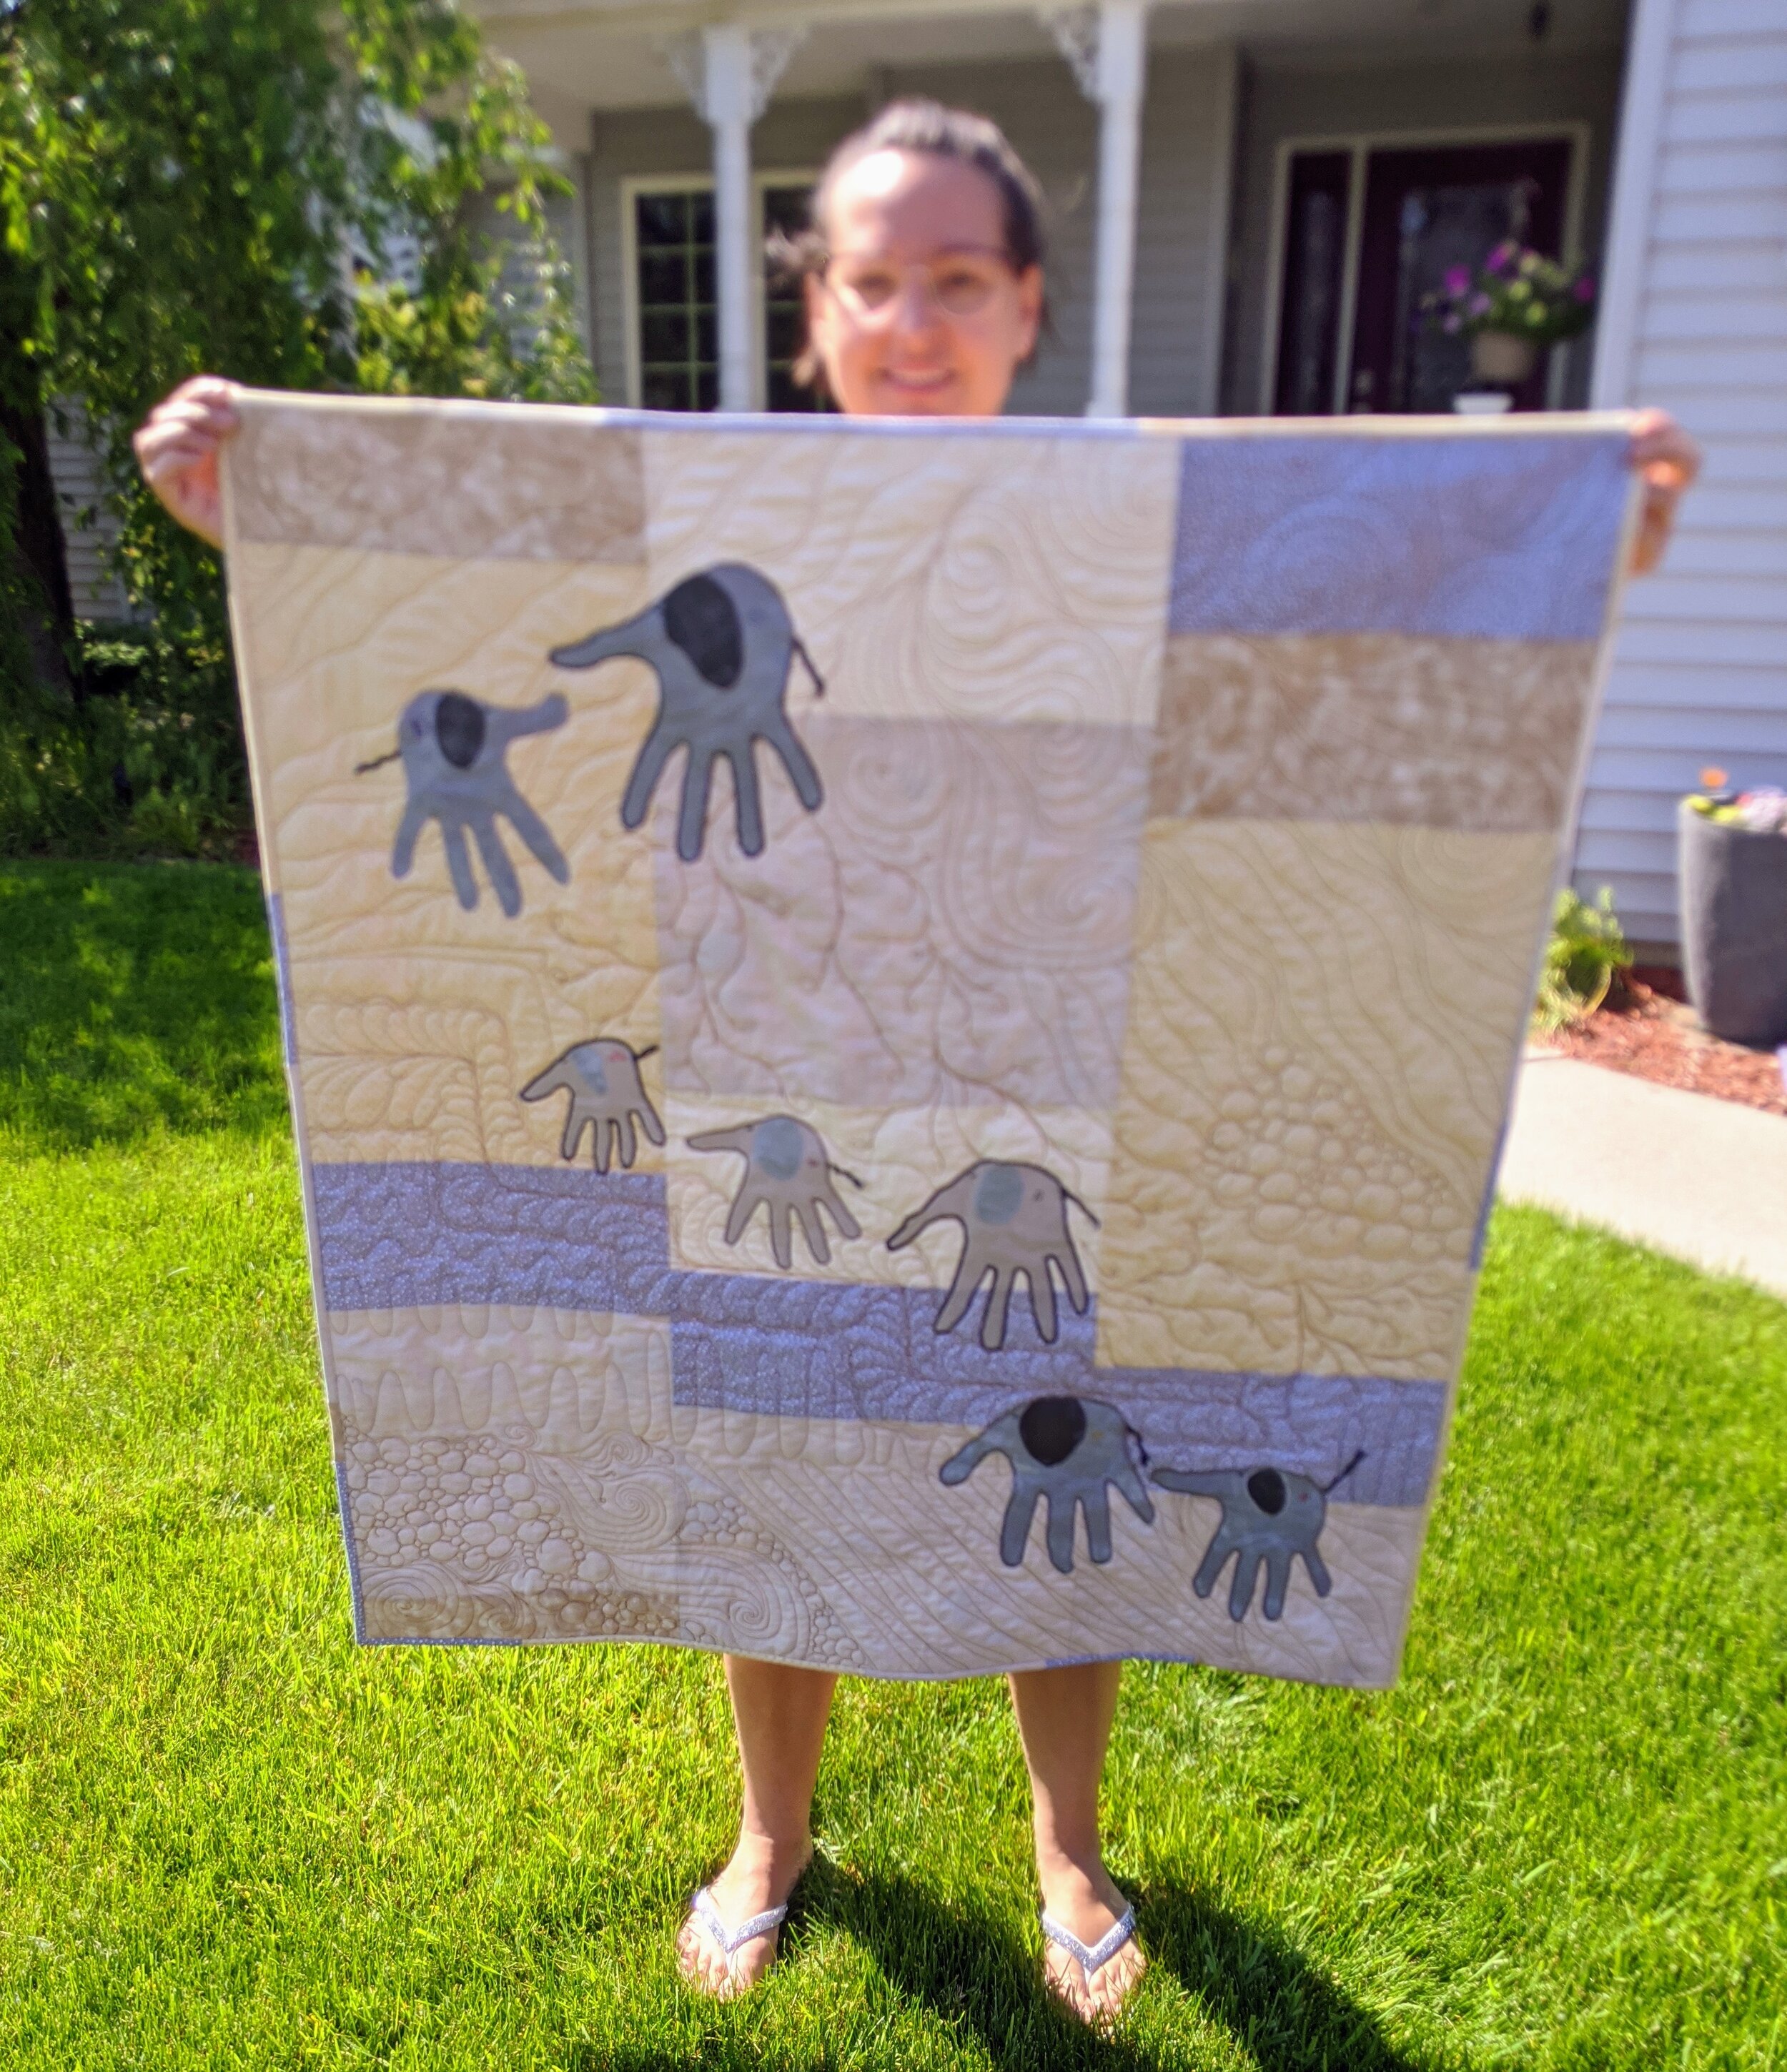
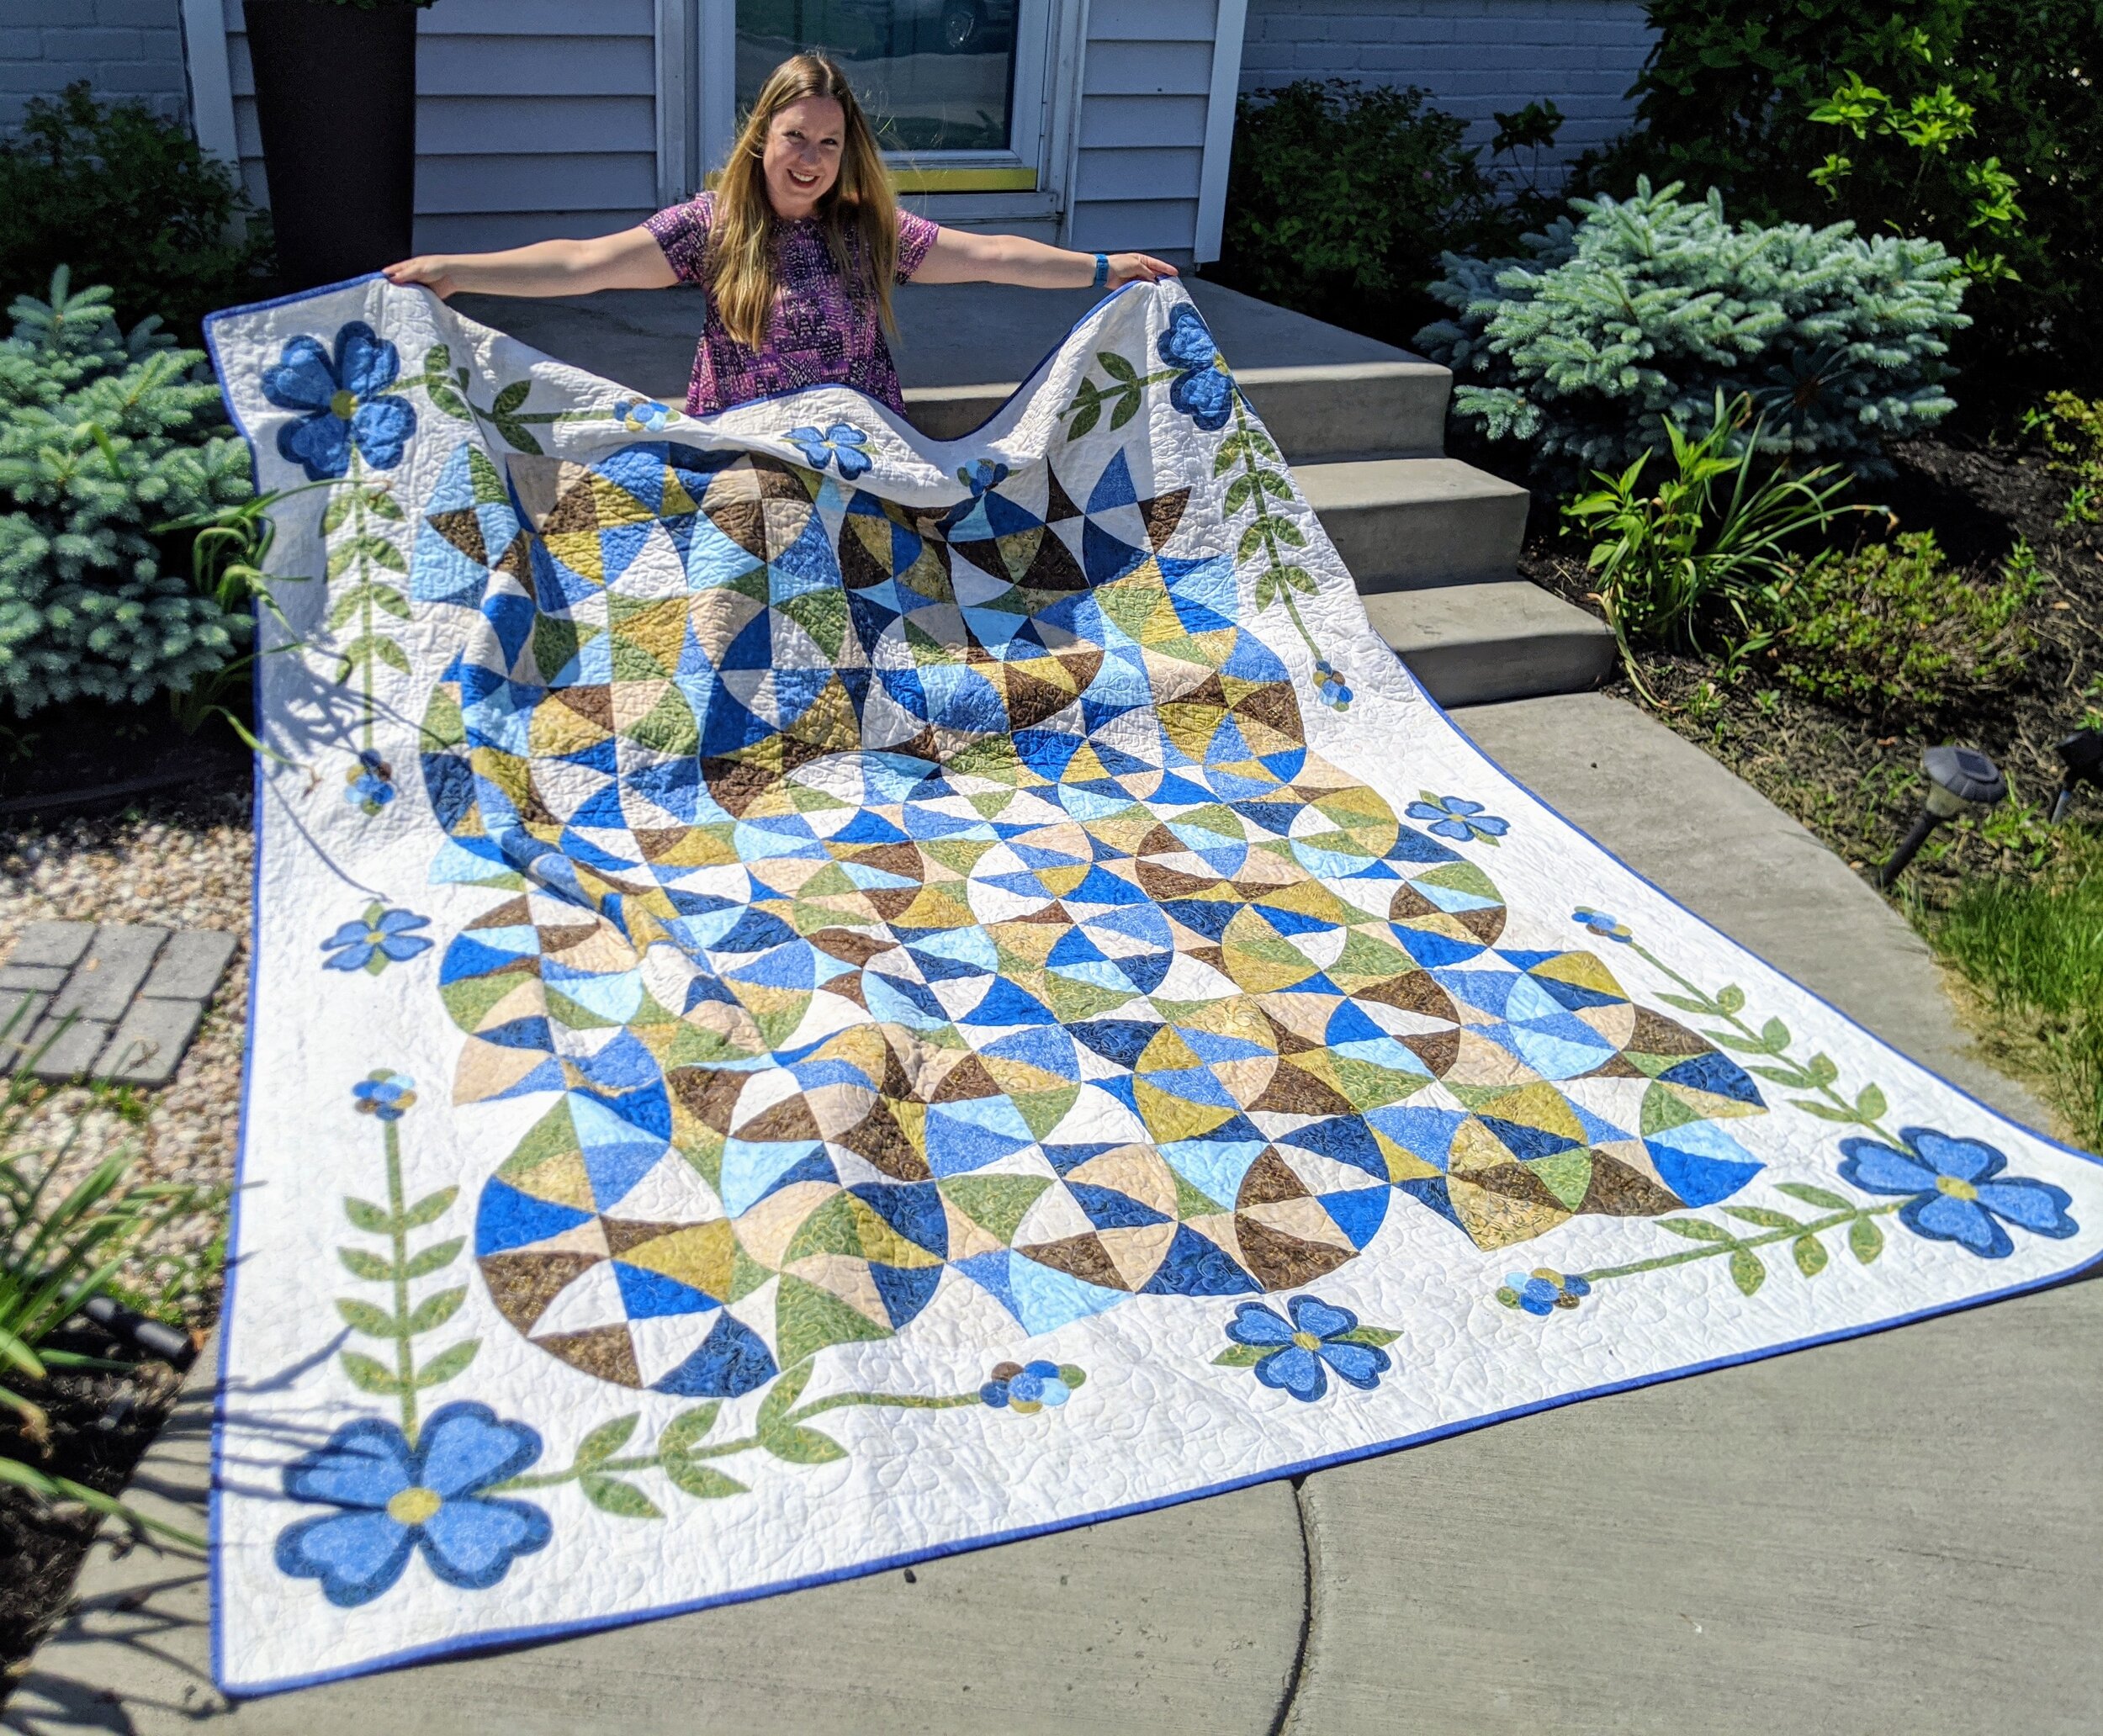
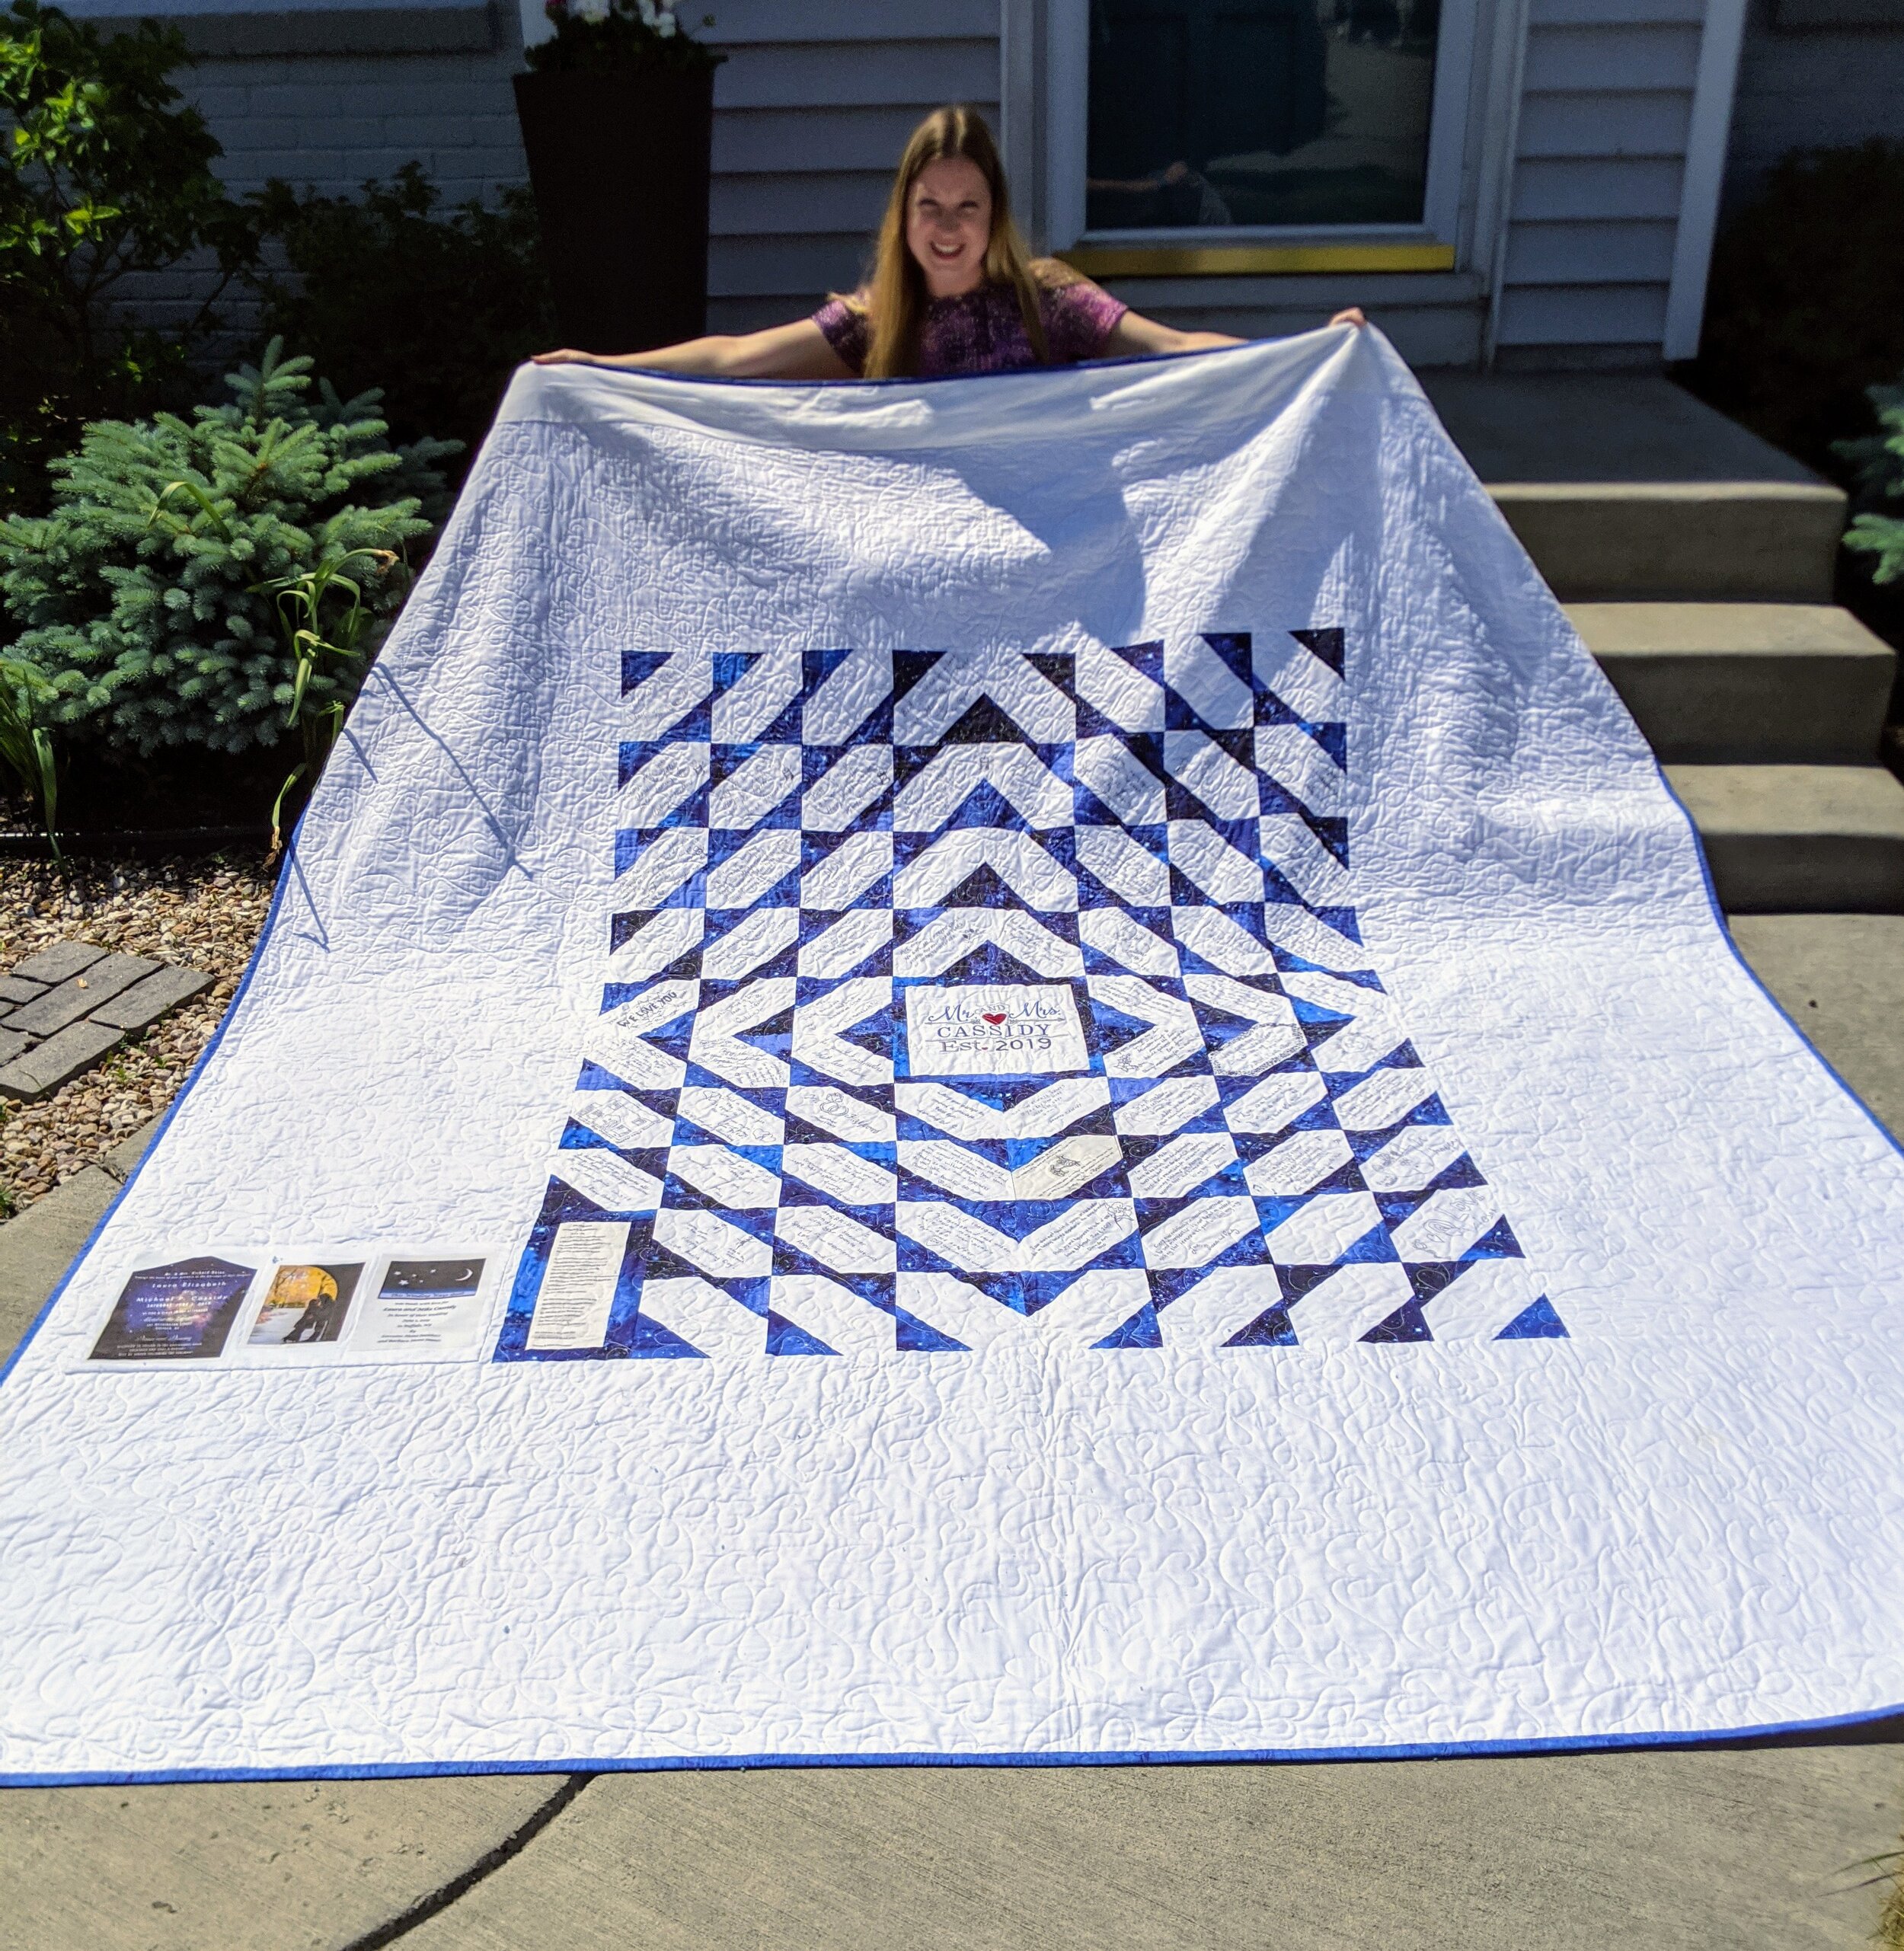
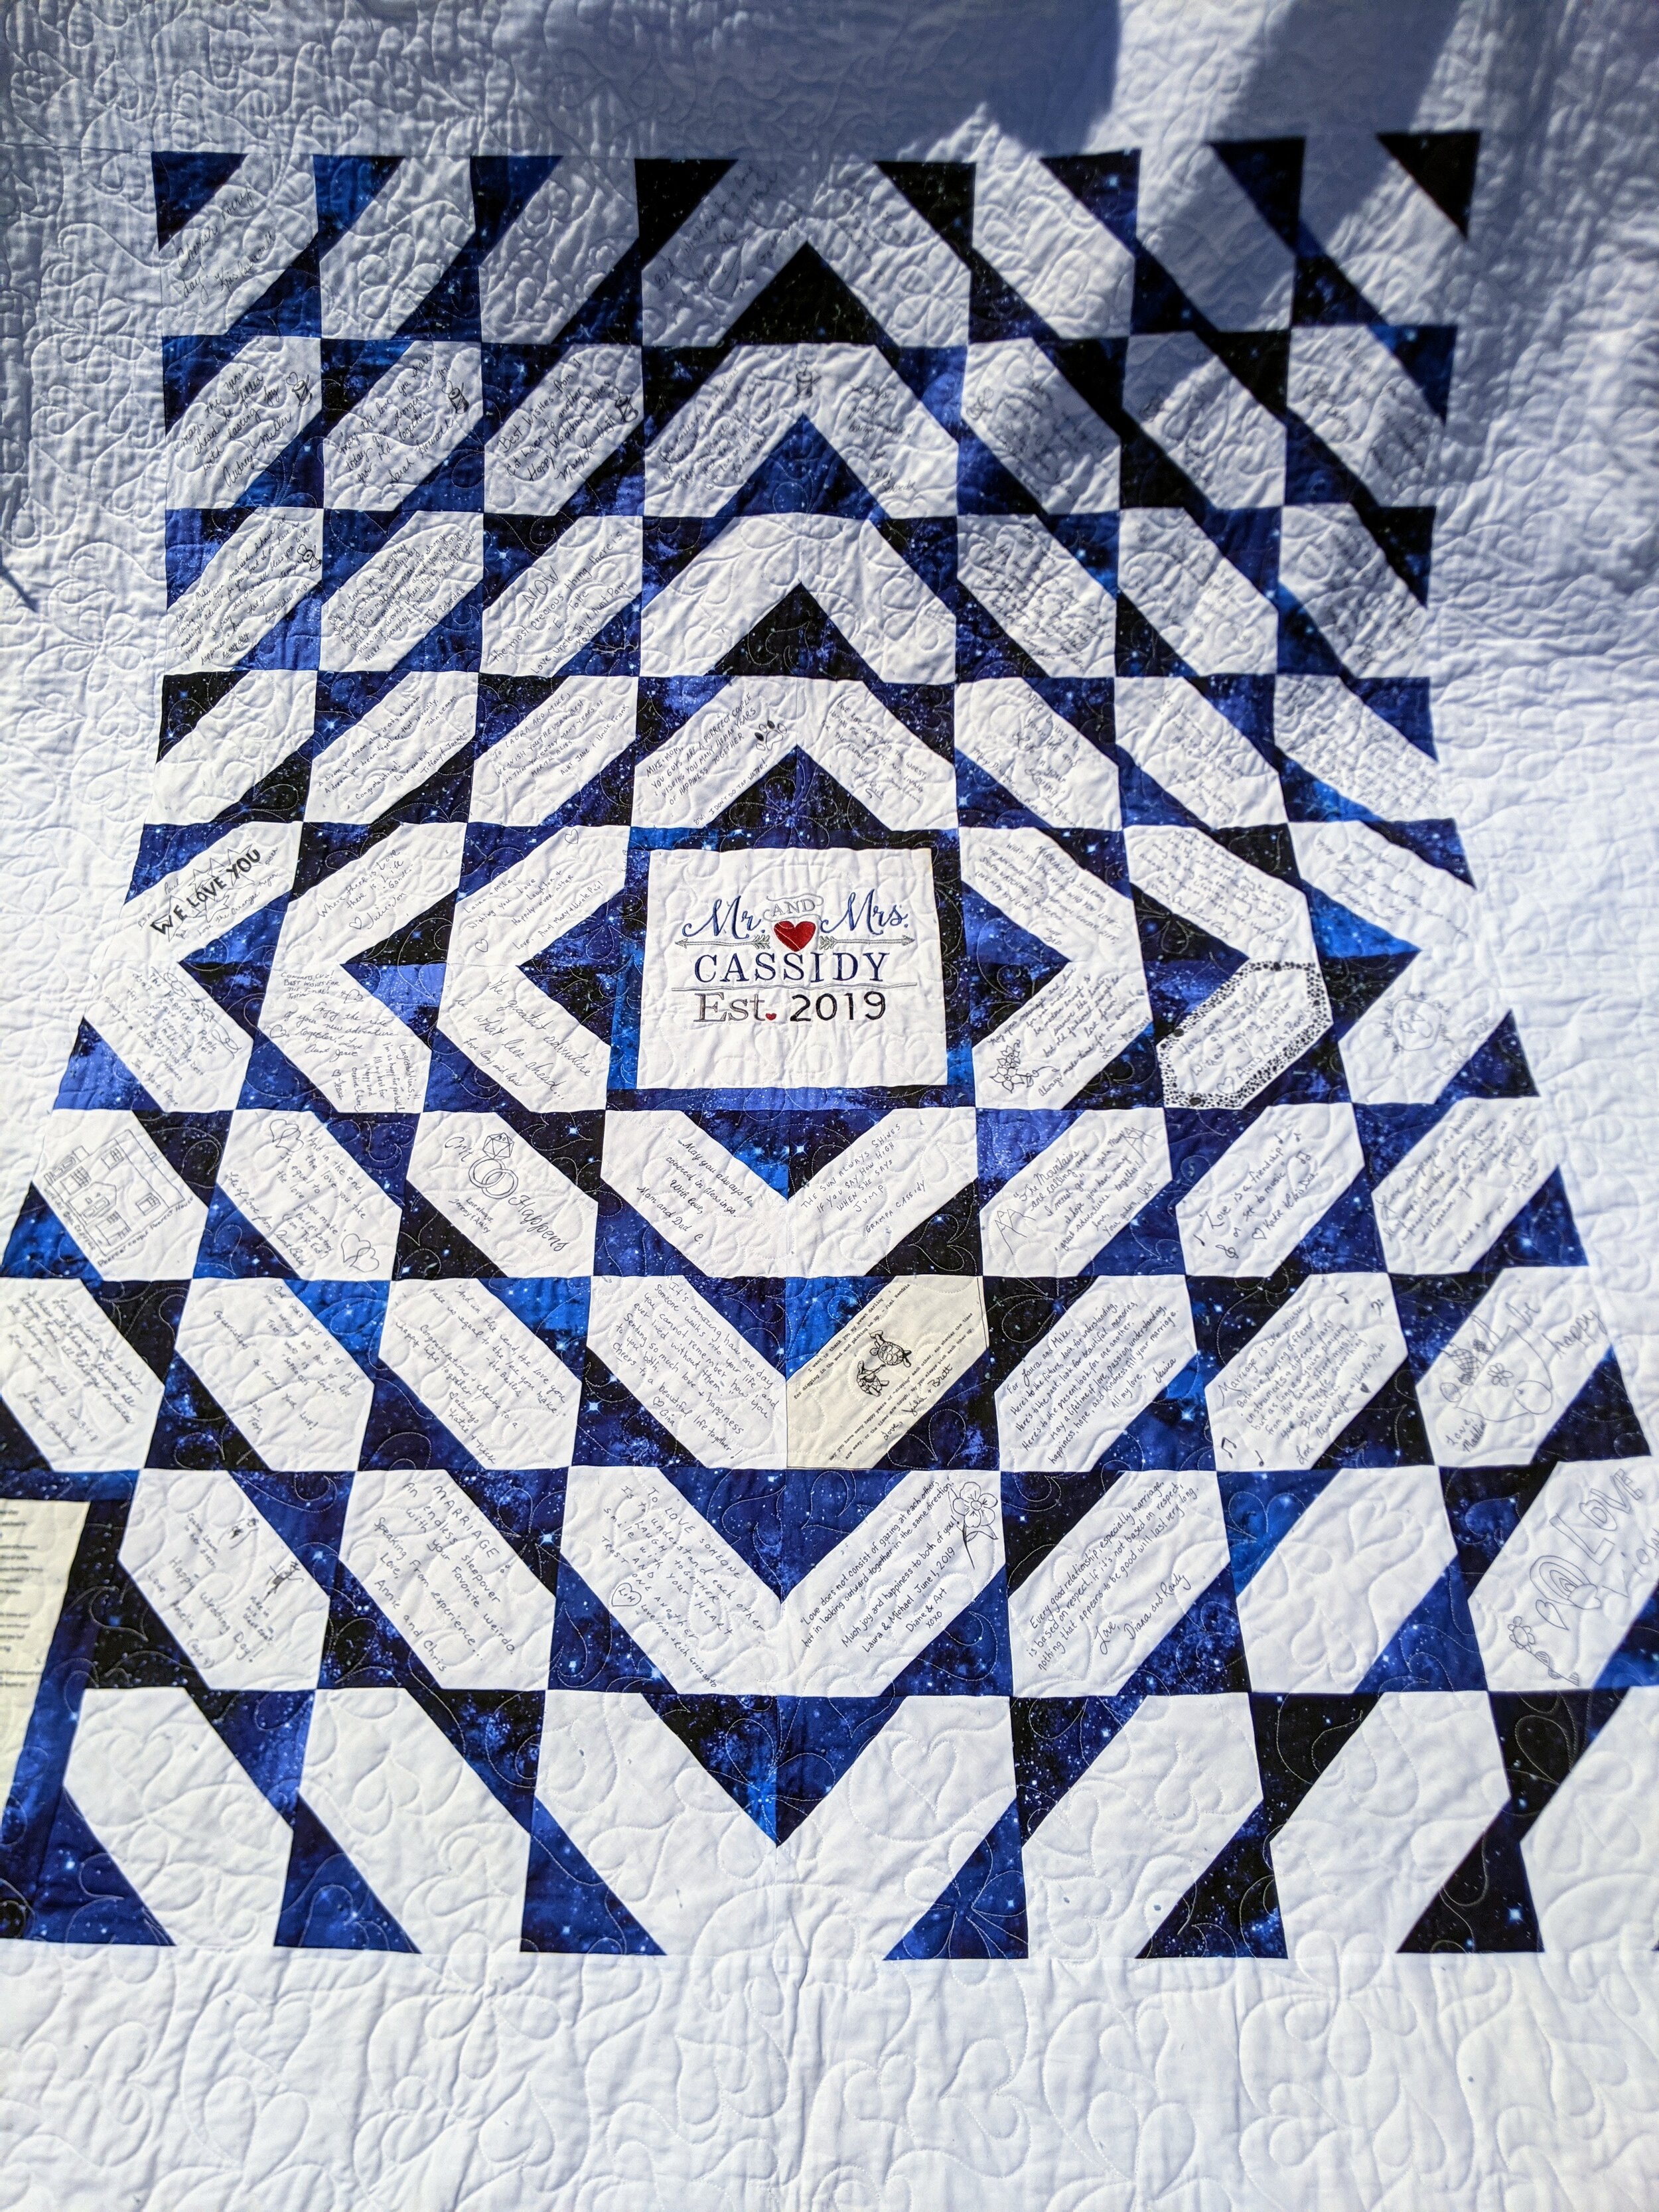
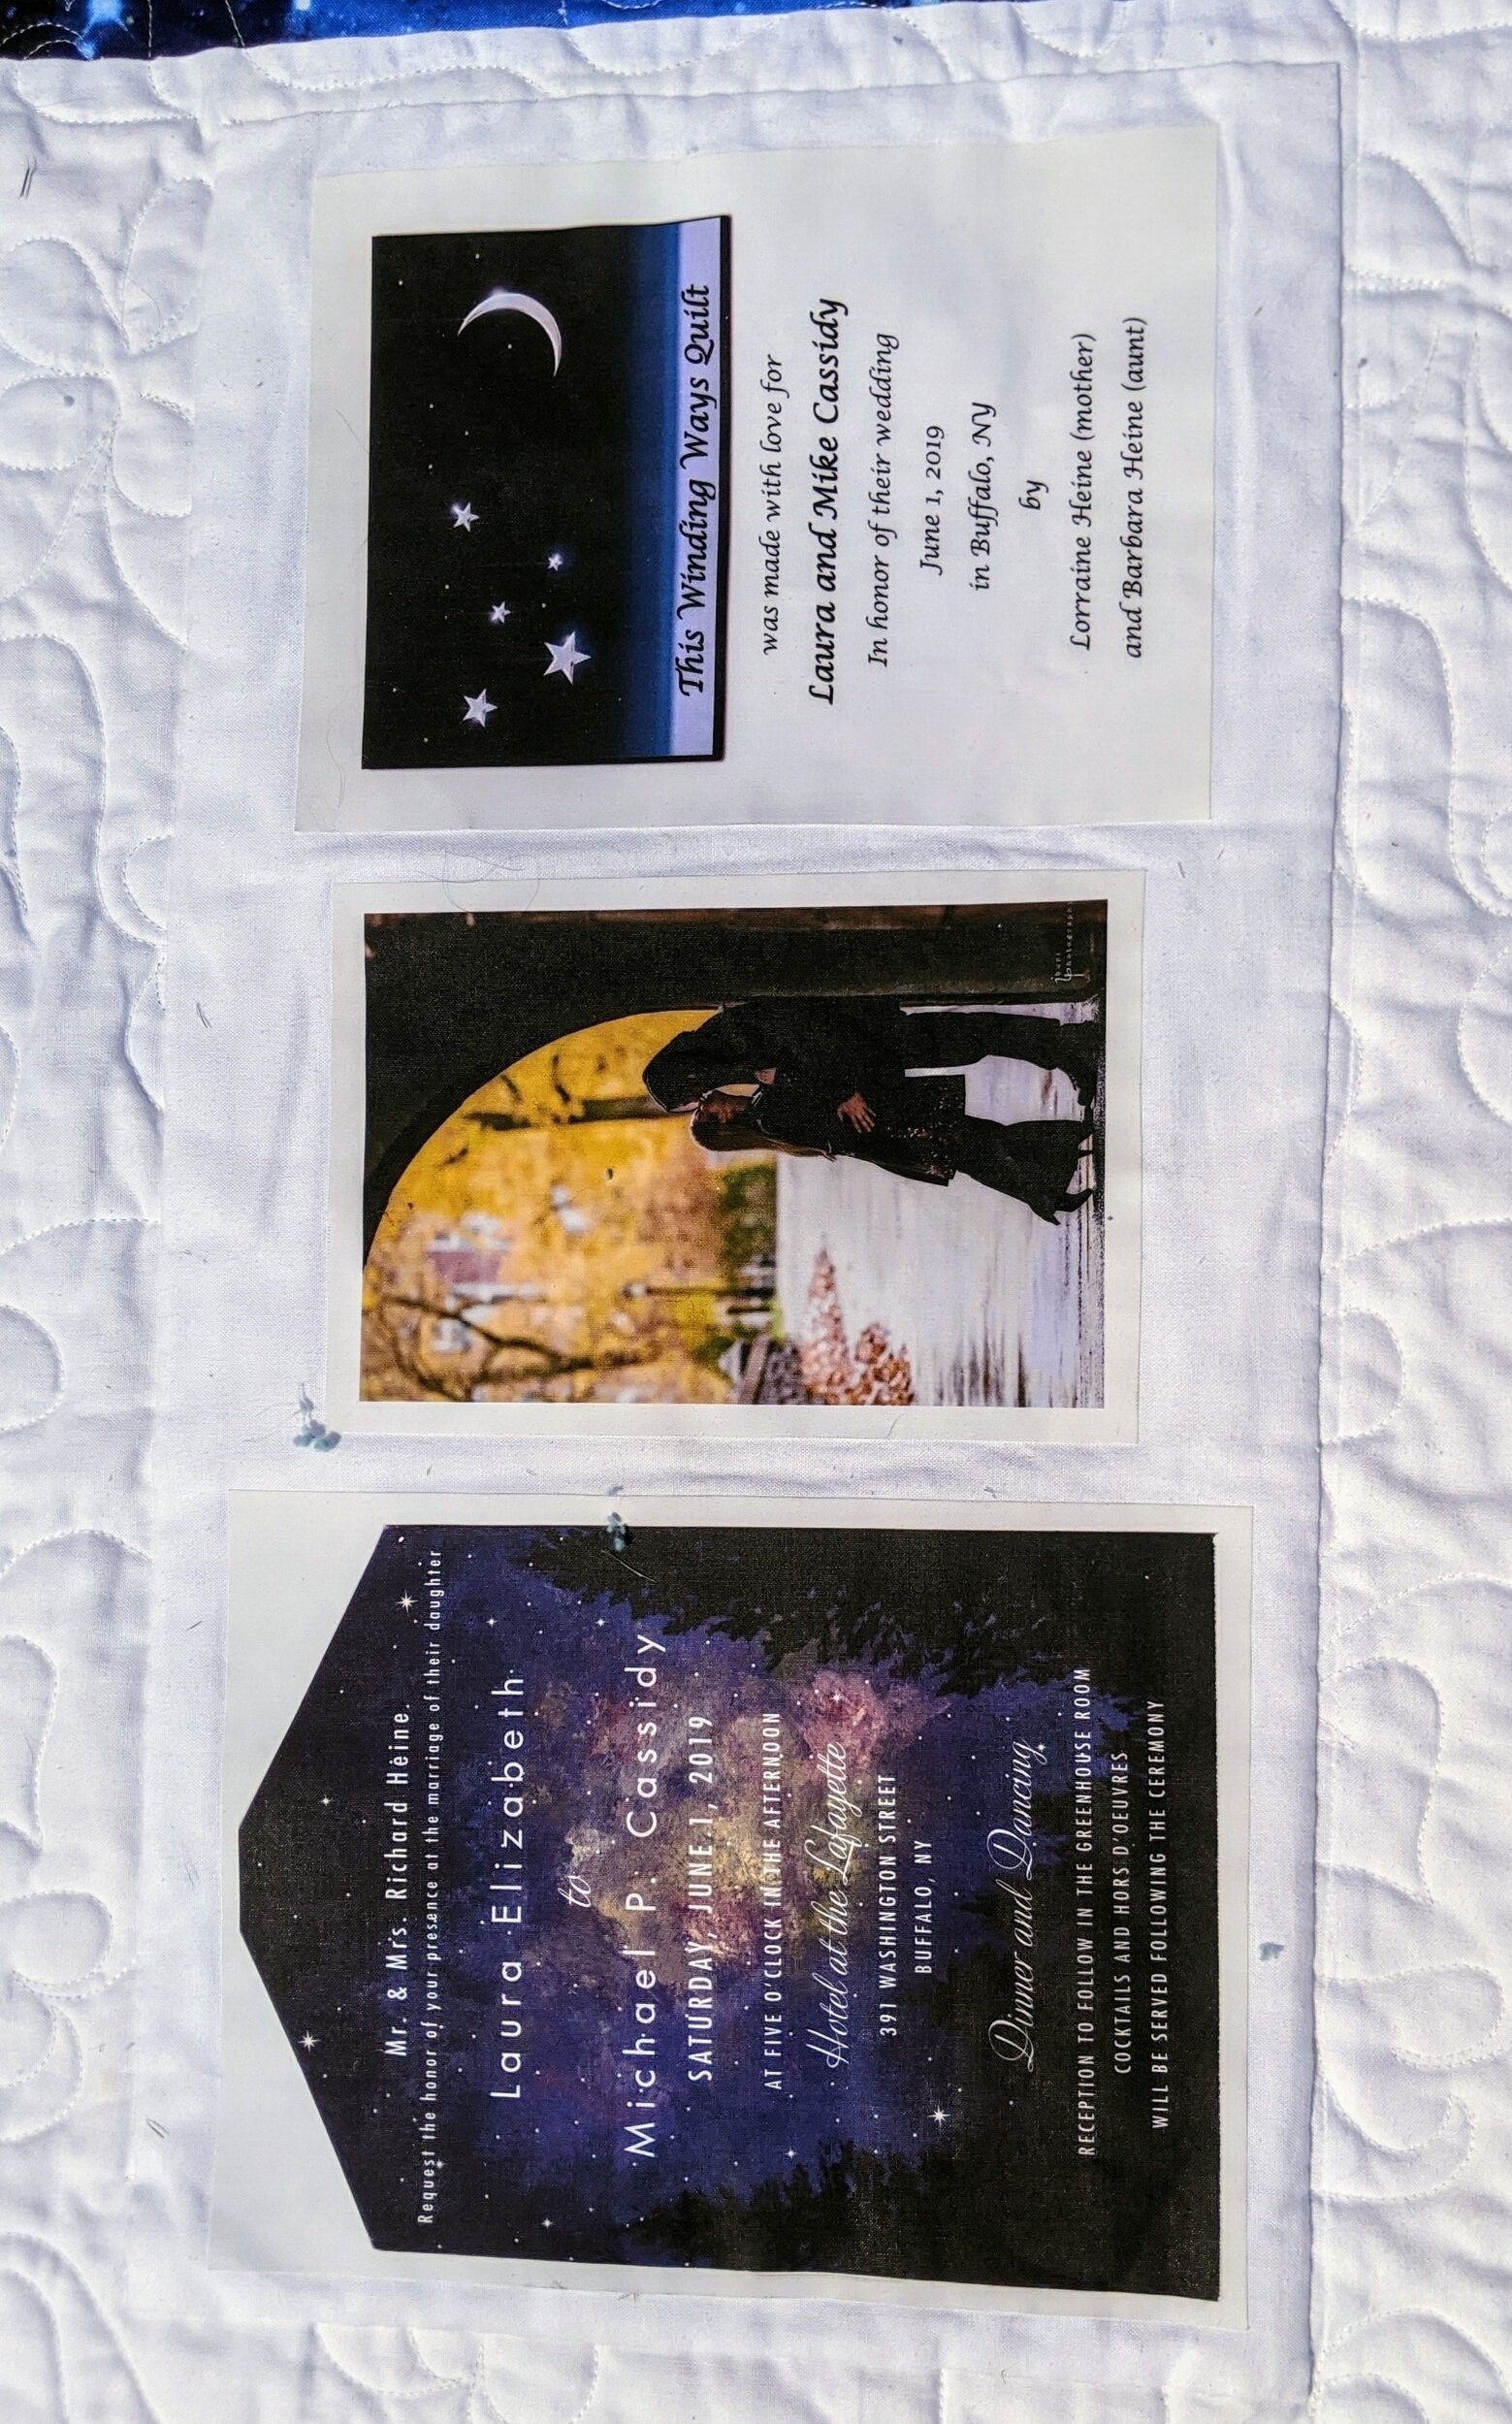
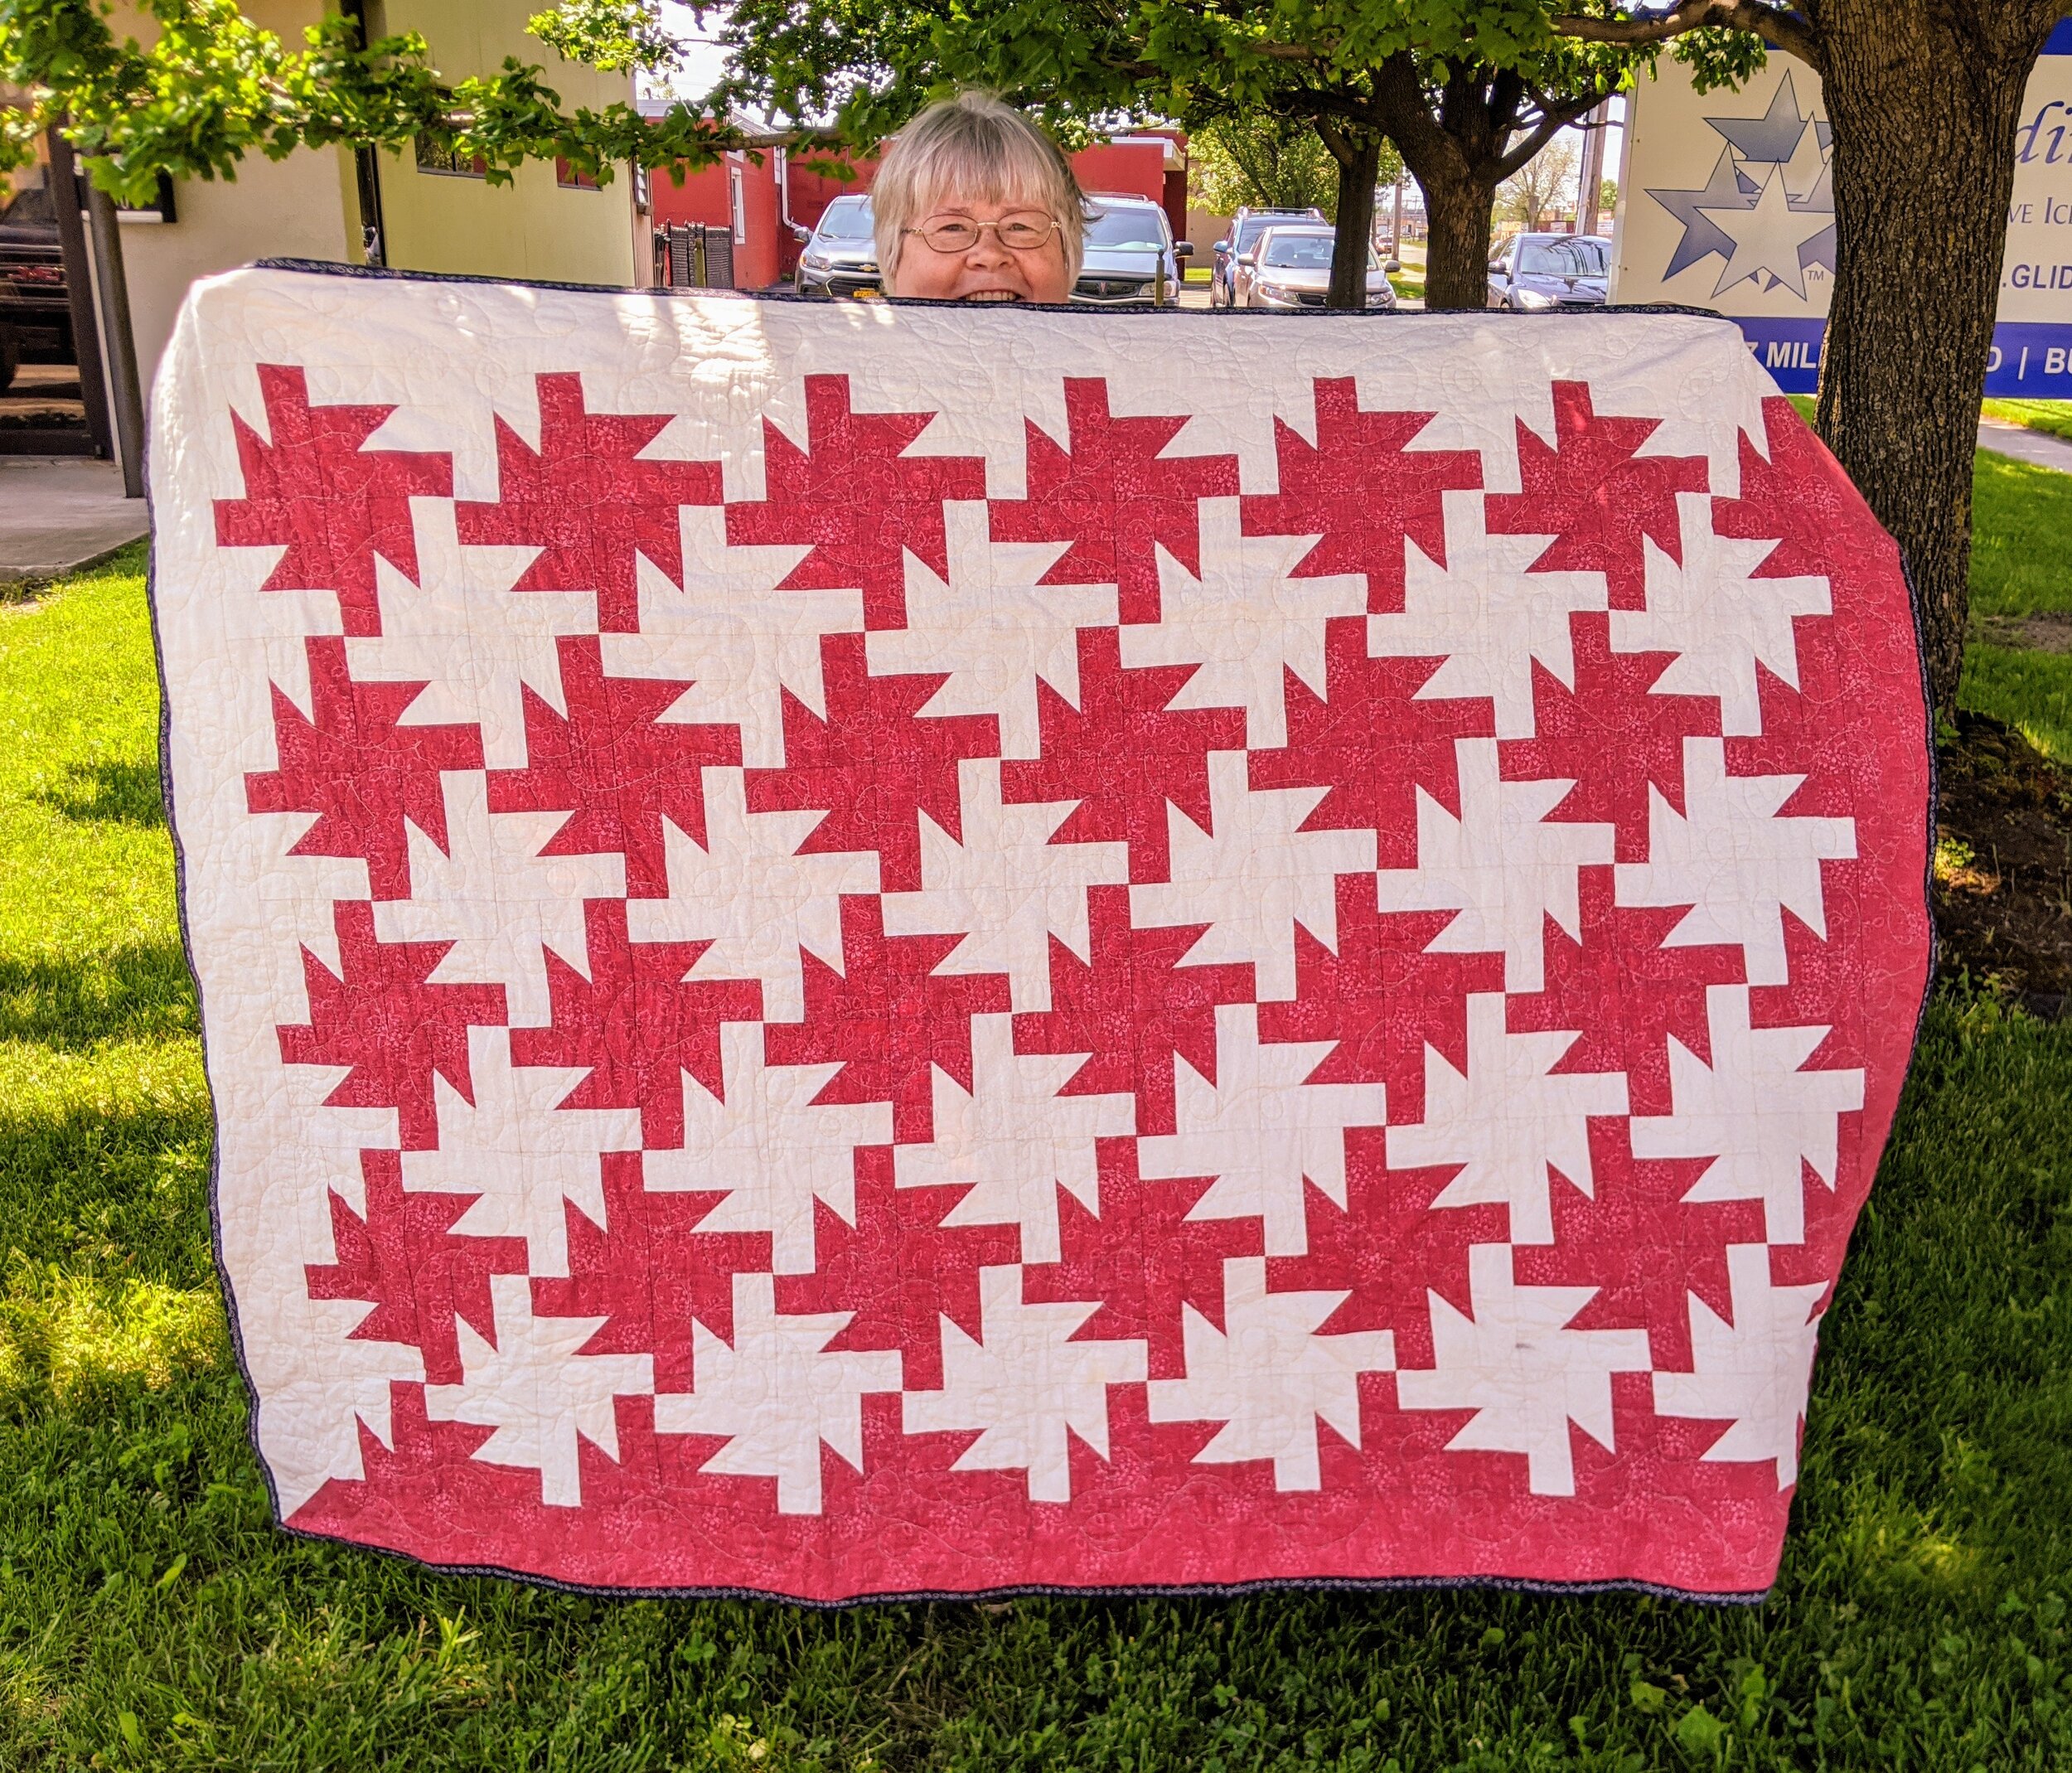
Photo Captions Starting Top Left:

  • Lorraine in front of her log home: Grandmother's Garden wall hanging subtitle "Wishful Thinking" hint, hint Laura Cassidy.

  • Yvonne from her balcony: Cabin In The Woods, Poked with Pins, and many, many pieced totes.

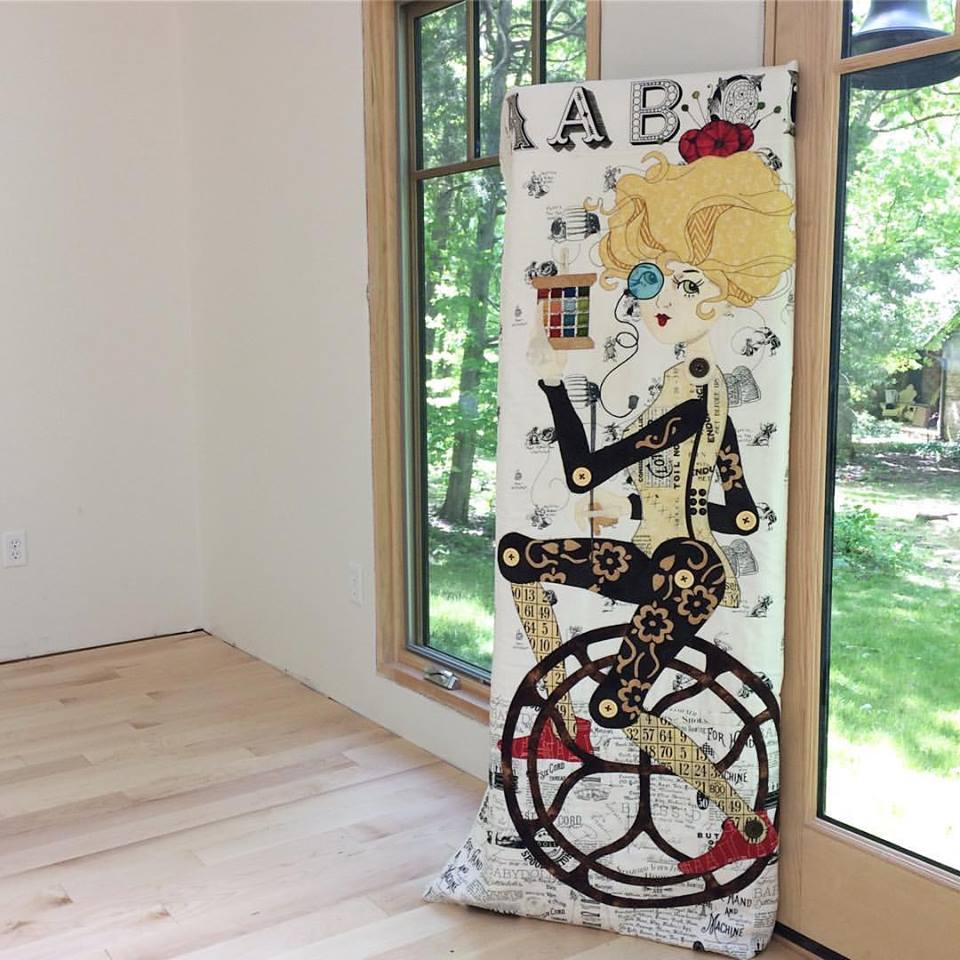
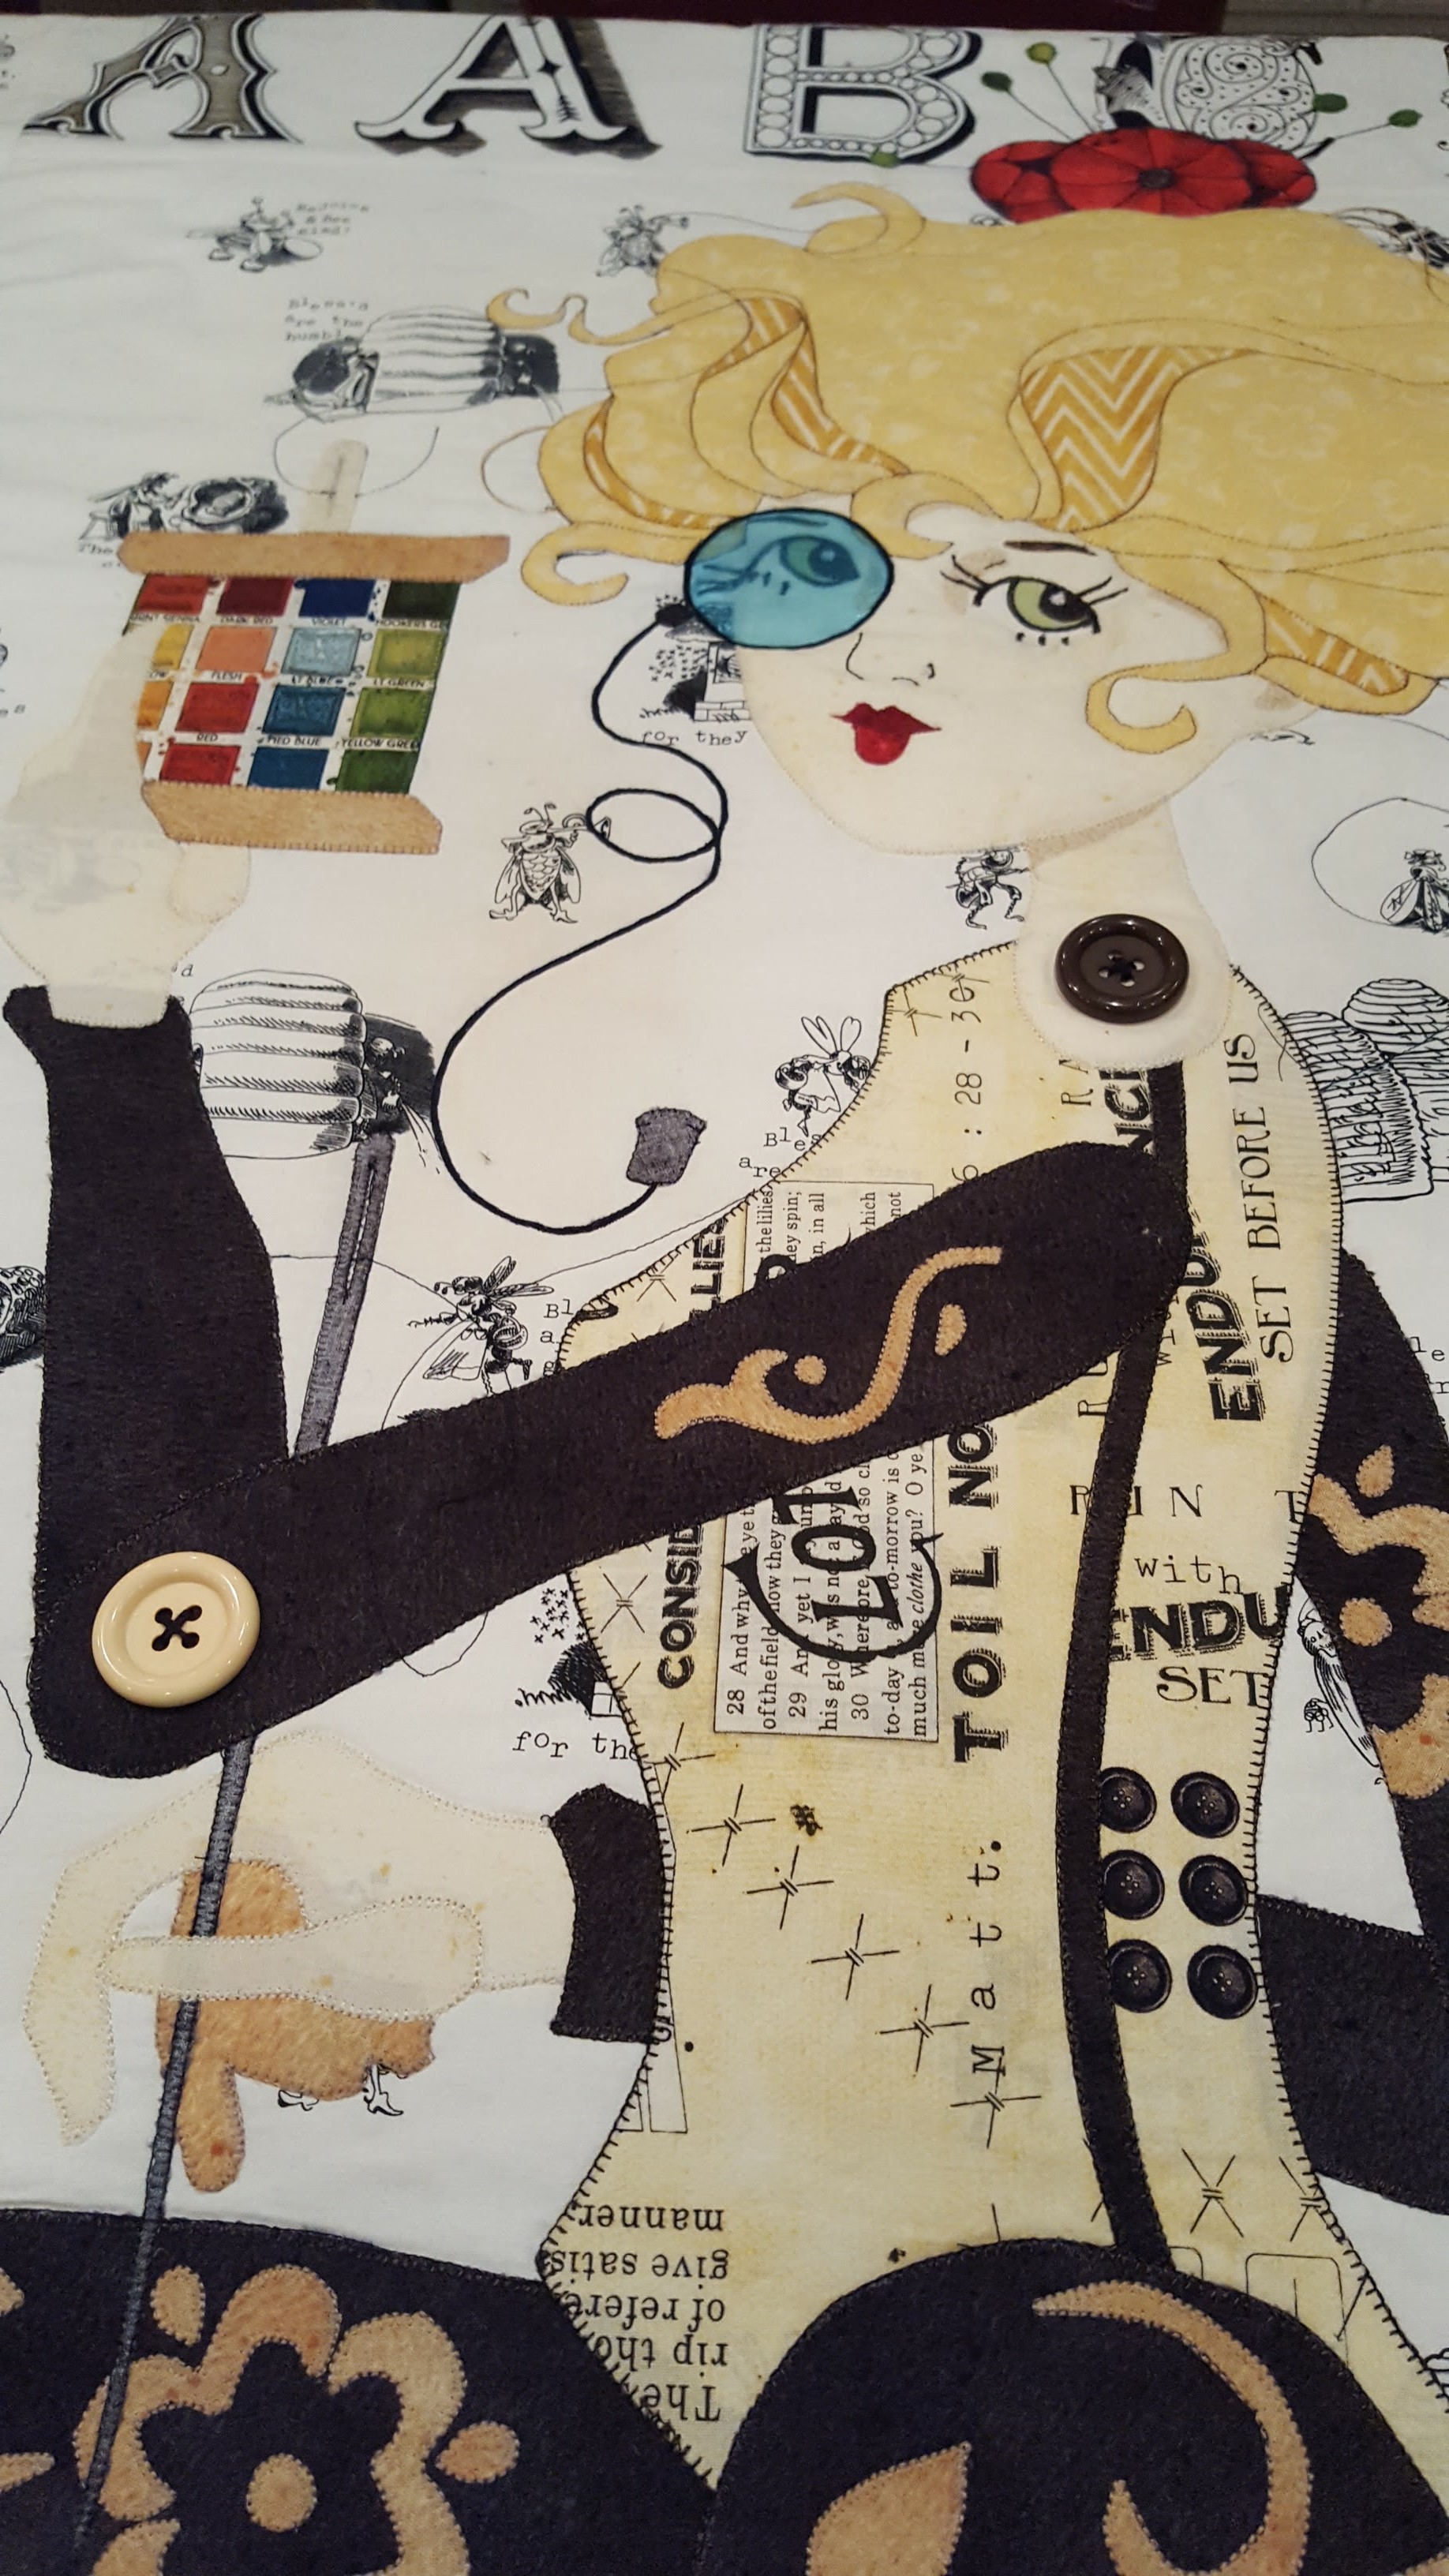
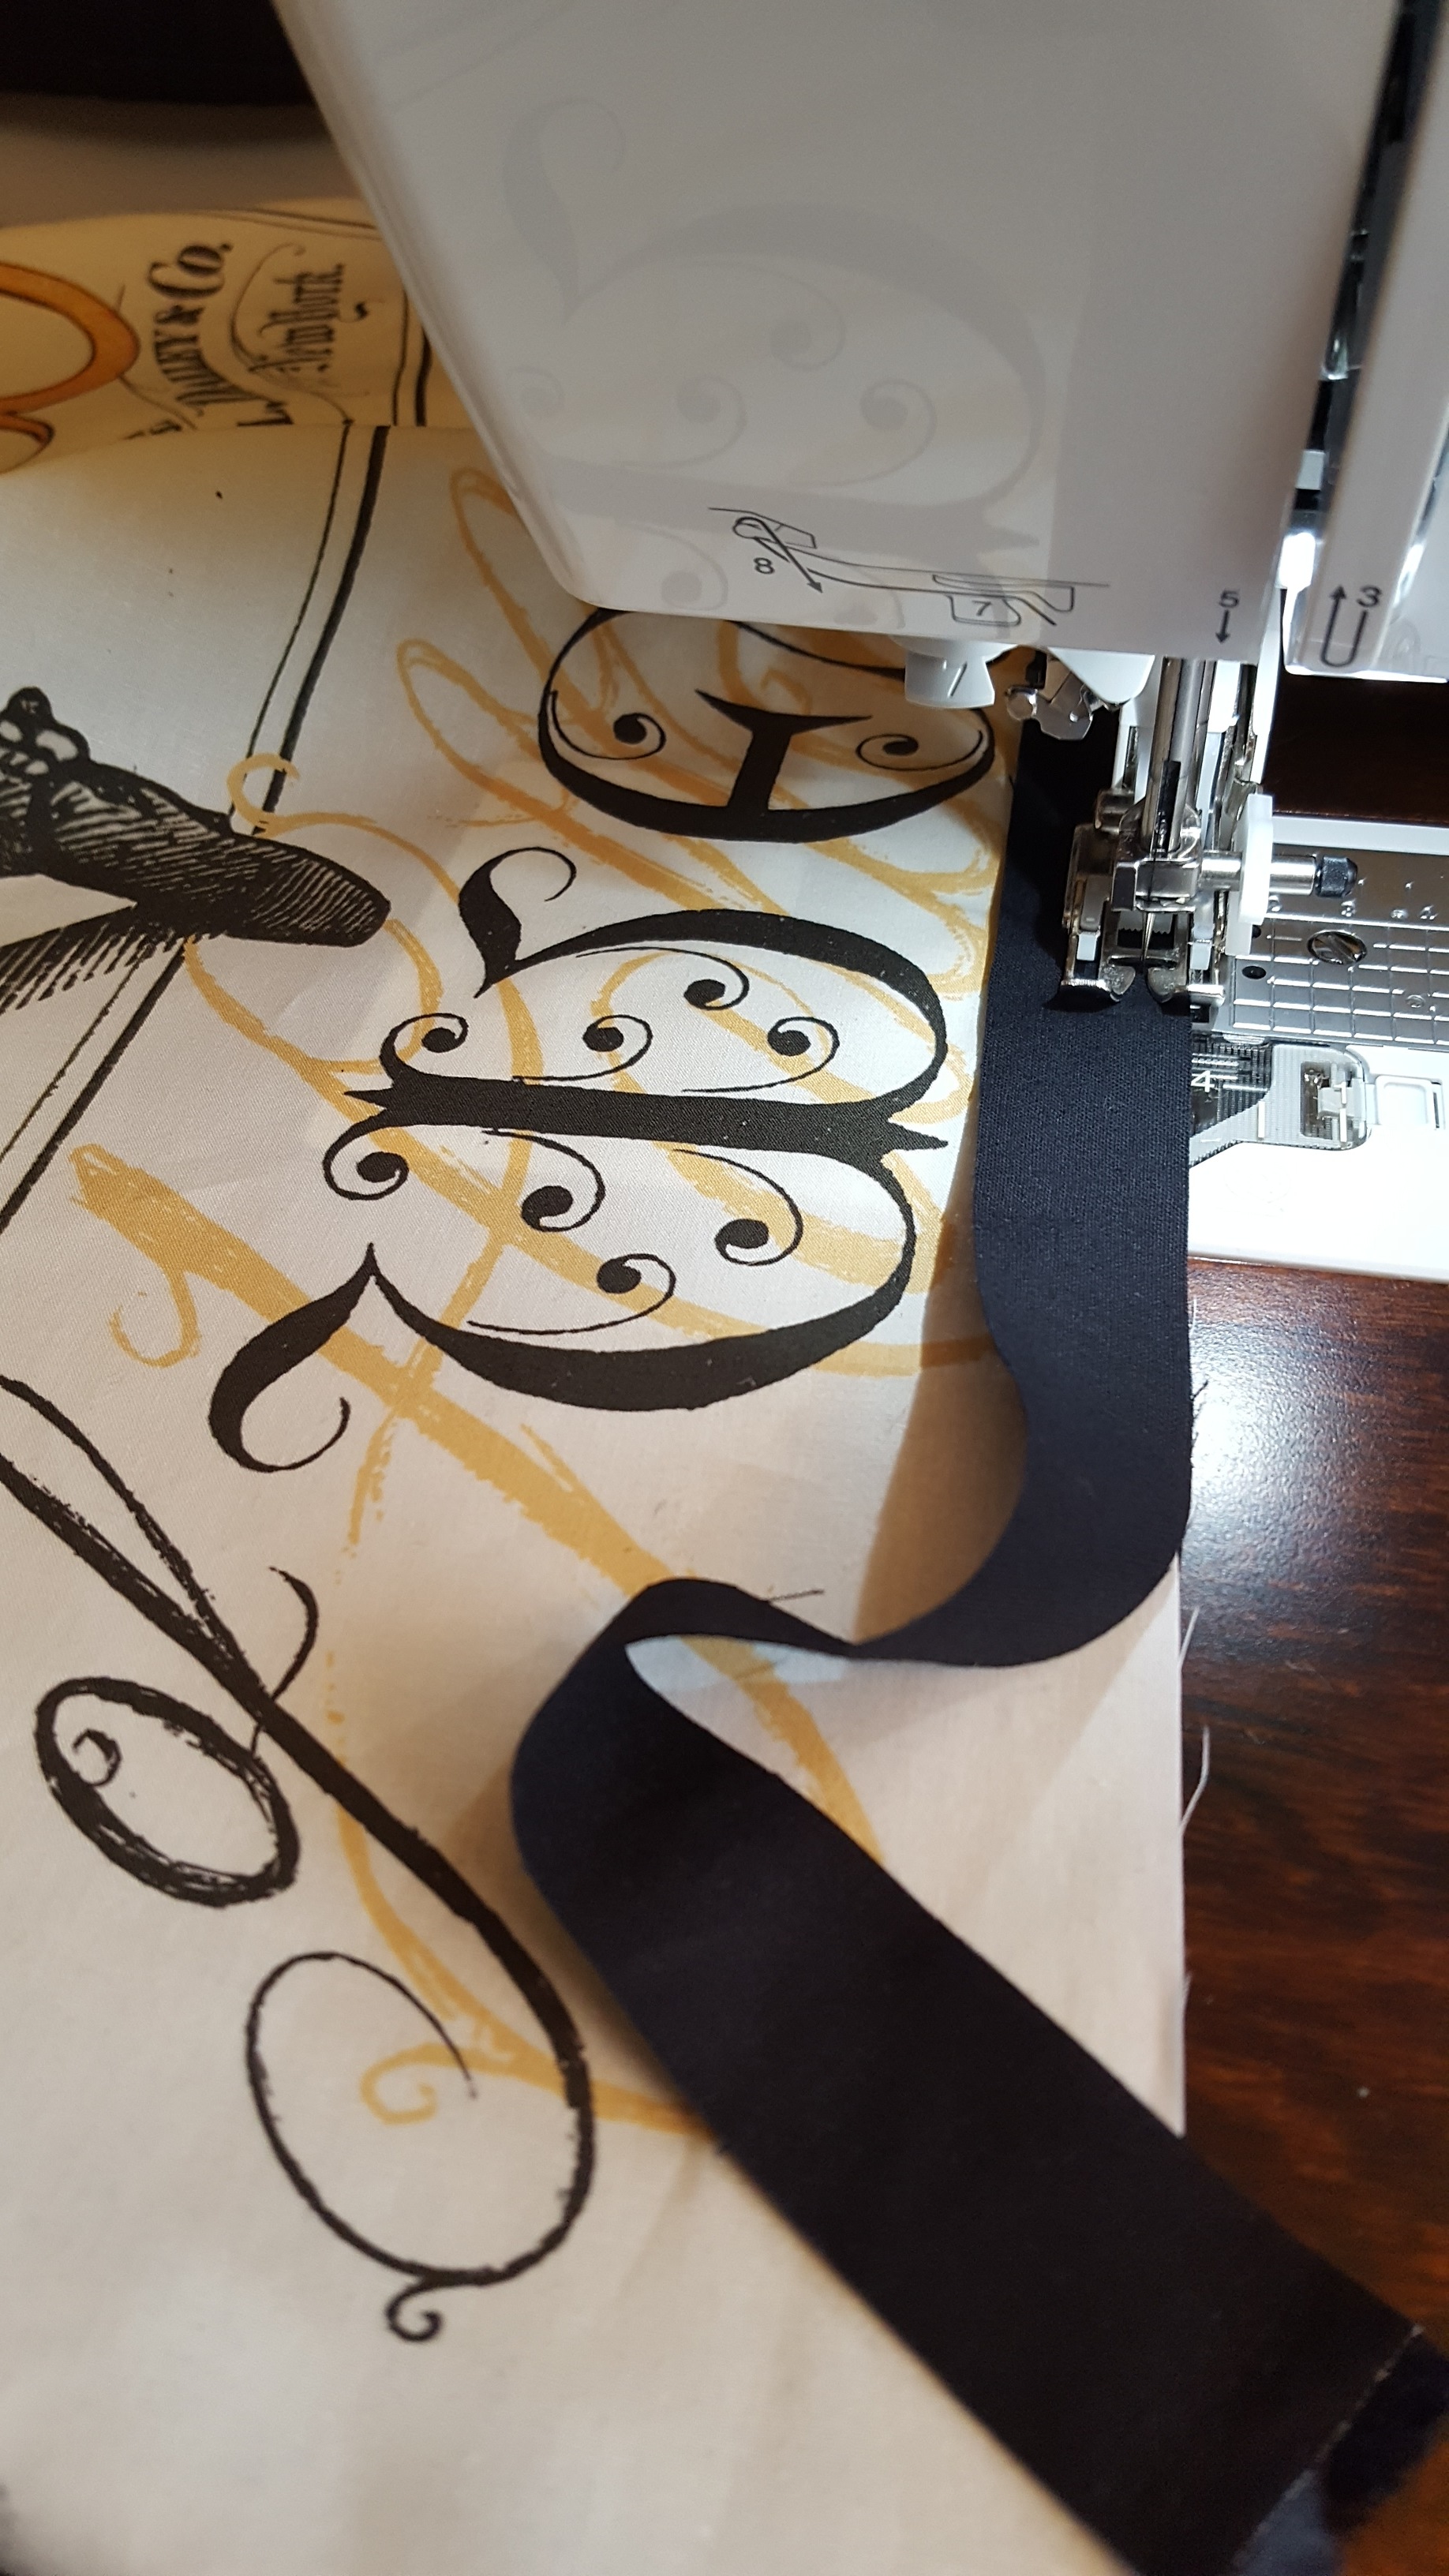
  • Pat from her front porch where the red tractor/sewing machine can be found. Voices in My Head, wall hanging, The Harvest, wall hanging, Crosstowns Quilt Group - Mystery Quilt Project, and a few new garments to spruce up Pat's wardrobe

  • Kris in front of Kathy's house...one stop, two ladies! Celtic Wave Quilt - your outfit matches your quilt, very nice!

  • Kathy in front of her house with a beautiful metal quilt block embellishing the front door. Bali Wedding Ring Quilt.

  • Drenda by the front door. Look closely, that is Prince Harry peeking out from behind her. Had to add a close up of the Prince, he is so handsome!! He has 7 toes on each of his front paws and 6 toes on each of his back paws...that's a lot of toes! The tiny black cat is Prince Harry's Momma! Springtime Quilt - Drenda mentioned it has one mistake. I couldn't find                       it.

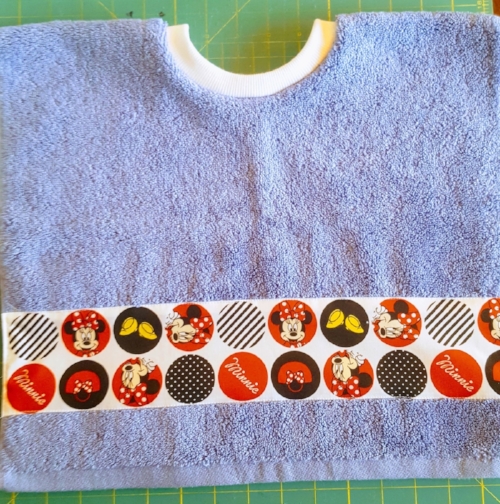
  • Teresa and daughter Katie modeling quilts. Oops, I arrived earlier than expected. Postage Stamp Quilt - awesome colors. Elephant's Never Forget Baby Quilt - hand prints of the family make each elephant's body. Additional embellishments were added to individualize each elephant.

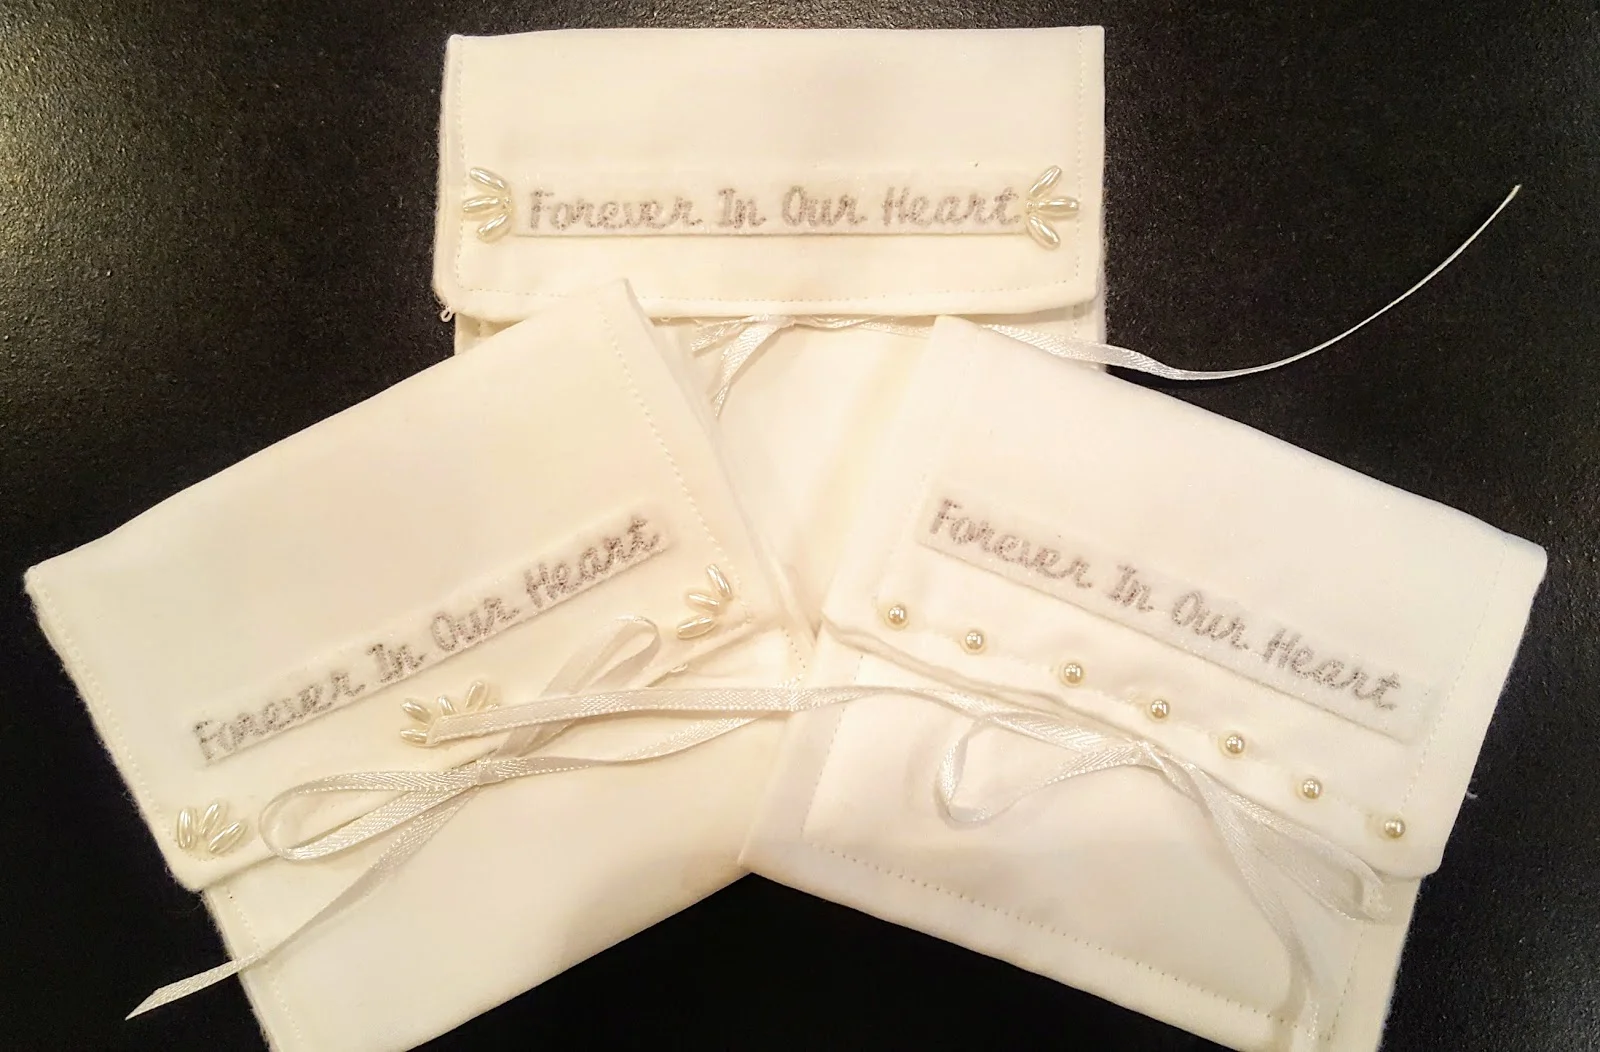
  • Laura's front porch: Wedding Quilt - made by her mother Lorraine and aunt Barbara. This is Laura's favorite quilt and you can certainly see why.  The attention to detail is wonderful. On the back, are well wishes from family and friends to Laura and Mike. This is an heirloom. PS. Laura, don't forget about "Grandmother's Garden" We are all excited for when you and Mike decide to start that "project."

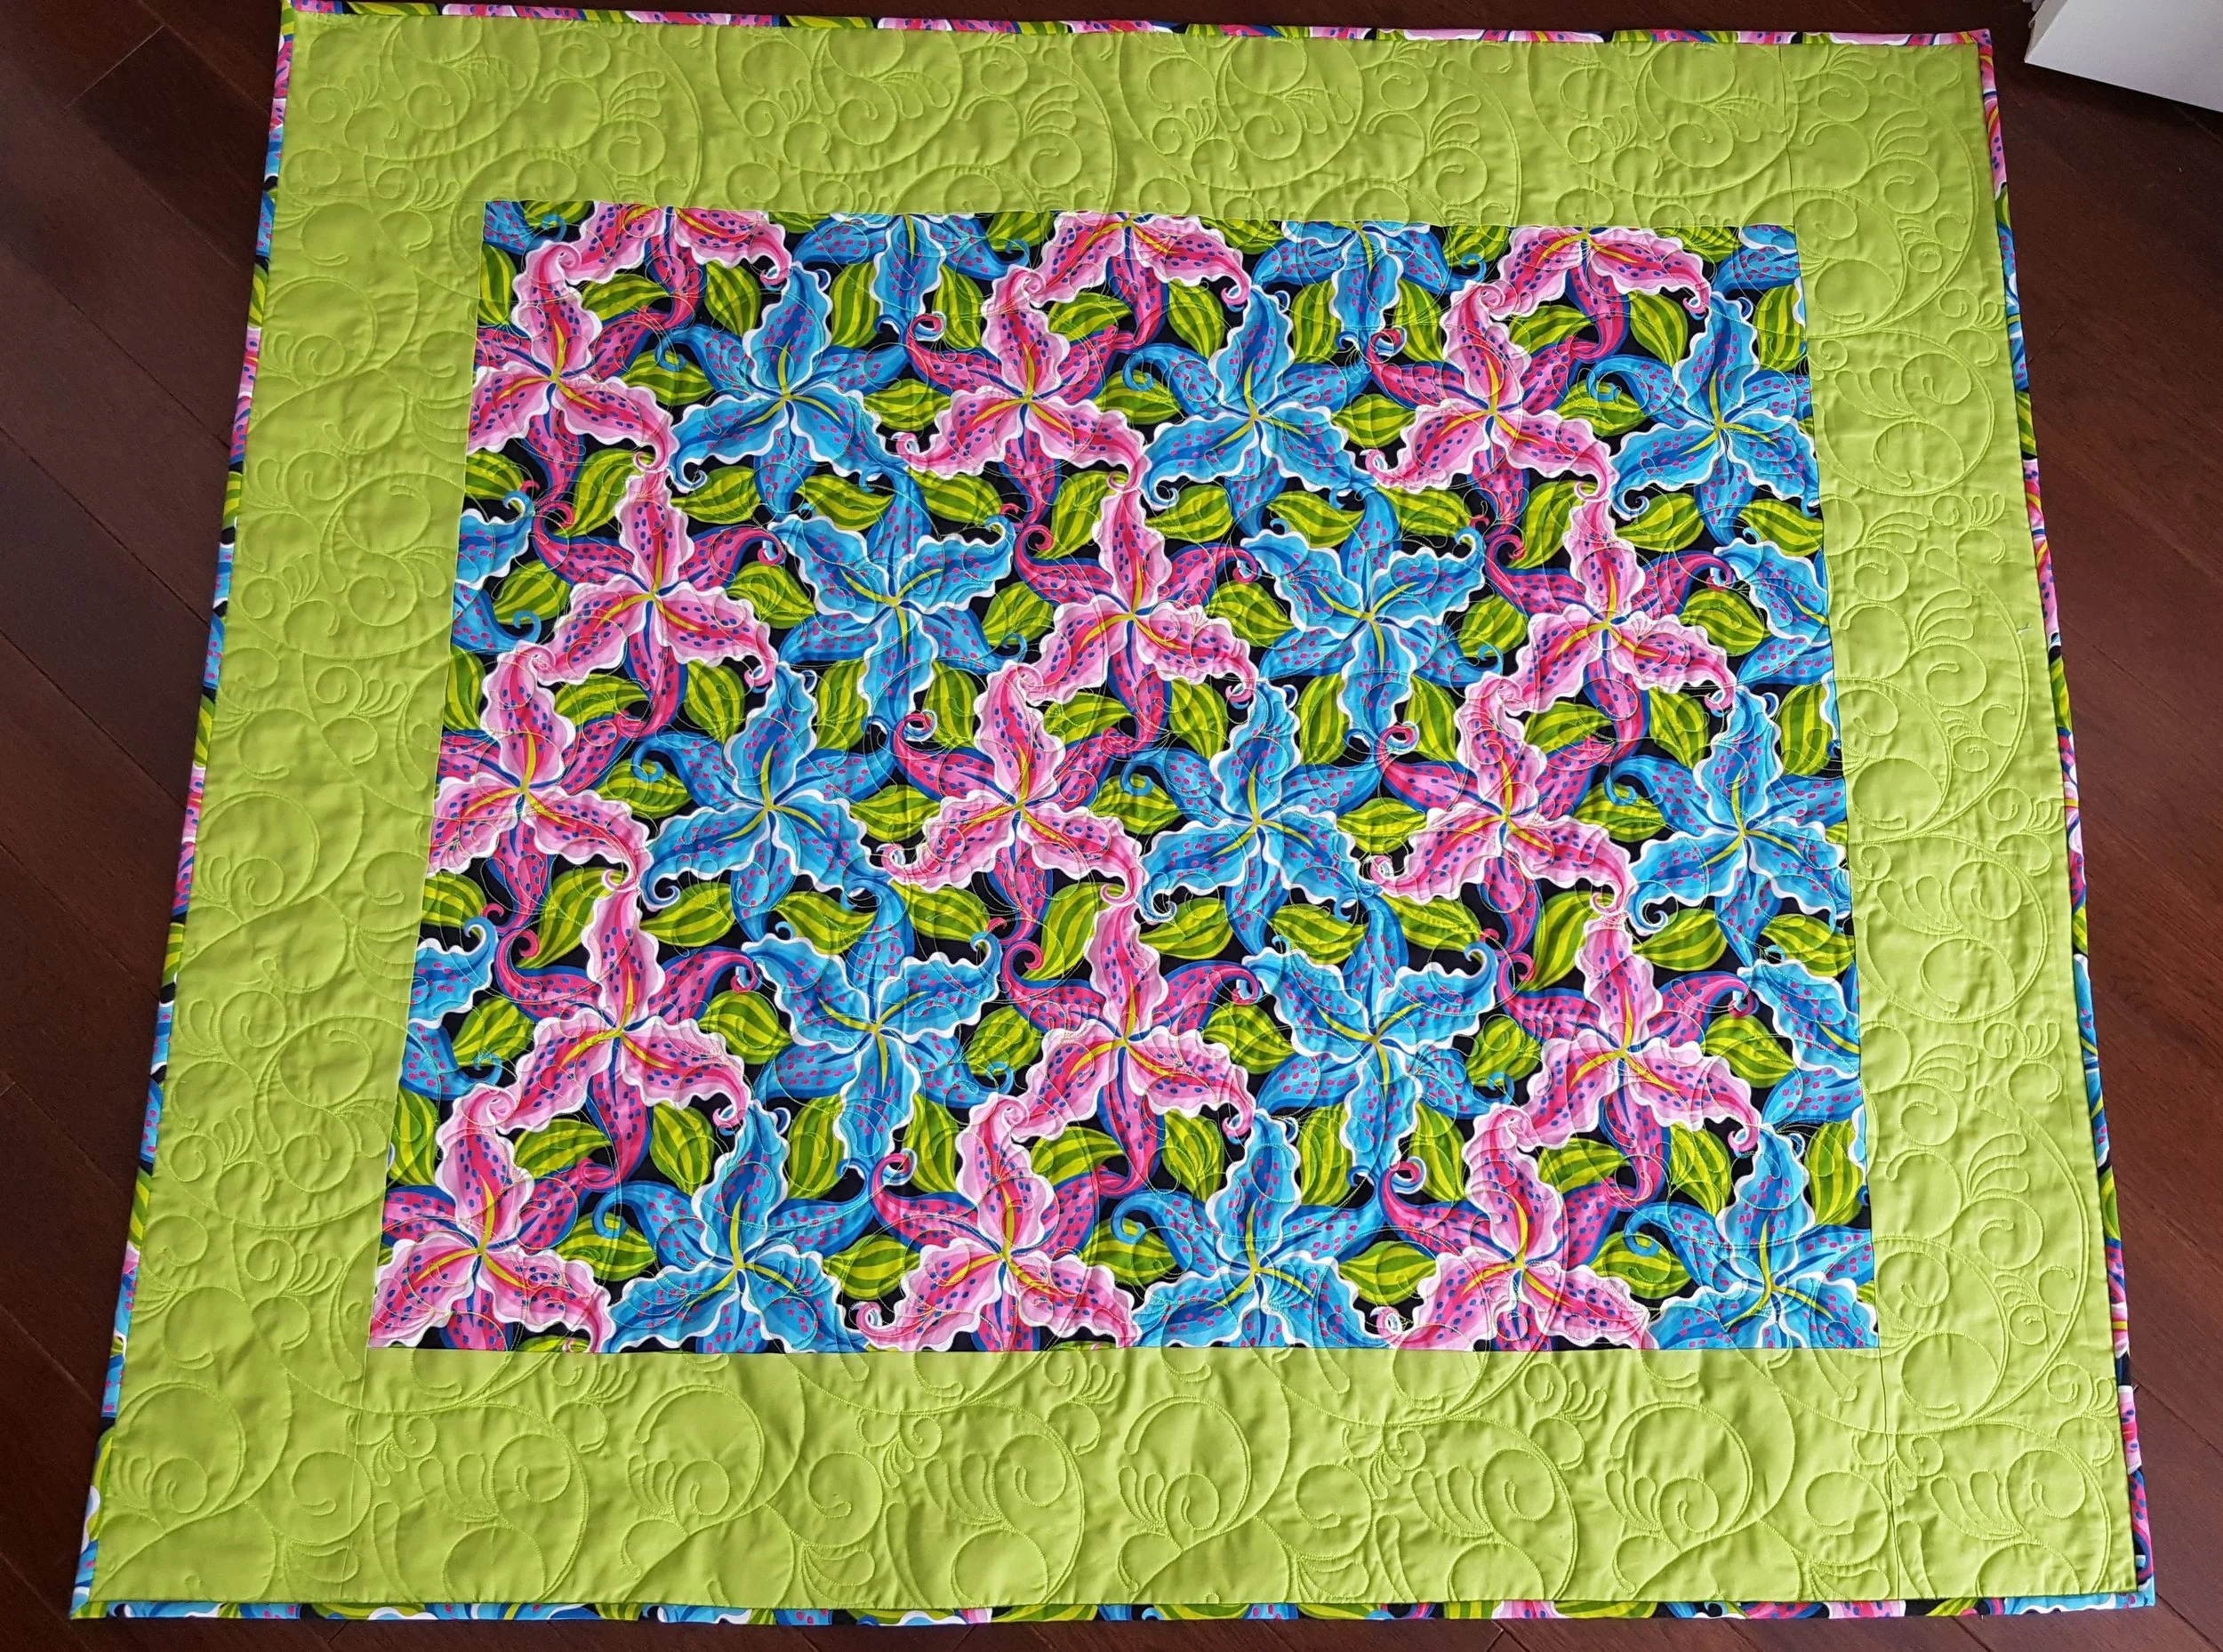
  • Mary Jane in the grass outside of her office. Tessellations Quilt -  the first quilt she made in the year 2011!

Gifts from the Heart

Western New York Perinatal Bereavement Network Sew Day

20180409_083608.jpg

This past Saturday I had the opportunity to work with a truly lovely group of ladies.   We gathered at Wayside Presbyterian Church in Hamburg, NY. We brought our sewing machines, rotary cutters, ribbons, and supplies needed to cut, sew, and create small drawstring jewelry bags, angel pouches, and weighted butterfly pillows.  Ladies also created crocheted and knitted blankets, sweaters, booties, and tiny caps for infants.

20180410_101232.jpg

To create these projects, we use stunning wedding gowns, generously donated by women within our area.  Beaded lace, satin and silk, sequins, and pearls decorate these gorgeous gowns. Next, we carefully consider which gowns are best suited for each project.

20180410_101454.jpg

The small drawstring jewelry bags will hold cremation necklaces given to mothers as a keepsake of their infant.  The angel pouches are used to hold an urn, teddy bear, or any other memorial item that will be presented to a family.   

The weighted butterflies can be warmed in a microwave and placed on a parent’s chest or stomach or simply held in a mother’s aching arms. The butterflies are made with an extremely soft fabric called minky. After the fabric butterfly shapes are stitched together, we fill them with rice.

Next, we begin cutting and sewing.  All ages come together to work on these special projects, from Annabelle, who is eleven years old, to ladies in their seventies!  We learn from one another, share stories, and enjoy great fellowship. Some stories are shared, that years ago may have been brushed under the rug, about a miscarriage or the passing of an infant. This is a place where we can share and support one another and of course sew these precious gifts.  

If you are interested in starting an outreach program similar to this, please contact me by email at Elizabethcecchettini@gmail.com.  You will be providing a service that will assist your community and the needs of people facing perinatal death, the death of a baby from miscarriage, ectopic pregnancy, stillbirth or early infant death.

20180410_101117.jpg
20180409_083907.jpg
20180409_083823.jpg
20180409_083748.jpg

Charity Raffle Ready!

Western New York Perinatal Bereavement Network is a very worthy organization that helps to assist our community in meeting the needs of people facing perinatal death. The Network hosted a fund-raising raffle event last weekend.

20180309_120154.jpg
20180309_120254.jpg

Pictured is the quilt I made to be donated as one of the raffle items. It is extremely simple, but very effective. The center fabric is a single cut of bright, eye-catching fabric that is surrounded by complimentary borders. Yes, that is all there is to the quilt! When you look at the center fabric, you can see that cutting the fabric into pieces for quilt blocks would not be an effective use of such a dynamic piece of fabric.  It took me longer to get the quilt to my amazing quilters Kathy and Kris at Chasen Dreams Quilting!!

Do you have a beautiful piece of fabric you just can’t cut? Then this quilt might just be the answer!!

Sew Happy…Liz

The Ultimate Infant or Toddler Bib

20170824_165456.jpg

Fast and easy to make bibs will help keep toddlers clean while they are learning to feed themselves.  The bibs cover the entire front of the toddler and can be used to clean-up the area when they finish eating.

Make the bibs using dish towels or hand towels (approximately 16” x 27”). Hint: check out the clearance sections of stores for inexpensive towels. The two bibs displayed are made from dish towels I found on clearance at JoAnn Fabrics. T.J. Maxx and HomeGoods are also great resources.

20170824_162124.jpg

The bib can be sized down for an infant by using fingertip towels instead of the dish or hand towels.

Ready to sew!

Supplies: 1 towel, 2” of rib knit fabric (sold by the yard), marking pen, and basic sewing supplies.

  1. Find a bowl or cup with a 5” (4” for infant) opening. This will be used to mark the neck opening on the towel.

  2. Place the bowl on the towel’s center. Using a marking pen, draw around the outside of the bowl.

  3. Cut out the neckline opening.

  4. Divide and mark the neckline opening into fourths.

  5. Cut the rib knit fabric for the neckline, 2” x 13 ½” (2” x 11 ½” for infant). Stitch the short ends of the rib knit together with a ¼” seam allowance. Finger-press the seam open.

  6. Divide and mark the rib knit into fourths.

  7. Fold the rib knit in-half, place the raw edges of the rib knit to the raw edges of the towel’s right-side. Match the markings on the rib knit to the markings on the towel. The rib knit will need to stretch to fit the markings on the towel.

  8. Prepare to stitch the ribbing to the neckline of the towel. Set your machine for a wide zigzag stitch with a medium stitch length, a serger can be used for this step if you prefer. Place the bib under the presser foot, towel side facing down.

  9. Begin stitching slowly, while gently pulling the rib knit to “fit” the opening of the neckline. Zigzag stitch through all three layers.

  10. Clip the threads and you’re done!!


Countdown! Only 136 days!

Yes, there are only 136 days until Christmas. If you are like me, you have 136 projects you would like to complete before the holidays. 136 days may sound like a lot of days; I mean it is summer and we are just two-thirds of the way through the year.

But…

Consider these thoughts, we have three major holidays leading up to Christmas; Labor Day, Halloween, and Thanksgiving.  You know you are going to want new place-mats with matching napkins for Labor Day. Halloween…what can I say? Everything Halloween is fun and I want to sew it all; a quilt, basket liners, table runner, another quilt, pillows to match the quilt, a wall hanging. You get the idea, I enjoy sewing for Halloween! Thanksgiving the family is coming to your house, so you decided to re-do EVERYTHING; new curtains, seat cushions, another quilt, hot pads, apron, tablecloth with of course matching napkins!

Do you see where I am going with this? We might want to start thinking Christmas and the gifts we believe we are going to create and stitch.  We want Joy, Joy, Joy, not stress.

Break down…

136 days, a project a day, great!!

19 weeks, a project a week, still really good

4.5 months, a few projects, for those near and dear…everyone else, cash/gift cards

Now reality…

Grab a pen and notepad - Jot down all of the people on your gift list.

Brainstorm what gifts you would like to create for each person or any items you would like to create just for fun.

Print calendar pages from now until December; fill-in the weeks with projects you would like to complete.  Include when you plan to start the project and when you would like the project completed. Estimate the amount of time for each project; include gathering the project’s supplies, either from your stash or shopping time.

Doing this now will give you a snapshot of what you need to do to see your gifts wrapped and under the tree before Christmas Eve!

It will also allow you to prioritize what projects are a must and maybe some that can wait until after the holidays.

Now you have an outline of how your goals can be achieved for this coming holiday season!

Blown Away

Have you ever wandered out your front door or into your backyard, only to notice that the pillows and cushions on your outdoor furniture have traveled three doors down the street to your neighbor’s yard?

It was happening to me almost daily! Part of the reason is we live at the eastern end of Lake Erie, just outside of Buffalo, New York. The wind whips across the lake and up the hill all year long. Taking the pillows and tossing them to and fro across the neighborhood.  I was ready to staple the pillows to our chairs, because you know I wouldn’t bring them in each night or if there was a storm on the horizon!

This is the super easy and fast fix that what worked for me:

Dig through your stash of ribbons and pick out any grosgrain ribbons that are about 1” to 1 ½” in width, and that compliments or matches your pillows and cushions. For the best length, place the pillow on the chair or chaise lounge and measure the length needed for each ribbon to be tied into a bow.

Fold the ribbon in half and stitch it by hand or machine to the pillow top at the center seam. Or, you can open the seam slightly and insert the ribbon tie into the seam, stitching the seam closed, while securing the ribbon ties into the seam. I found that just stitching the ribbon to the top of the pillow works well.

For chaise lounge chairs, the ribbon ties may need to be secured to the bottom edge of the pillows near the lower corners.

Doing this to each pillow outside has alleviated the seek-n-find game we played almost daily!

Handmaids®

Recently, I had the privilege to work on a lovely project with artist J. Wecker Frisch owner of Tidings of Great Joy . Janet has a creative spirit, which can be seen in all that she touches.

Janet’s Handmaids® collection is a delight! Working with Janet’s artwork for Machine Maid, I was able to create a life sized raw-edged appliquéd quilted panel. When completed, she measured 60” tall!  Janet debuted the Handmaids® collection of appliqué patterns at Spring Quilt Market in St. Louis, Missouri. The vintage look of Machine Maid is charming. All of the fabrics used for this project are from Janet’s fabric collection She Who Sews. Janet’s artwork has been translated on to cotton fabrics by Quilting Treasures. Her fabrics are available at your local independent quilt shop.

20170419_202013.jpg

P.S. - Janet’s artwork can also be seen on many other products such as note cards, journals, and calendars. I purchased these at Jo-Ann. So, pretty!

Resized_20170526_110538.jpg

“To Make Do”……to work with what you have.

This quilt was started with no real intention or preparation. I just wanted to use the rest of a charm pack I had laying on my studio table.  So, I went to my stash, grabbing some white-on-white cotton fabric, cut it into 5” squares, and started piecing the fabric and charm pack together in a simple random pattern.

Looking good….yes it was! Add rick rack, of course! Oh wait, it’s not big enough for anything other than a table topper….I’ll add a border and make it into a lap quilt!

A white border would really set off the pretty colors in the center and the bright red rick rack. I grabbed the remaining white-on-white fabric….ahhh, what happened? I had a small piece remaining, that’s all. No….not nearly enough!

Back to the stash hoping to find more hiding out. No such luck, now what? Dig some more and discover a pretty white eyelet fabric. I have never used eyelet for a quilt, but why not?

I decide to “Make Do”! Here’s how I did it.

  • Cut the border strips from the white eyelet fabric.

  • To keep the batting from poking through the holes in the eyelet fabric; cut lining strips from lightweight cotton such as white batiste, the same size as the border strips.

  • Baste the right sides of the lining strips to the wrong sides of the eyelet border strips.

  • Next, stitch the border units to the outside edges of the quilt’s center.

  • Quilt the quilt in the same manner as normal.

“Making do” added an extra design element to the quilt, saved money, and looks pretty!

Cupid's Valentine Pillow

A little quilting, a little embroidery…Cupid’s Valentine Gift for you or your love!

Supplies:

  • 1/3 yard of white cotton

  • Scraps of pretty Valentine fabrics

  • 1 package of red rickrack

  • Medium weight tear-away stabilizer

  • Fiberfill

  • Quilt batting

  • Water soluble marking pen

Instructions:

  1. Begin the pillow by deciding what to embroider on the pillow top. Maybe LOVE, XOX, or perhaps,

  2. KISS. The font I used is built into many Baby Lock Sewing Machines, it measures 5 ½” tall, but any font would work. Now, prepare and program the machine for embroidery, hoop the white cotton fabric and stabilizer, stitch out the selected word design. Gently, remove the stabilizer.

  3. From the scraps of Valentine fabrics, cut twelve 2 ½” x 2 ½” squares. Randomly lay the squares out into four rows of three squares each.

  4. Stitch the squares together into four rows; using a ¼” seam allowance, press the seams. Stitch the rows together and press well.

  5. Measure the finished size of the patch work; mine measured 8 ½” x 6 ½”. Use the 8 ½” measurement for the height when cutting out the embroidered letters. The length will vary depending on the word you embroidered, my length was 14”, and I cut the letter section 8 ½” x 14”. Stitch the letter panel to the patchwork and press well.

  6. Mark the patchwork for quilting. Layer the pillow top and a piece of quilt batting, baste the layers together. Quilt the patchwork section of the pillow top.

  7. Baste the rickrack to the pillow top edge, centering the rickrack over the ¼” seam allowance.

  8. Measure the pillow top and cut a pillow back using this measurement. Mine measured 8 ½” x 20”.

  9. Place the pillow front and back together, with right sides facing, pin securely. Once pinned, stitch the pillow together with a ¼” seam allowance. Leave an opening at the bottom edge, to allow for turning the pillow right sides out.

  10. Turn out the pillow and press. Stuff the pillow with fiberfill.

  11. Pin the small opening closed and hand-stitch with matching thread.

  12. Happy Valentine’s Day!
Be sure to check out DandelionRoseDesign.com for a free pattern! Please like and share

Happy New Year!

The New Year always inspires me. The opportunity to bring back a small amount of order in my life and focus is rewarding.  Often, I become sidetracked, but anything I accomplish toward order and focus, I consider a bonus!

My personal challenge in 2017 is, “What can I do?”  It is a small question with mostly wonderful consequences, asked of anyone that may cross your path. In a short amount of time I have been amazed at the overwhelmingly positive response to this simple question.

Recently, I asked my friends, aka. quilters, for help with a charity project. They said, “yes” and we are now supporting Western New York Perinatal Bereavement Network. Their mission is to assist the community in meeting the needs of people facing perinatal death, the death of a baby from miscarriage, ectopic pregnancy, stillbirth or early infant death. As the mother of three healthy children, I can only imagine the love these families have for their babies and cannot even begin to imagine the grief of these families, when for whatever reason their precious babies are taken.

20161114_204206.jpg

There is a small group of us that meet and work on items requested by WNY Perinatal Bereavement Network to provide to their families; tiny burial gowns, burial pouches, and small memorial envelopes. When we first came together to work on this project, we shed tears. It was difficult to think of the loss and the grief of these precious parents. We work to create tiny items of beauty to help in some small way.  We use items that have been mostly donated like: wedding gowns we cut into the small envelopes, gowns, and pouches to be sewn, along with beads and ribbons.

To the Child in my Heart
Precious, tiny, sweet little one,
You will always be to me
So perfect, pure and innocent,
Just as you were meant to be.
We dreamed of you and your life
And all that it could be.
We waited and longed for you to come
And join our family.
We never had the chance to play,
To laugh, to rock, to wiggle
We long to hold you, touch you now
And listen to you giggle.
I’ll always be your mother,
He’ll always be your dad,
You’ll always be our child-
The child that we had.
But now you’re gone…
But yet you’re here.
We’ll sense you everywhere.
You are our sorrow,
And our joy.
There’s love in every tear.
Just know our love
goes deep and strong
We’ll forget you never-
The child we had, but never had,
And yet we’ll have forever.

The Forget Me Not

What can I do? I ask you to consider this as one of your challenges for 2017. See what a difference it will make in the world around you and in your own self!

The Queen of We'en

So, I took a long “quick-stitch-break” the past few weeks and collaborated with J. Wecker Frisch from Joy Studio. She is an amazing artist showing her new fabric lines at the International Quilt Market in Houston, TX this week. Janet’s new fabric line, “The Queen of We’en” is being introduced by Quilting Treasures.

For my part, I was able to work with fun printed panels from Janet’s newest fabric collection. We designed one large Queen fabric panel into a quilt and four smaller Queen fabric panels into wall hangings. The quilting was kept simple; I used the Baby Lock Sashiko Sewing Machine to do all of the stitching. The Sashiko machine is one of my favorite machines. It is different than any other conventional machine; the machine makes what looks like individual stitches on the quilt. You know, like I hand-stitched the entire project…NOT!

To accentuate the Queen quilt and panels, I incorporated one of my favorite fabrics this time of year, burlap with golden accents. Granted burlap is not washable, but these projects and most fall sewing projects are usually just decorative. So, consider adding a little burlap to your next fall project, whether it is in a wall hanging, table runner, or some cute pillows.

Don’t forget if you are in Houston for the International Quilt Market, drop by booth number 2534!

Check out Janet’s fabrics and all of her unique projects for her collection “Queen of We’en”.

Stitching Our Own Piece of History

Great fun was had this past Saturday at The Buffalo History Museum. Several people joined me for the "Blind Man's Fancy Quilt Block Class" hosted by The Buffalo History Museum.

The Blind Man's Fancy Quilt is just one of the many quilts that were donated to the museum by Julia Boyer Reinstein, a dedicated patron of the museum. The original quilt (circa 1880) is currently on display in the museum's quilt exhibit. The quilt is pieced together with a large assortment of beautiful fabrics. All of the blocks are then surrounded by flying geese sashings, over 480 flying geese! Most all of them stitched together in different fabric combinations. This quilt is surely a potpourri of color, pattern, and happiness. It is one of my favorites in the museum's collection.

Okay, so we got busy Saturday and created our own little bit of history. Some ladies chose the historical reproduction kits, while others selected the Halloween inspired kits. At first glance, the block appears difficult, but by breaking the block down into sections, everyone successfully completed the block by the end of the day. Just as the blocks in the original antique quilt had variations from block to block, our blocks did too! It was interesting to see the effects of turning sections of the block different directions. Each block looked great when completed!

 A special "thank you" to the ladies shown here for attending the class and allowing me to photograph them with their completed blocks.

  • Kathleen Anderson
  • Kris Passinault
  • Kathy McKinney
  • Pat McDonald
  • Lorraine Heine

A Day at the Museum

A few weeks ago, Megan MacNeill with The Buffalo History Museum asked if I would spend the day sharing some of my quilts with visitors to the museum. Let me tell you, I couldn't respond "YES!!" fast enough!

The museum has a great exhibit taking place now with quilts from their vast collection. The day was wonderful, from 10:00 a.m. until 7:00 p.m., all I did was talk about quilts and quilting! I brought along a few of the quilts I made for the upcoming book, they are reproductions of the original historical quilts from the museum's collection. It was fun taking photos of a couple to see the similarities of the historical quilts and my reproductions.

My mind was churning after the visit...which historical reproduction to start on next? So many beautiful quilts with interesting stories! Interesting stories?? How do we know these stories? People used journals and shared oral histories to preserve the unique heritage of their quilts that had been documented.

Have you labeled your quilts, written in a journal about your quilts? Now, having worked with the museum I see how important this simple step is in preserving the history of our quilts.

Stop by The Buffalo History Museum and Say Hi!

Next Wednesday, August 17th take a few moments out of your day and stop by The Buffalo History Museum. Admission is free and the new installment of the museum's quilt collection will be on display. Stop by the State Court and visit me! I am honored that the museum has asked me to display and talk about some of the historical reproduction quilts I created. It will be a fun day of quilts, shopping, and chatting! See you there...

Welcome!

Hi!

Welcome to my blog, I am happy you stopped by today.

I learned to sew forever ago. Sewing makes me truly happy, I look forward to it every day! Sewing is also what I happen to do for “work”. I am a independent project designer, I design quilting and sewing projects. That being said, I decided to write a book. Of course, the book is about quilting, my favorite type of sewing. For the book, I am collaborating with The Buffalo History Museum. Learning about their quilt collections has been very interesting, more about the book later.

Working on the book requires a lot of time at the computer…not my favorite thing, at all!! So, I decided to take a quick-stitch-break today. This is what I made; cloth napkins from my favorite scraps of quilt fabric.

  1. These napkins are eco-friendly.

  2. Being made from quality quilting fabric, the napkins wash and dry like a dream.

  3. I get to see my favorite quilt fabrics at breakfast, lunch, and dinner!

  4. And, I feel wonderfully luxurious using cloth napkins, instead of paper.

  5. Great gift idea! Make a set of cocktail napkins, tied together with a pretty ribbon and a bottle of wine!

Supplies!

  • scraps of 100% cotton fabric

    • 15” x 15” squares for a lunch/ dinner napkins

    • 10” x 10” squares for cocktail napkins

  • A serger, set to create a rolled-hem stitch

  • 3-spools of thread that compliments the fabric, I like to use contrasting thread

  • Seam sealant

Stitch!

  1. Use a rotary cutter and mat to cut the fabric scrap into a square.

  2. Zip the square through the serger; stitch a rolled-hem on all four sides of the fabric square.  

  3. Before trimming the serger tails, apply a dab of seam sealant on each corner.

  4. Press the napkin and trim off the serger tails.

  5. Repeat often for sets of pretty napkins!

If you don’t have a serger; simply turn the raw edges of the fabric square under to the wrong side of napkin, twice, creating a small hemmed edge, and straight-stitch around the edges.